
Overview
This guide provides step-by-step instructions on how to add Interceptor (Carrier Agent) to the Carrier Platform. By Adding an interceptor to the Carrier platform allows you to enhance monitoring and interception capabilities for your performance testing environment. Follow these straightforward steps to seamlessly integrate the interceptor into your setup.
Prerequisites
To add Interceptor successfully you should use Docker so your machine must meet the following hardware requirements (CPU, RAM, Disk space):
| Minimal Hardware requirements | |
|---|---|
| CPU | 4 cores |
| RAM | 4 GB |
| Disk space | 30 GB |
Before you begin configuring Interceptor in Carrier, ensure that you have completed the following:
- Installed and set up Carrier successfully
- Had access to a project in Carrier
- Installed Docker
Step 1: Obtain Secrets Parameters from Carrier Platform
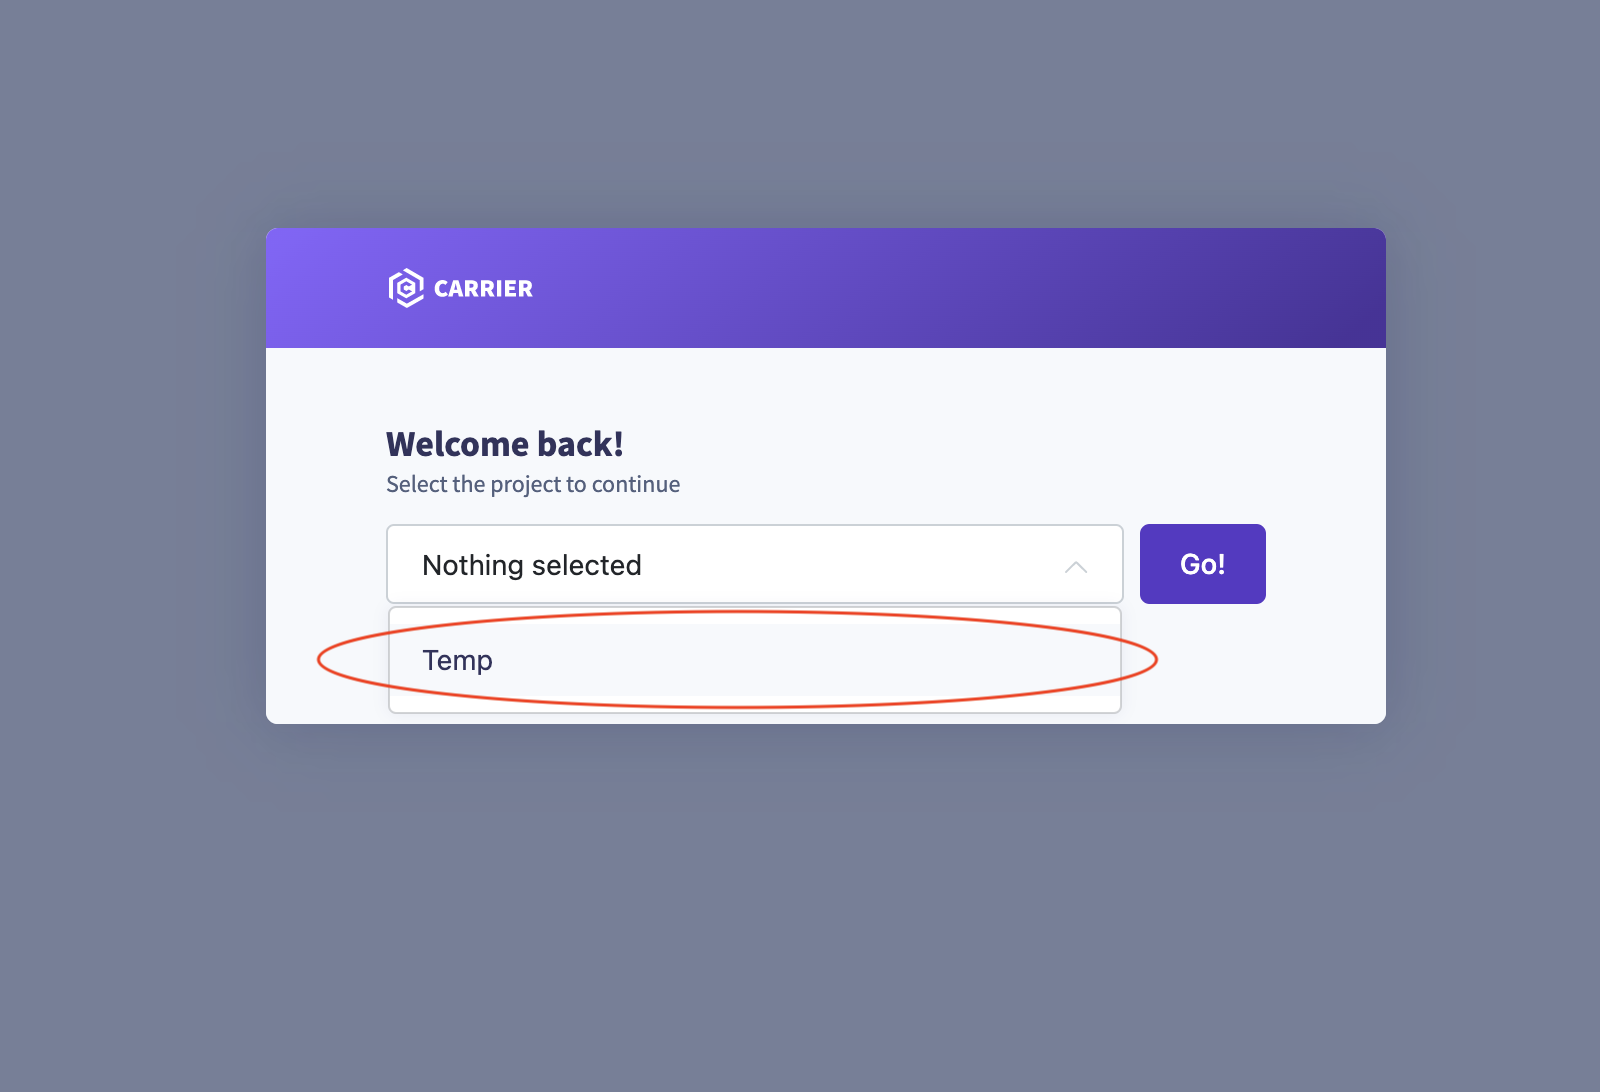
- Go to your Carrier platform by visiting - https://${CARRIER_HOST}/
(${CARRIER_HOST} is not a real URL it is just a template of the URL you should have after a successful Carrier installation)- From the project dropdown menu, select the project you want.
- Click “Go!” to navigate to the project’s configuration page.
![Select Project]()
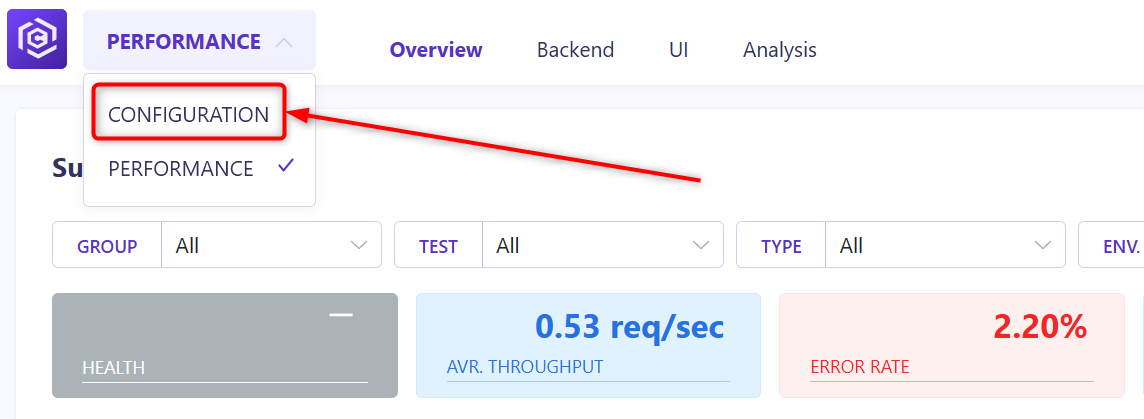
- Select CONFIGURATION option from the top left dropdown menu.
![Select Configuration Dropdown]()
- Click on “Secrets” option in the top menu
![Secrets Option]()
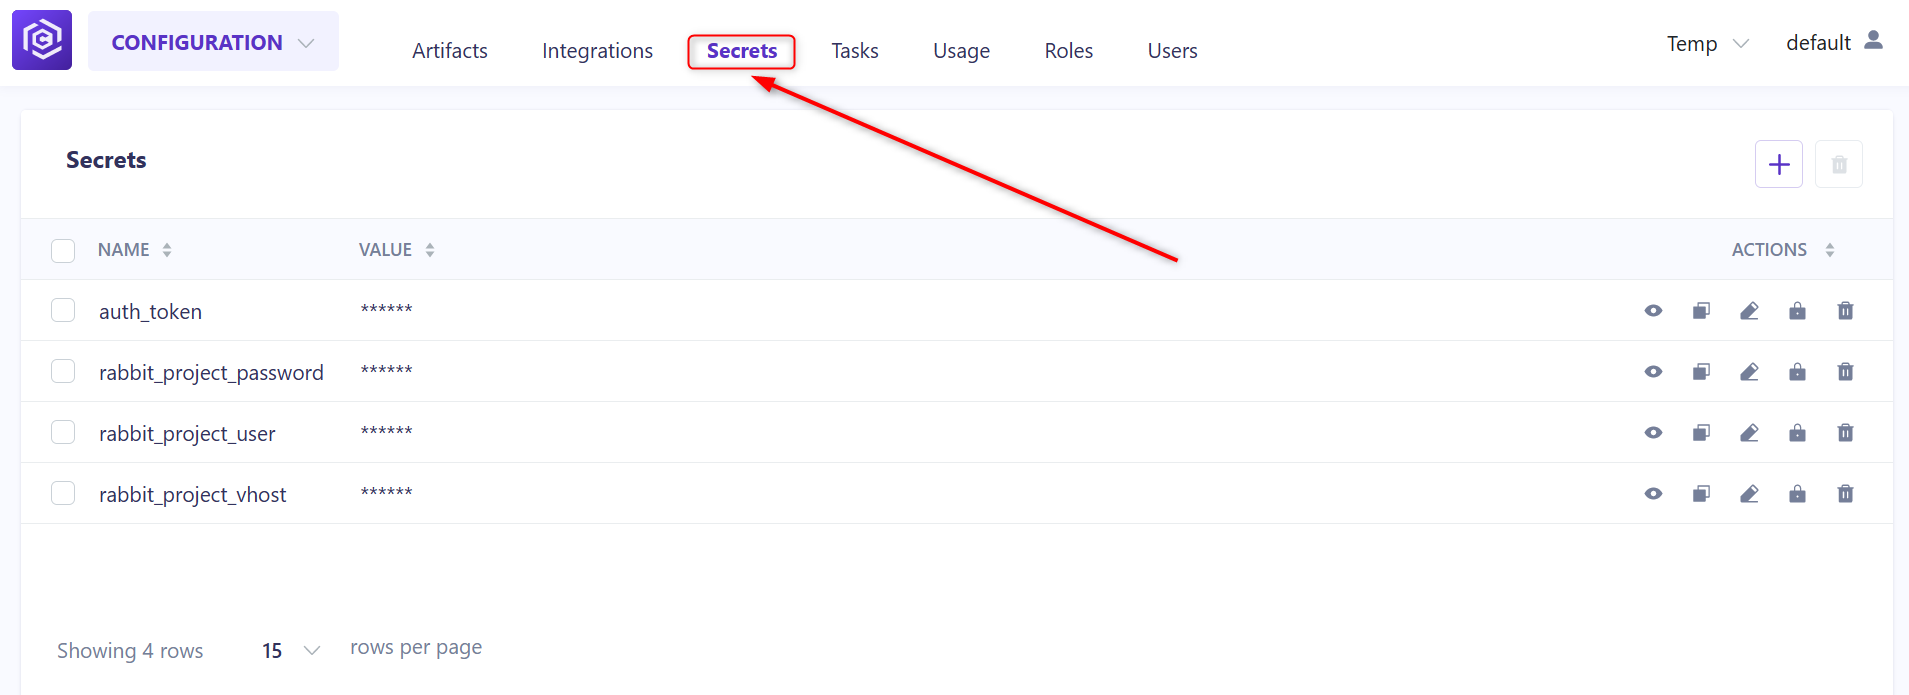
Also you can go to “Configuration” > “Secrets” on your Carrier platform by visiting
https://${CARRIER_HOST}/-/configuration/secrets/
- Copy the values of the following parameters:
auth_token(used as${AUTH_TOKEN}parameter)rabbit_project_password(used as${RABBIT_PWD}parameter)rabbit_project_user(used as${RABBIT_USER}parameter)rabbit_project_vhost(used as${PROJECT_VHOST}parameter)
For your convenience, you can temporarily paste the values into Notepad or another text editor, but don’t save it on your machine!
Step 2: Run the Interceptor Docker Container
Execute the following Docker command with parameters from “Secrets” to run the interceptor container:
1
2
3
4
5
6
7
docker run -d --rm -v /var/run/docker.sock:/var/run/docker.sock \
  -e RAM_QUOTA=4g -e CPU_QUOTA=2 -e CPU_CORES=2 \
  -e RABBIT_HOST=${CARRIER_HOST} \
  -e RABBIT_USER=${RABBIT_USER} -e RABBIT_PASSWORD=${RABBIT_PWD} \
  -e VHOST=${PROJECT_VHOST}
  -e QUEUE_NAME=my_new_QUEUE -e TOKEN=${AUTH_TOKEN} \
  -e LOKI_HOST=https://${CARRIER_HOST} getcarrier/interceptor:latest
Ensure to replace the placeholders
${CARRIER_HOST},${RABBIT_USER},${RABBIT_PWD},${PROJECT_VHOST}, and${AUTH_TOKEN}with your specific values. Also don’t forget to remove all ${ }.
Note: You must set CPU_CORES=2 in the interceptor configuration. This is essential because one CPU core will be allocated for running the performance test, and the other core will be used for post-processing. If only one core is allocated, the test will start, but the post-processing phase won’t. Ensure that both cores are available for smooth task execution.
Additionally, make sure that the interceptor version matches across configurations (e.g.,
getcarrier/interceptor:latestor another version you have installed). Mismatched versions, such asgetcarrier/interceptor:beta-1.0andgetcarrier/interceptor:latest, could cause inconsistencies in behavior and task execution.
Step 3: Run Rabbit Queue Checker Task
- Navigate to “Configuration” > “Tasks” on your Carrier platform using the following URL: https://${CARRIER_HOST}/-/configuration/tasks/
![Tasks RQC]()
- Run the “rabbit_queue_checker” task.
![Run RQC]()

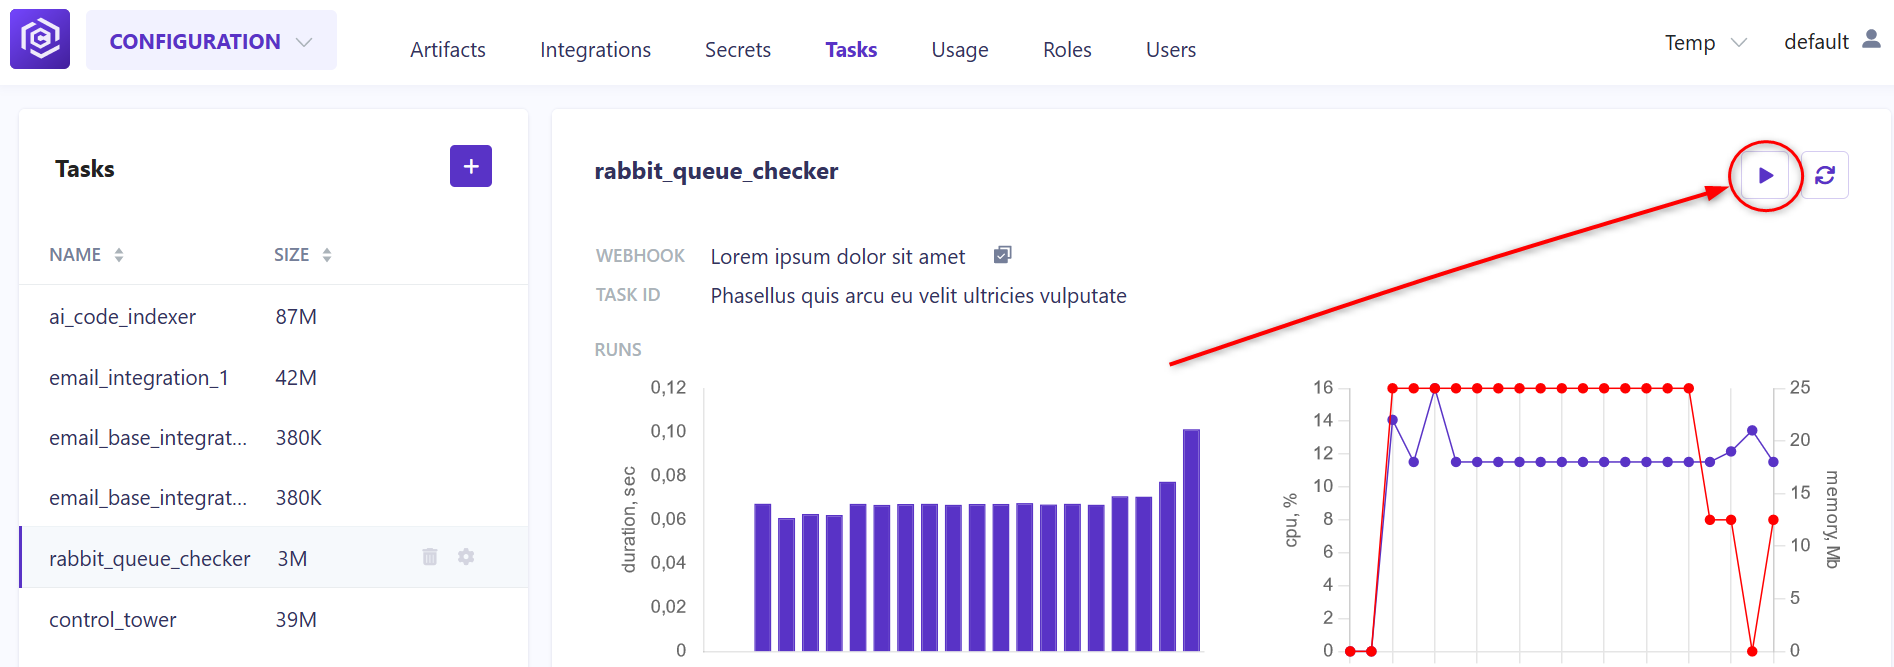
Please be patient Rabbit Queue Checker Task can take from 3-5 minutes to make new pool avaliable.
Step 4: Select Load configuration in a test
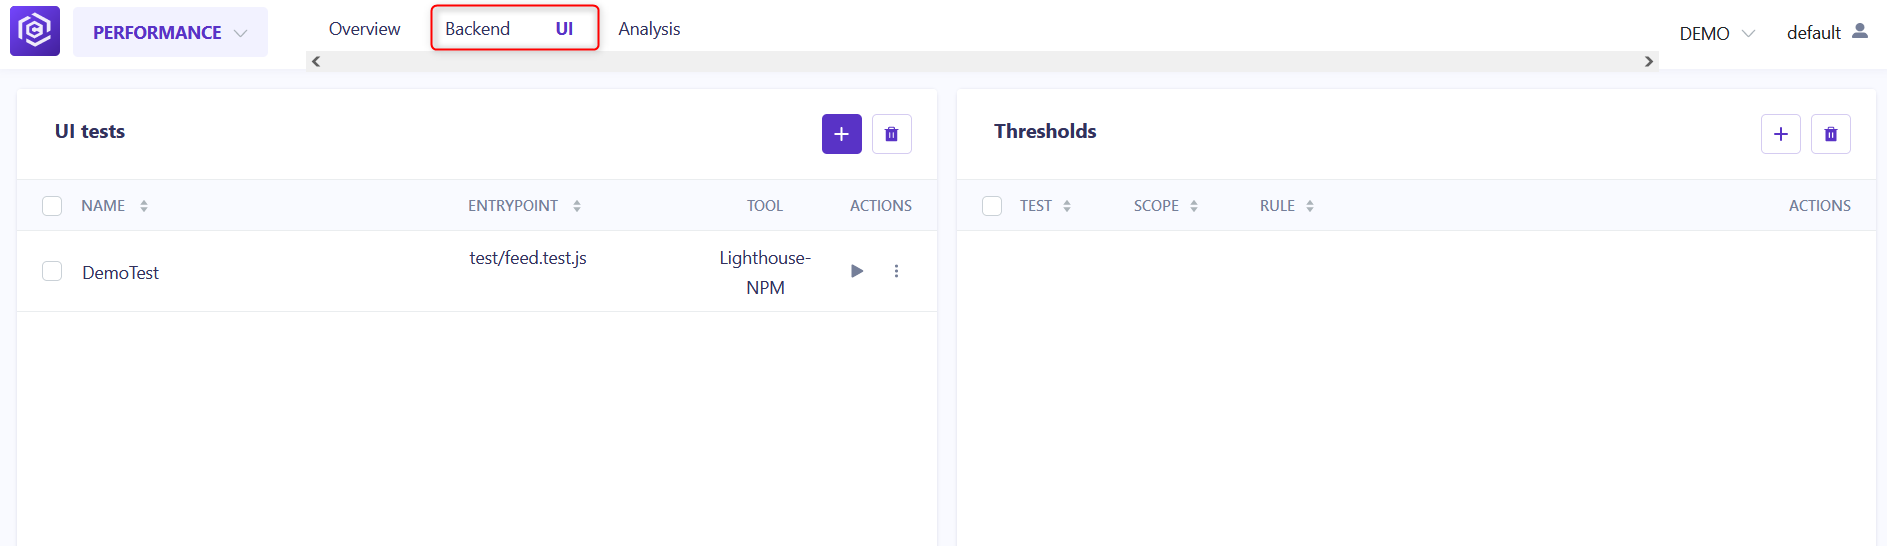
- In the project configuration page, click on the “Performance” tab located in the left menu.
![Performance Dropdown]()
- Select test type tab (
BackendorUI, depends on which test you configured before).![Navigate to Performance]()
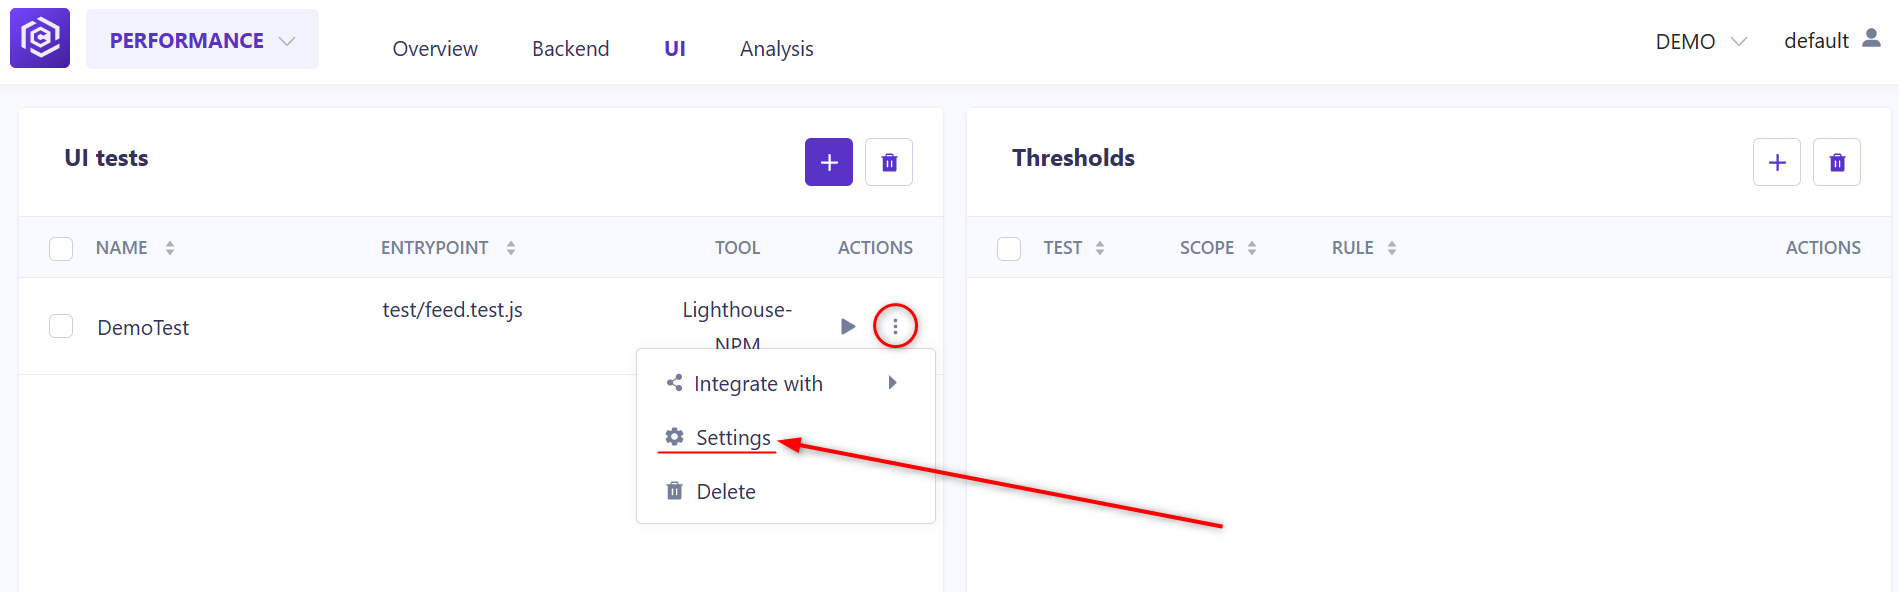
- Open Test settings by clicking on the More options button (3 dots menu).
![Settings Button]()
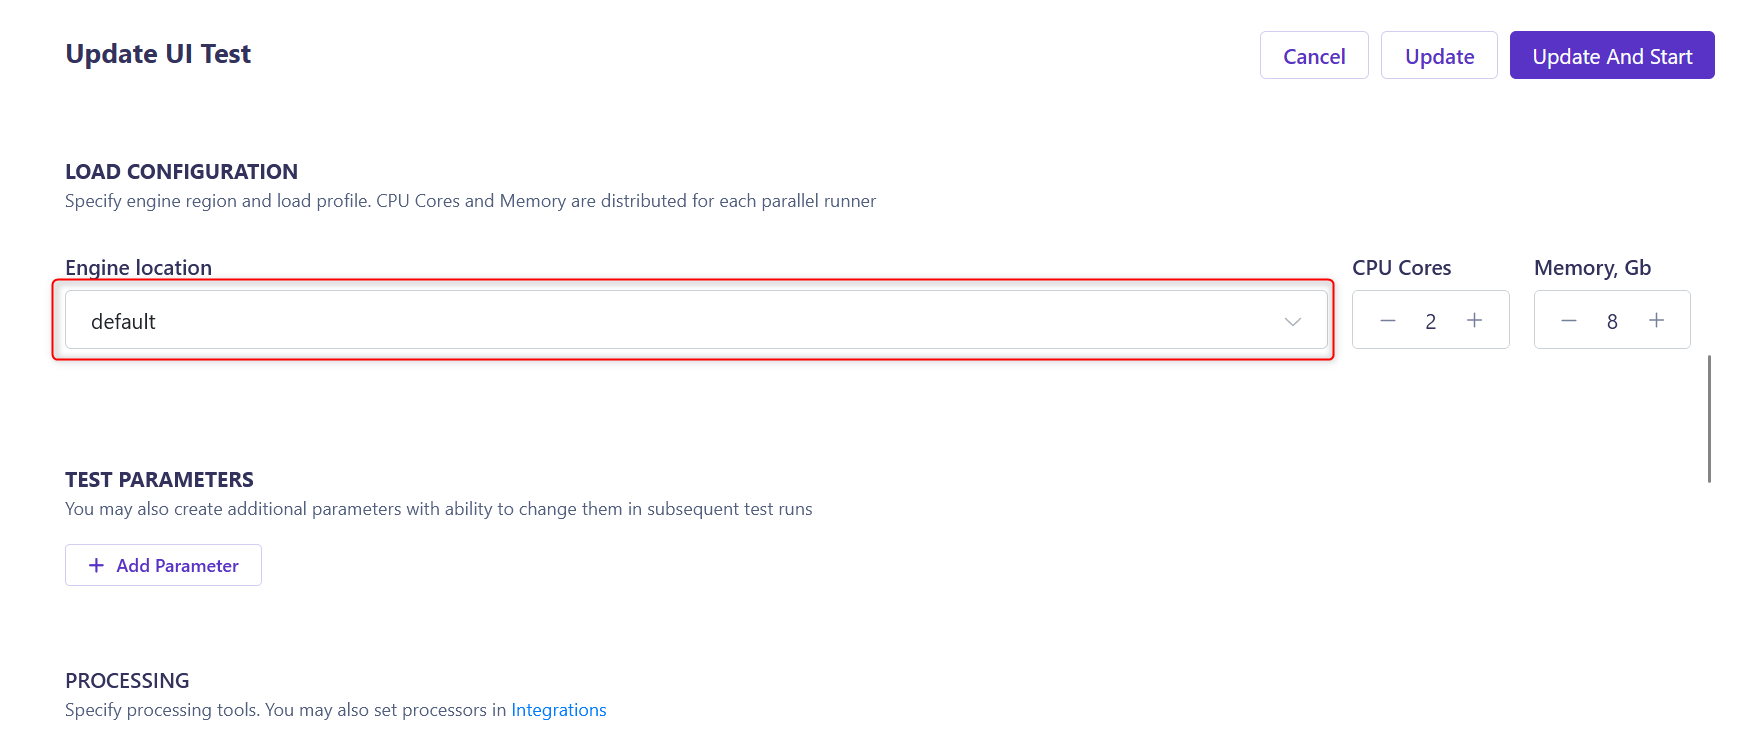
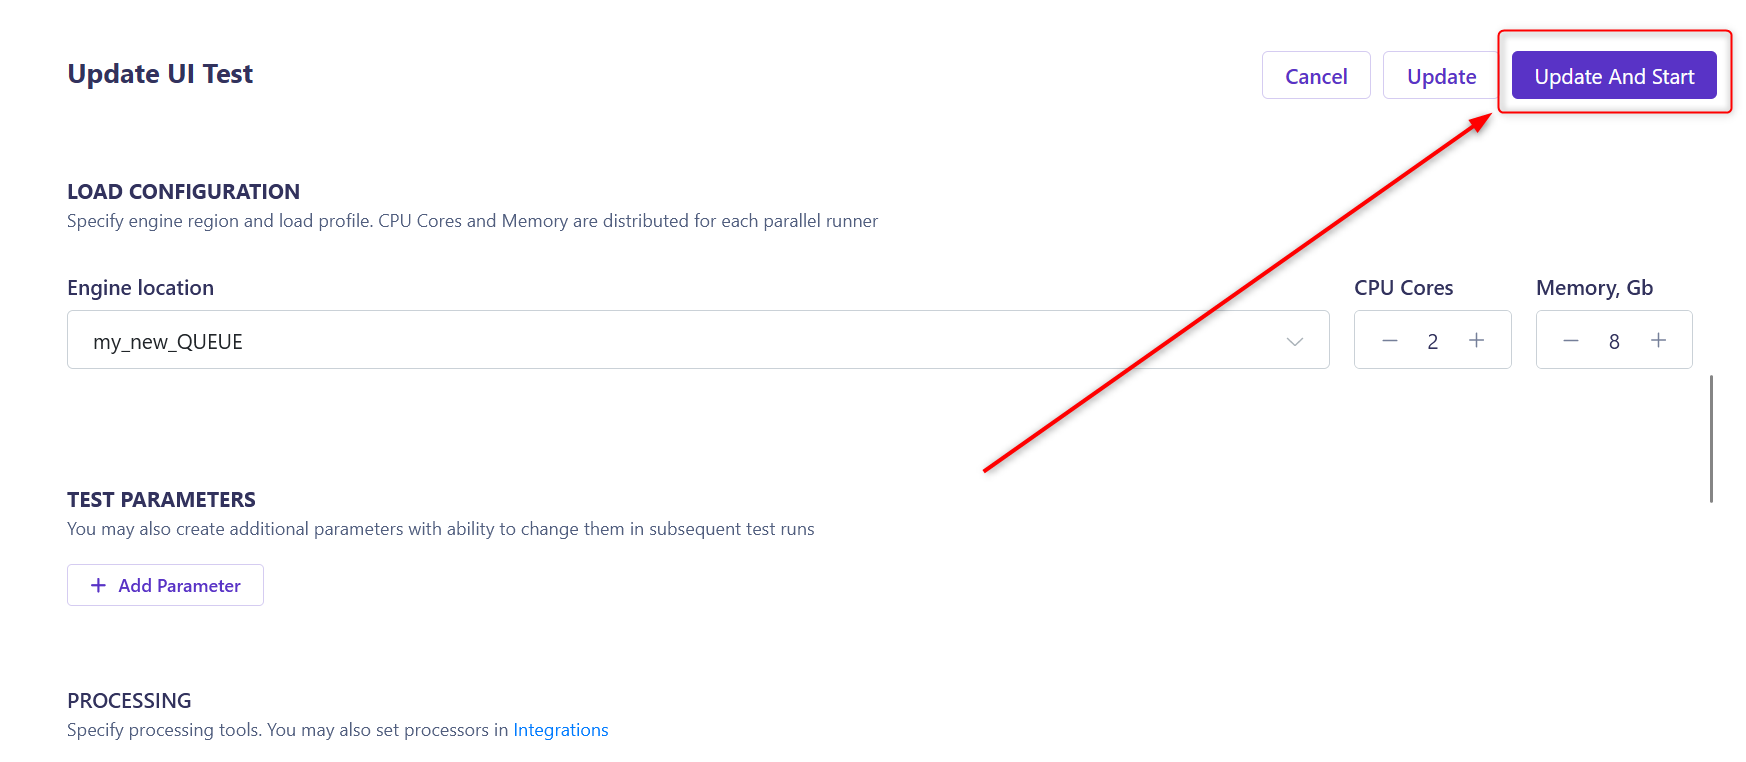
- Scroll down to the Load configuration section and click on Engine location dropdown.
![Load Config]()
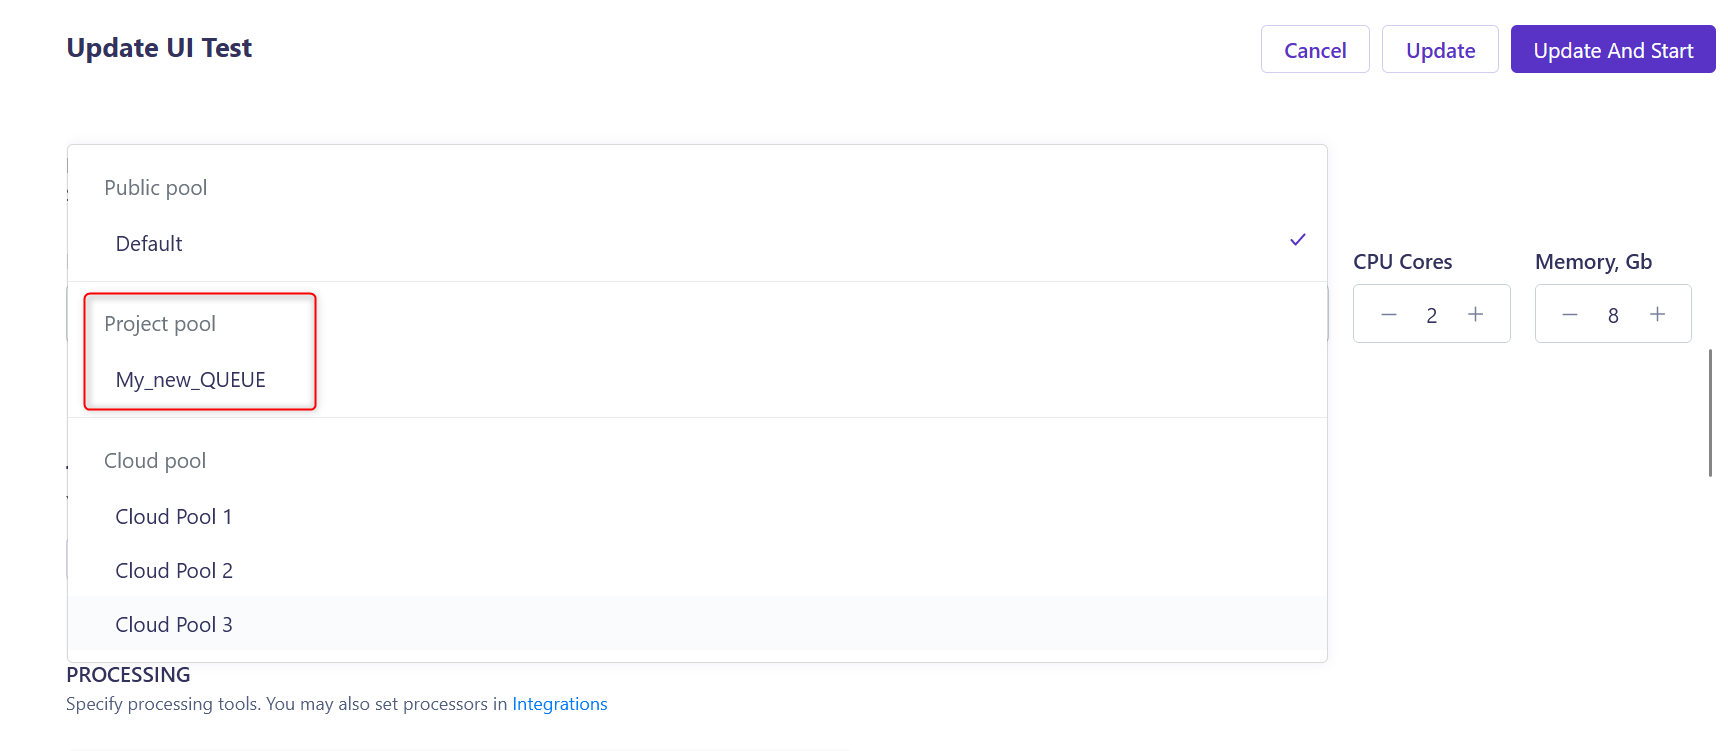
- Select Project pool with name
${QUEUE_NAME}from Docker command in Step 2![New Queue]()
- Click on Update And Start button.
![Update Queue]()

During the test execution you can run another Docker command:
1
docker ps
In order to see 2 Docker containers, one for interceptor and another for test execution. 
By following these simple steps, you can seamlessly integrate the interceptor into your Carrier platform, enhancing your performance testing capabilities with advanced monitoring and interception features.