Overview
This guide provides step-by-step instructions for Engagements in Carrier.
- Engagements is a tool that can help with tracking project progress, allowing teams to plan, assign, and monitor tasks through customizable workflows and boards.
- Engagements supports Kanban board, enabling teams to create sprints, manage backlogs, and visualize their workflow to enhance productivity and collaboration.
- Engagements also provides various reporting and analytics features, helping teams to measure performance, track progress against goals, and make data-driven decisions to improve efficiency and outcomes
Prerequisites
Before you begin working with Engagements, ensure that you have completed the following:
- Installed and set up Carrier successfully.
- Created a project in Carrier with checked engagements checkbox.
![Engagements checkbox]()

Note: You can find out how to create project in Carrier in the following guide
Steps
Follow the steps below to know how to use Engagements in Carrier:
Step 1: Access the Carrier Web Interface
- Open a web browser and enter the URL of your Carrier installation.
- Log in to the Carrier web interface using your credentials.
Note: Make sure you have logged in using the appropriate user account that has all required accesses
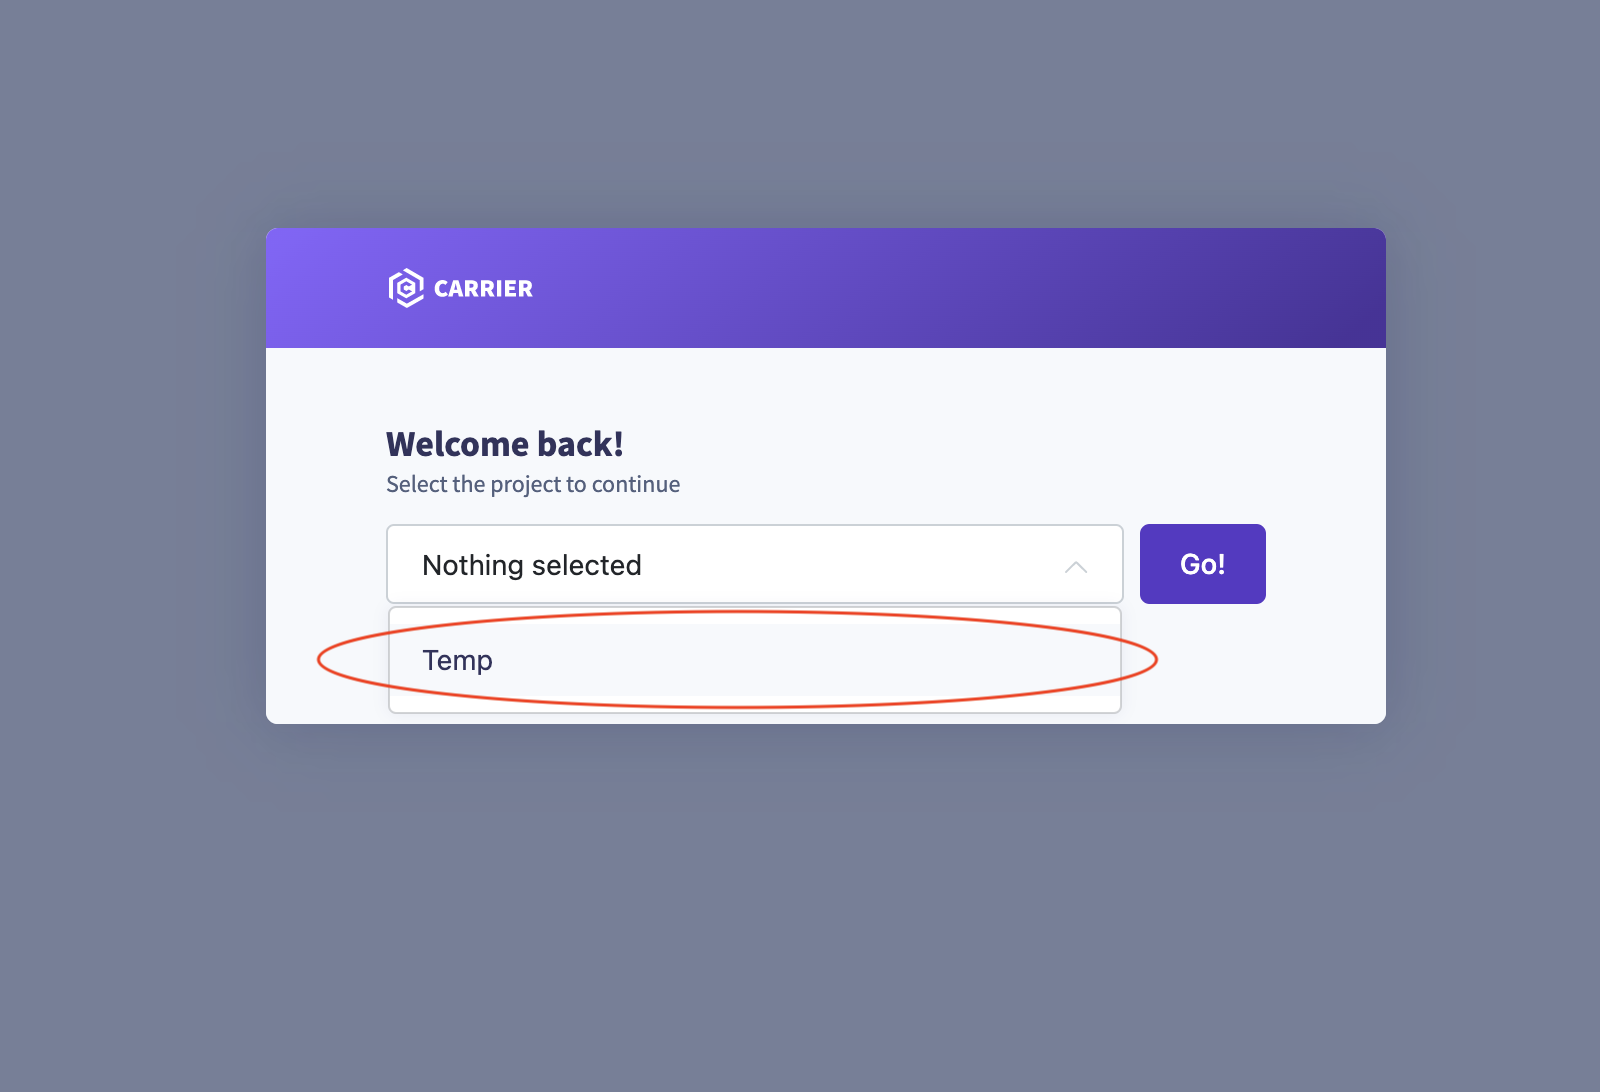
Step 2: Select the Project
- From the project dropdown menu, select the desired project where you want to work with Engagements.
![Select Project]()
- Click “Go!” to navigate to the project’s configuration page.
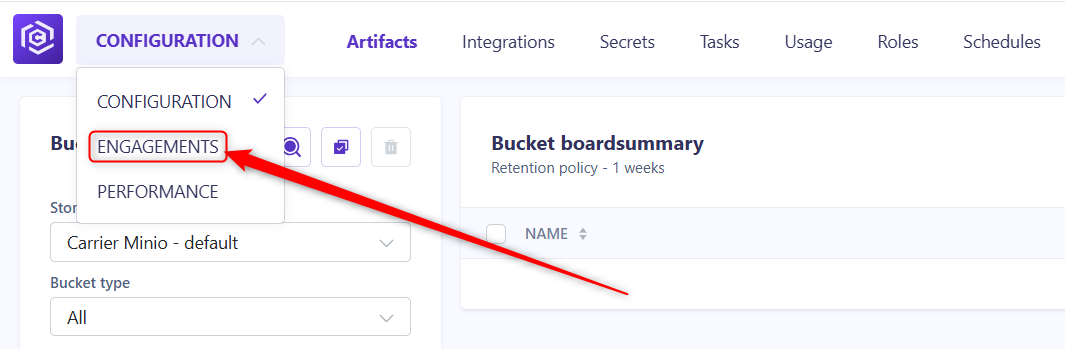
Step 3: Create Engagement
- Select ENGAGEMENTS option from the top left dropdown menu.
![Engagements Button]()
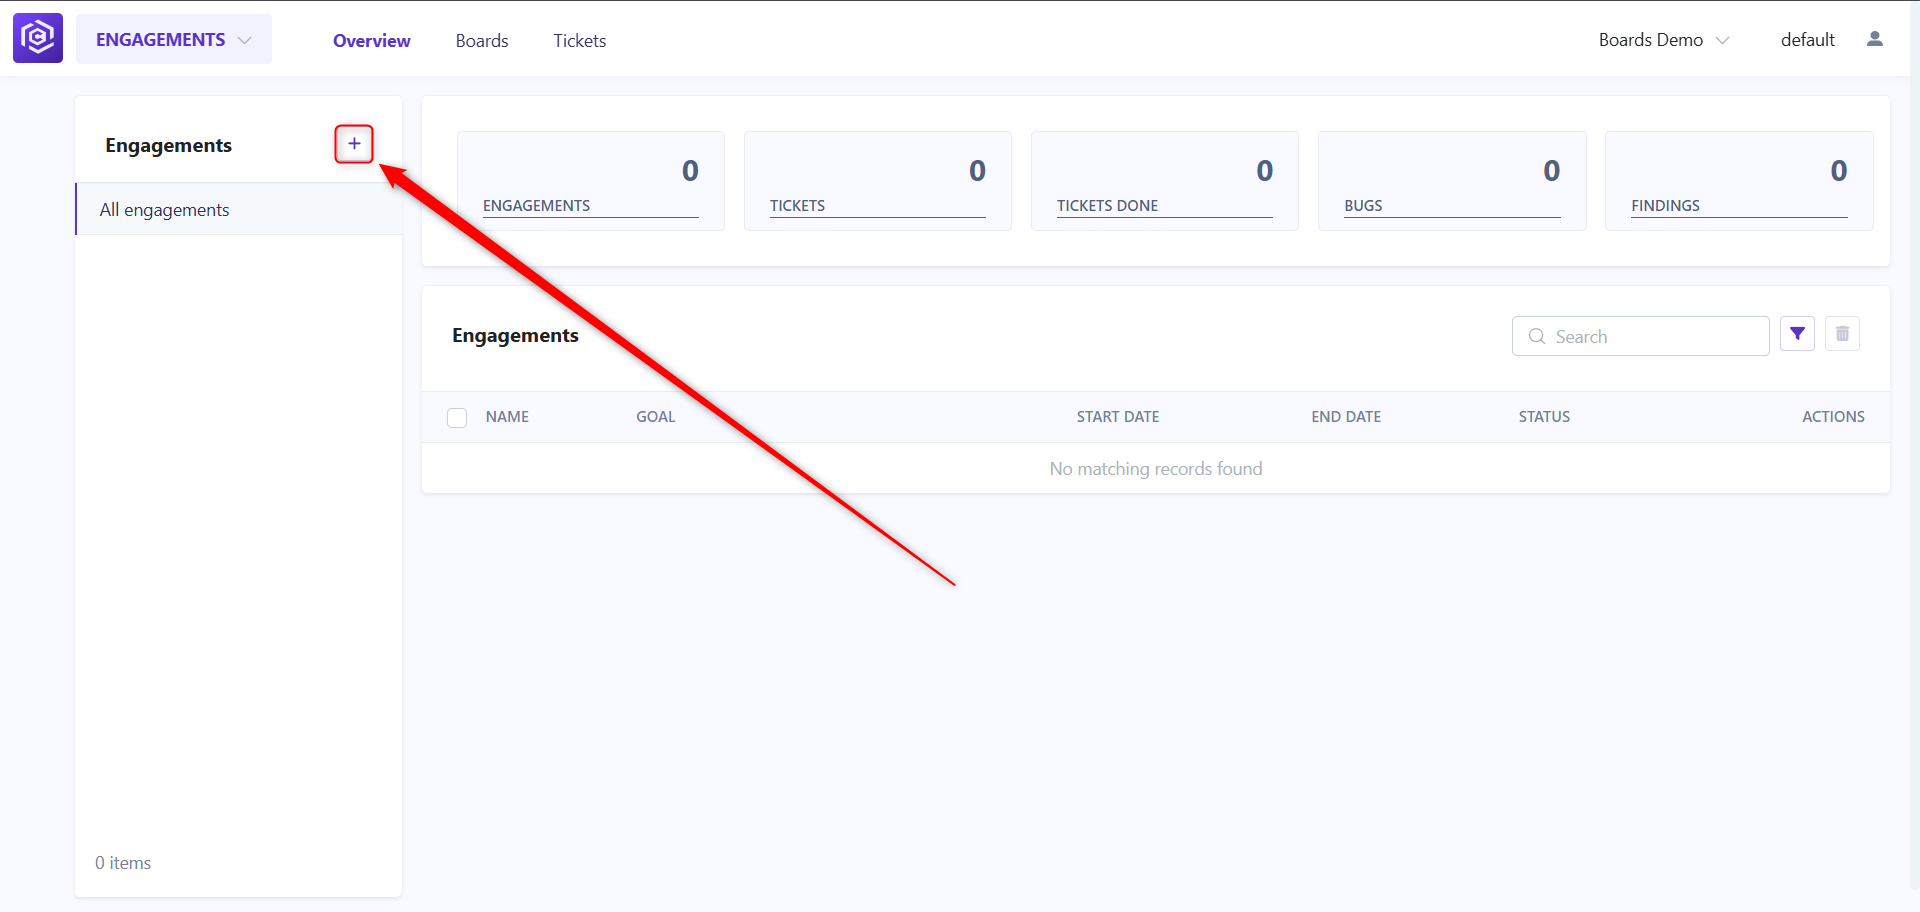
- In opened page click on the “+” button.
![Engagements Plus Button]()
- In new window you should fill in the following fields and click Save button:
![Engagement Save]()
- Engagement Name - name that will appear in your Engagements list.
- Goal - in this field you can describe purpose of creating Engagement.
- Status - shows Engagement status (New, In Progress, Done).
- Start Date - shows Engagement start date.
- End Date - shows Engagement end date.

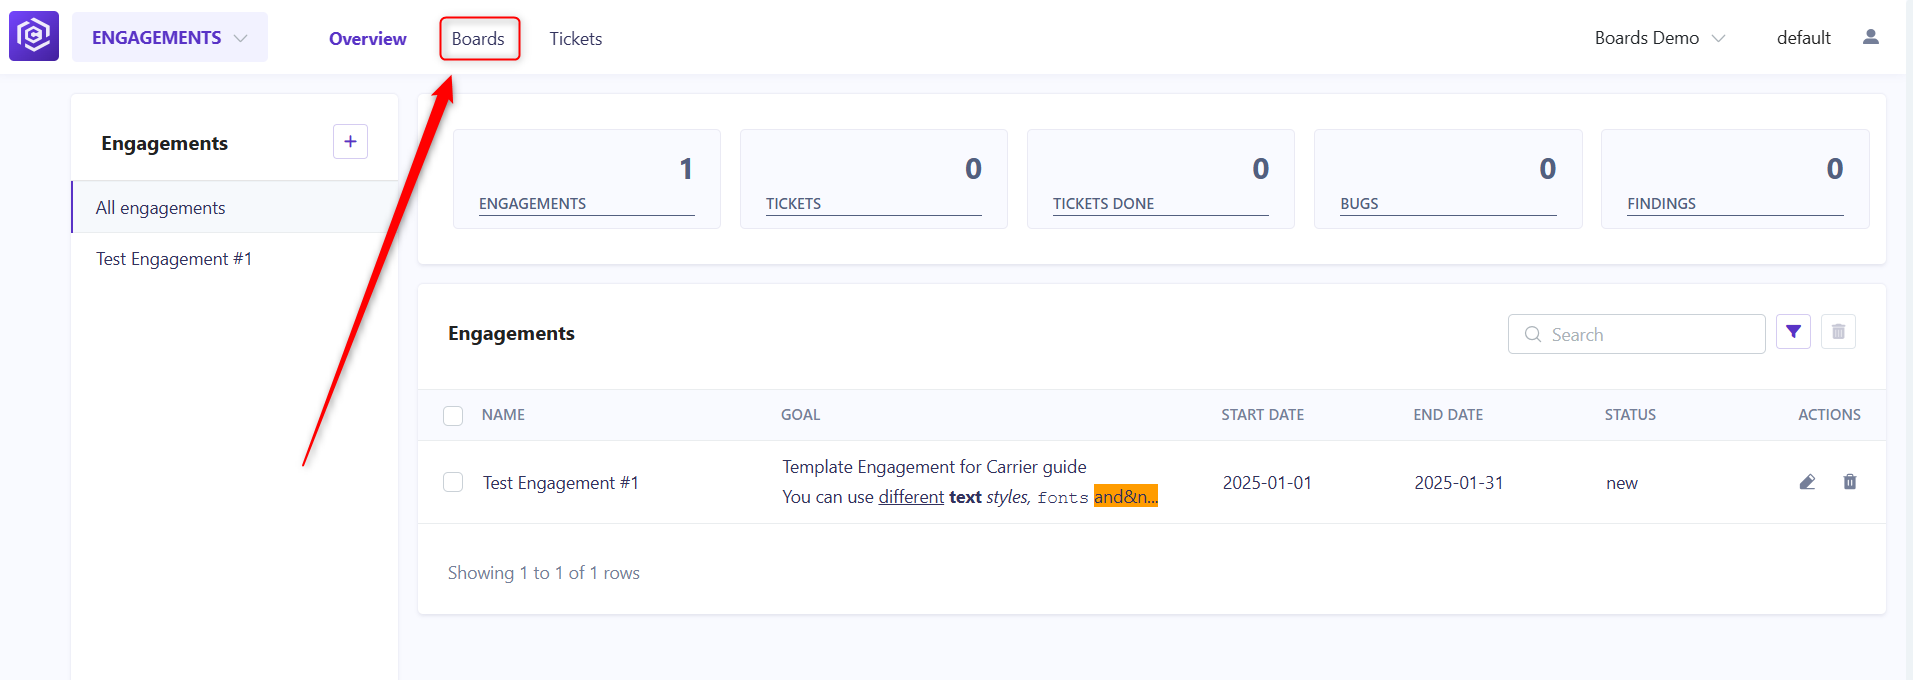
Step 4: Create Board
Click on the Boards tab from the top menu.
![Boards Tab]()
Select your board from all boards, click 3-dots button and press the New Board button.
![3 Dots Menu Boards]()
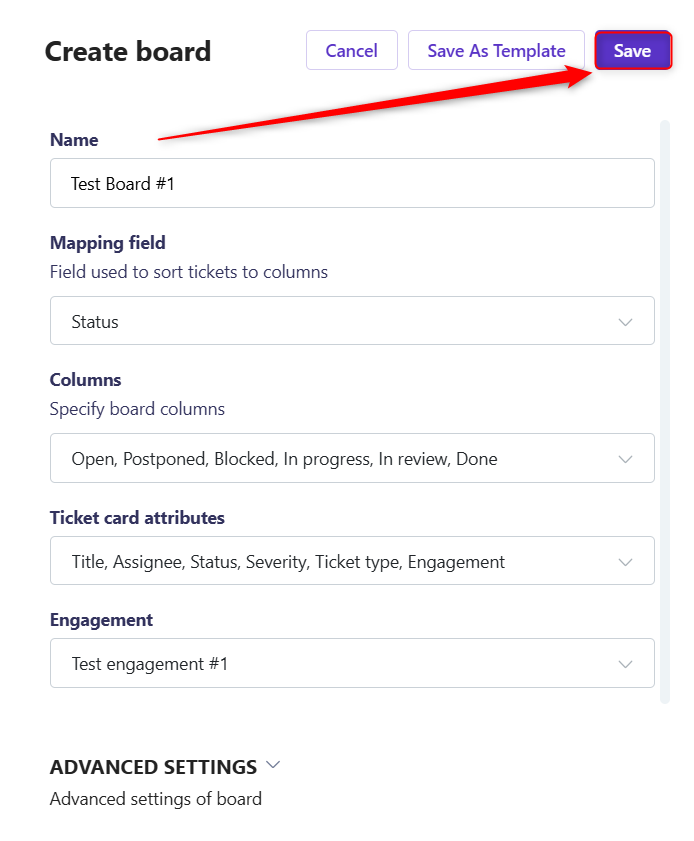
- In the opened window, you should specify following parameters and click Save button:
![Create Board]()
- Name - name that will appear in your Boards list.
- Mapping field - Field used to sort tickets to columns (Recomended using only Status field).
- Columns - Kanban board columns, such as: Open, Postponed, Blocked, In progress, In review, Done.
- Ticket card attributes - attributes such as: Title, Assignee, Status, Severity, Ticket type, Engagement.
- Engagement - which Engagement is related to Board.
- Also you can configure schedule to send an email with board summary.
![Board Schedule]()


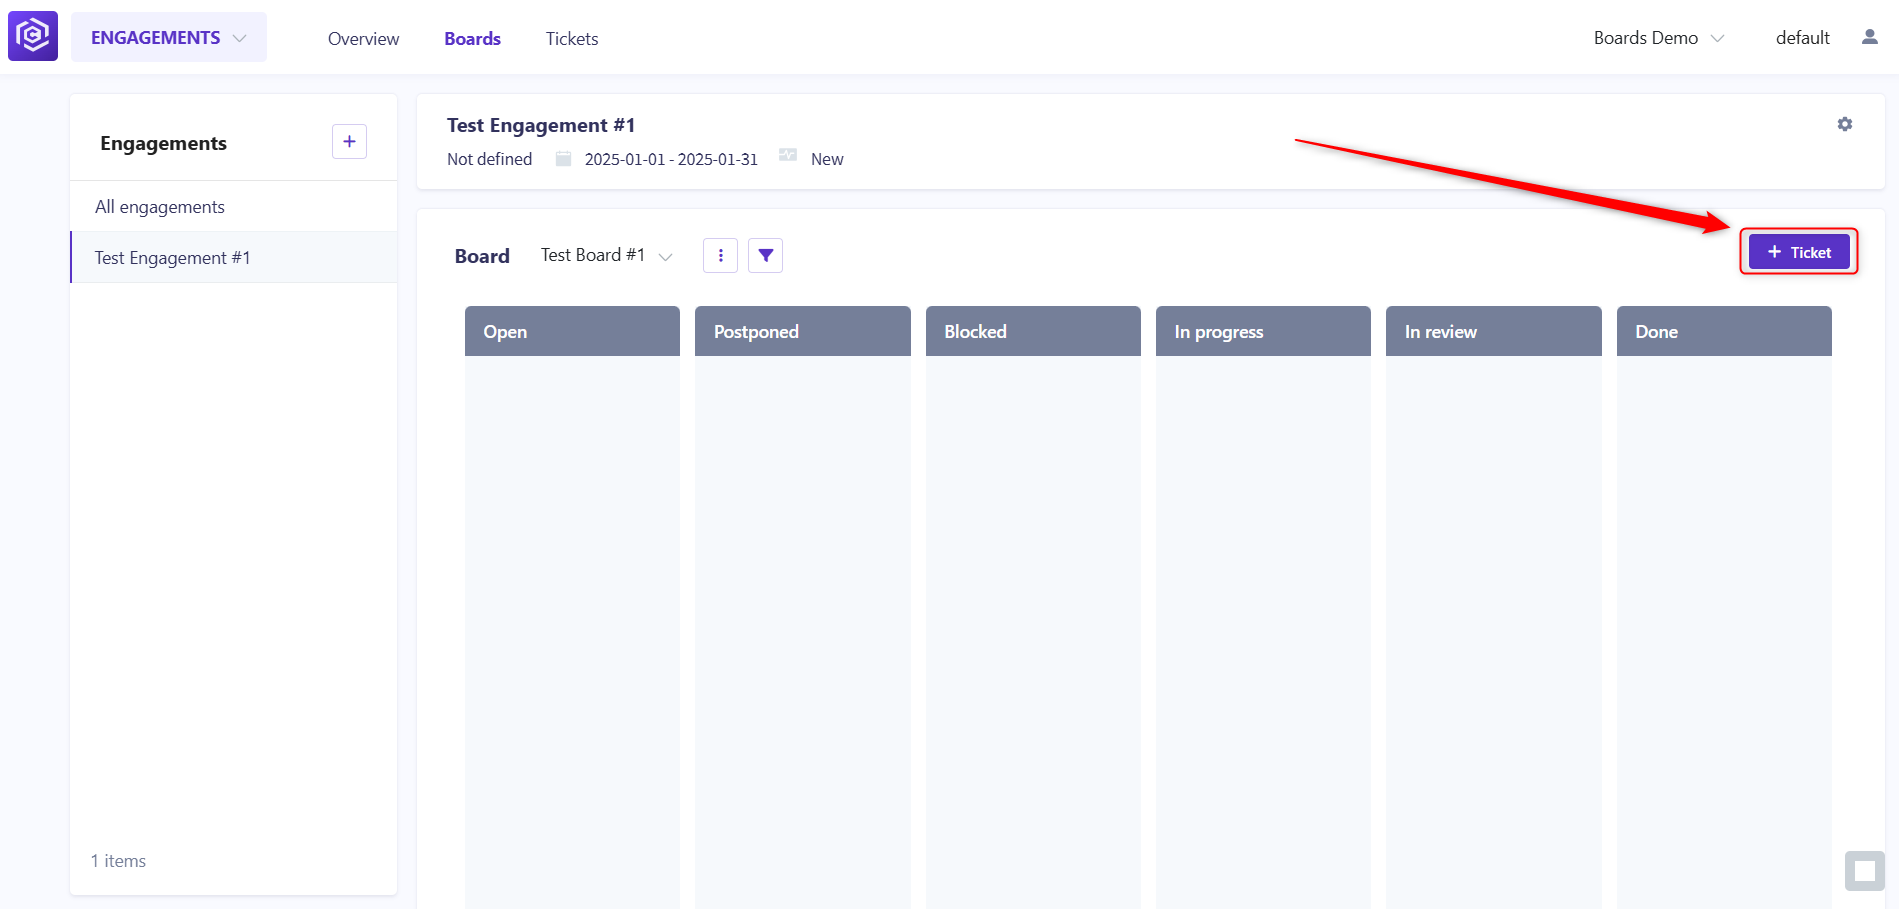
Step 5: Create Ticket
Click on the + Ticket button.
![Create Ticket]()
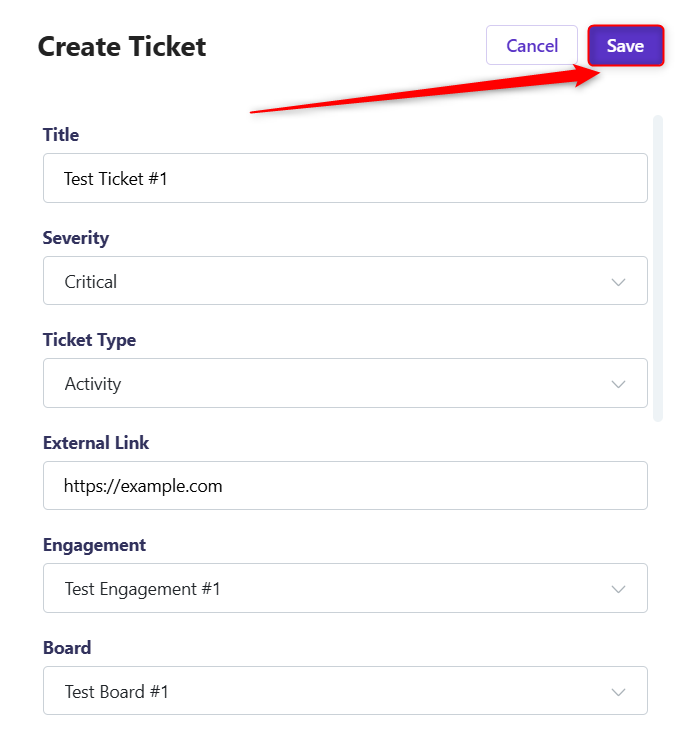
- Fill in the following fields and click Save button:
![Create Ticket Fields]()
![Create Ticket Fields]()
- Title - Ticket name.
- Severity - Critical, High, Medium, Low, Info.
- Ticket Type - Activity, Bug, Risk.
- External Link - Link to the external resource.
- Engagement - Related Engagement.
- Board - Related Board.
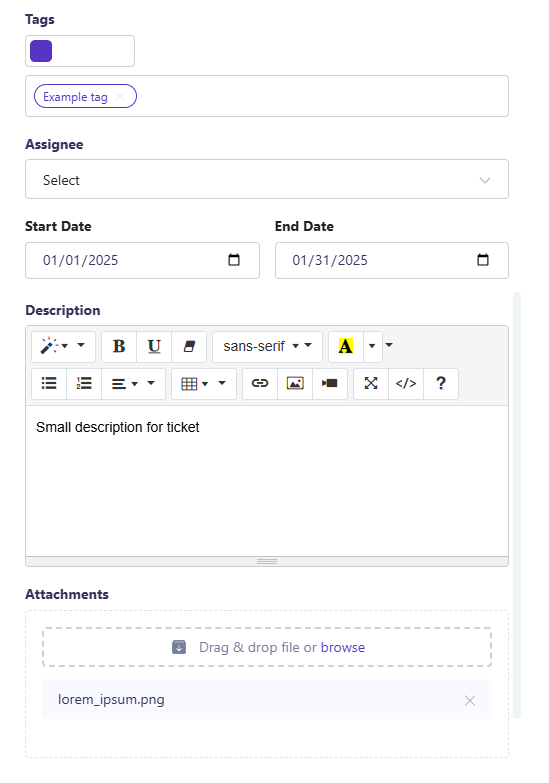
- Tags - Different tags for easier navigation.
- Assignee - Person who assigned to the ticket.
- Start Date - Ticket start date.
- End Date - Ticket end date.
- Description - In this field you can describe details of ticket.
- Attachments - Here you can attach different images and/or files.
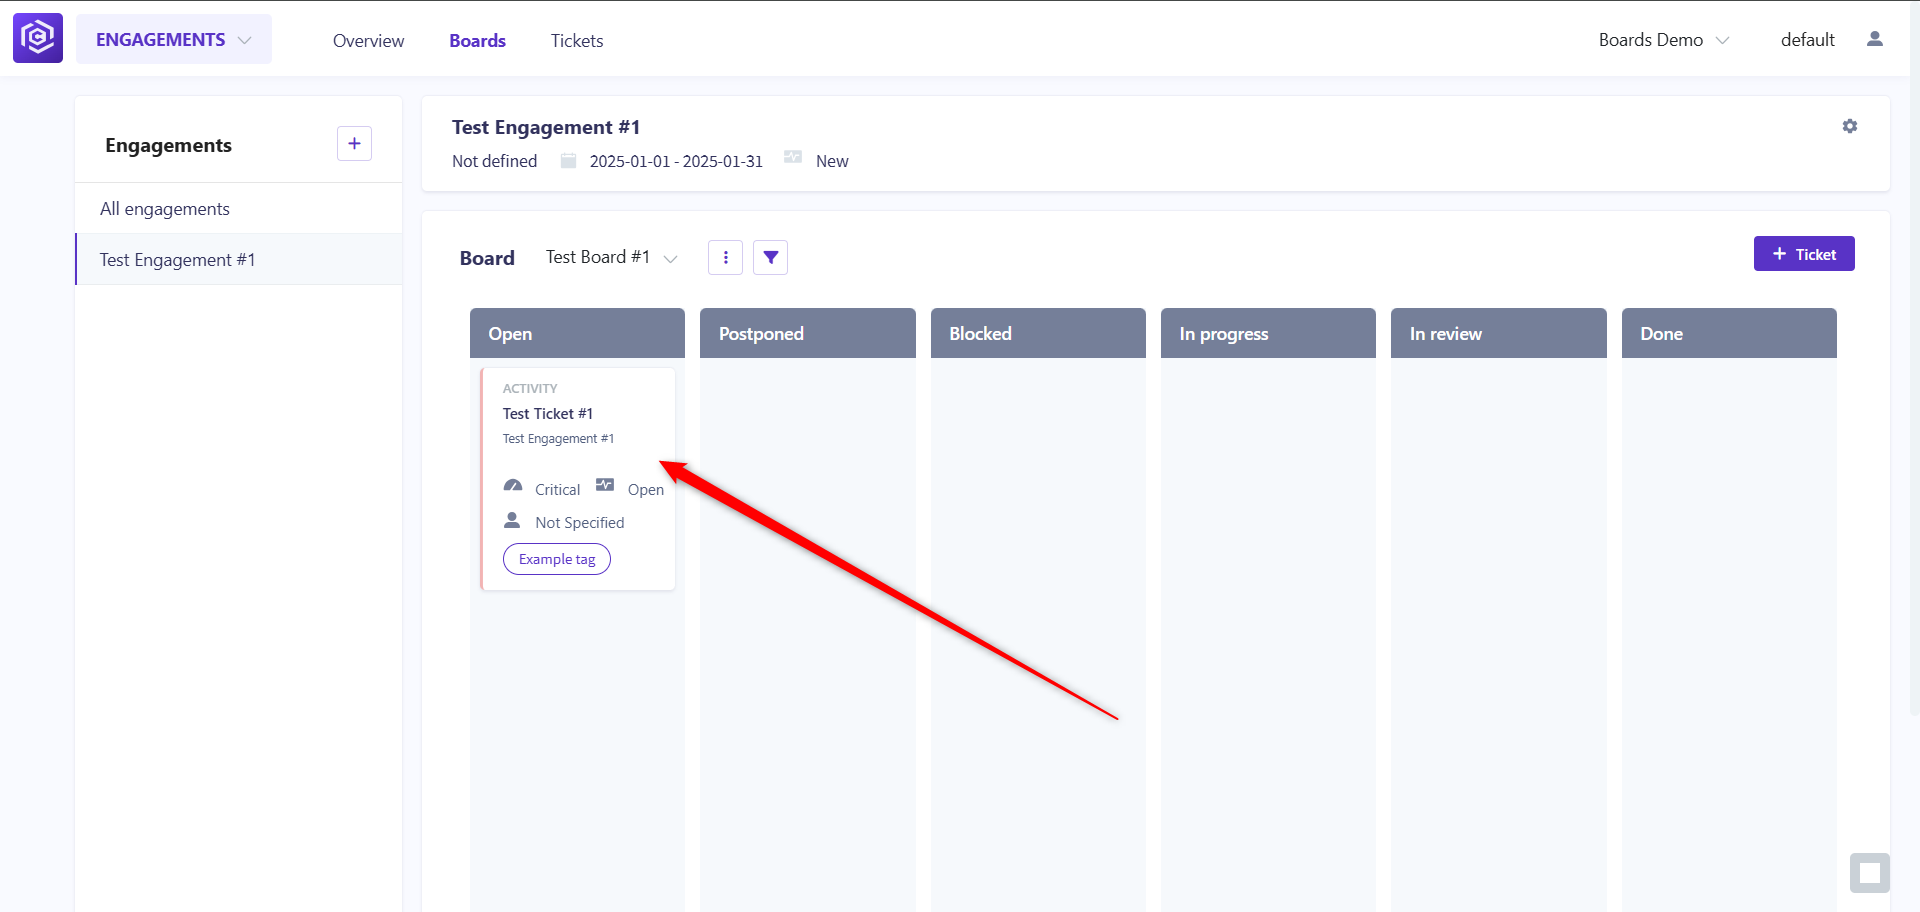
After creating a ticket, please reload the page to see it on the board.
![Ticket Example]()
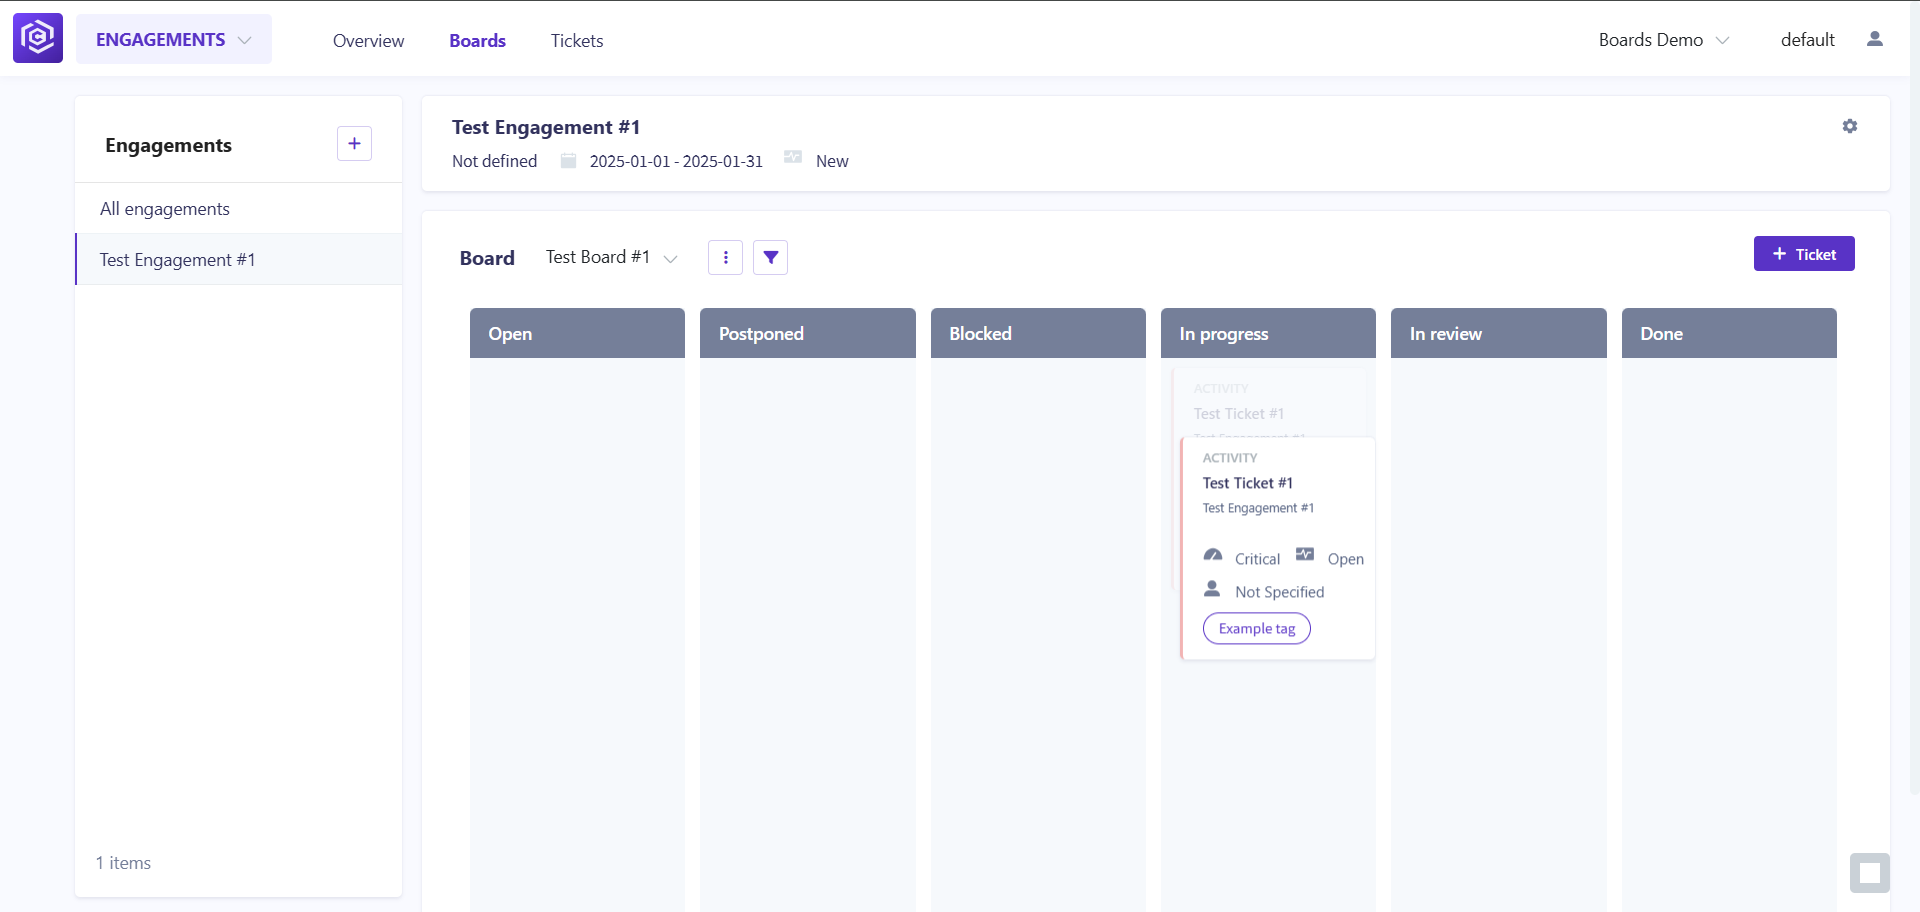
You can move ticket to different columns, just drag and drop it.
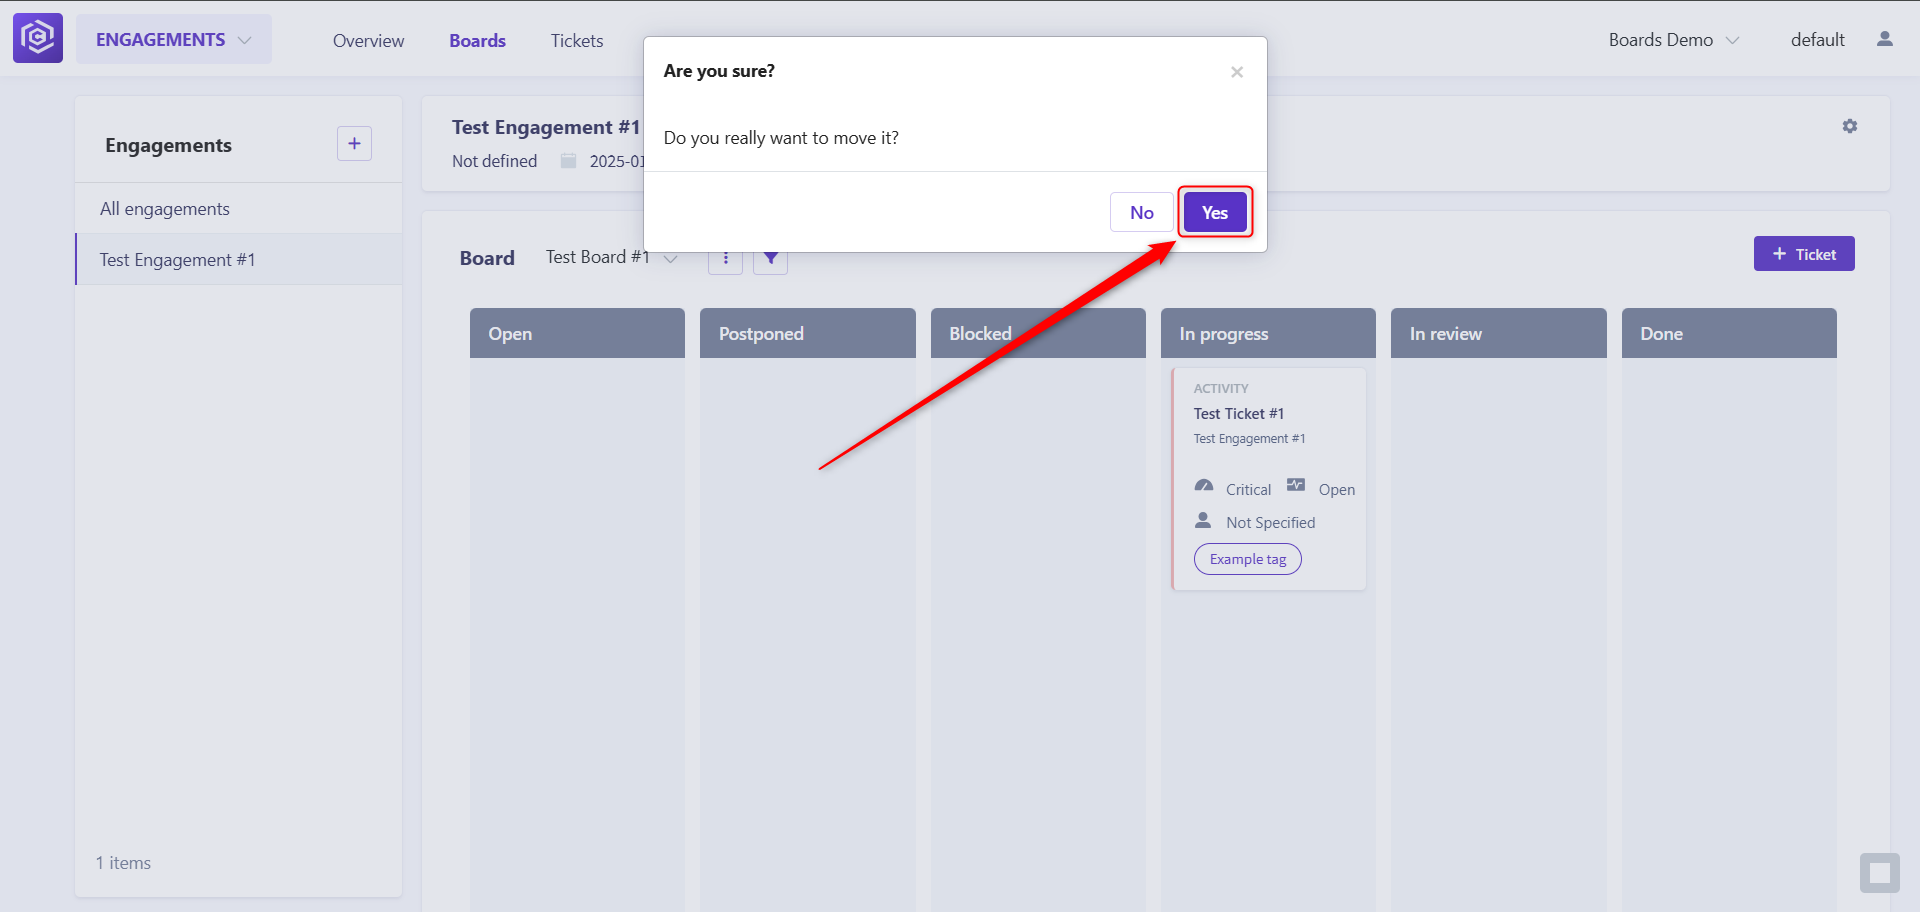
![Ticket Moving]() Also, you should confirm your choice by clicking Yes
Also, you should confirm your choice by clicking Yes ![Ticket Warning]()
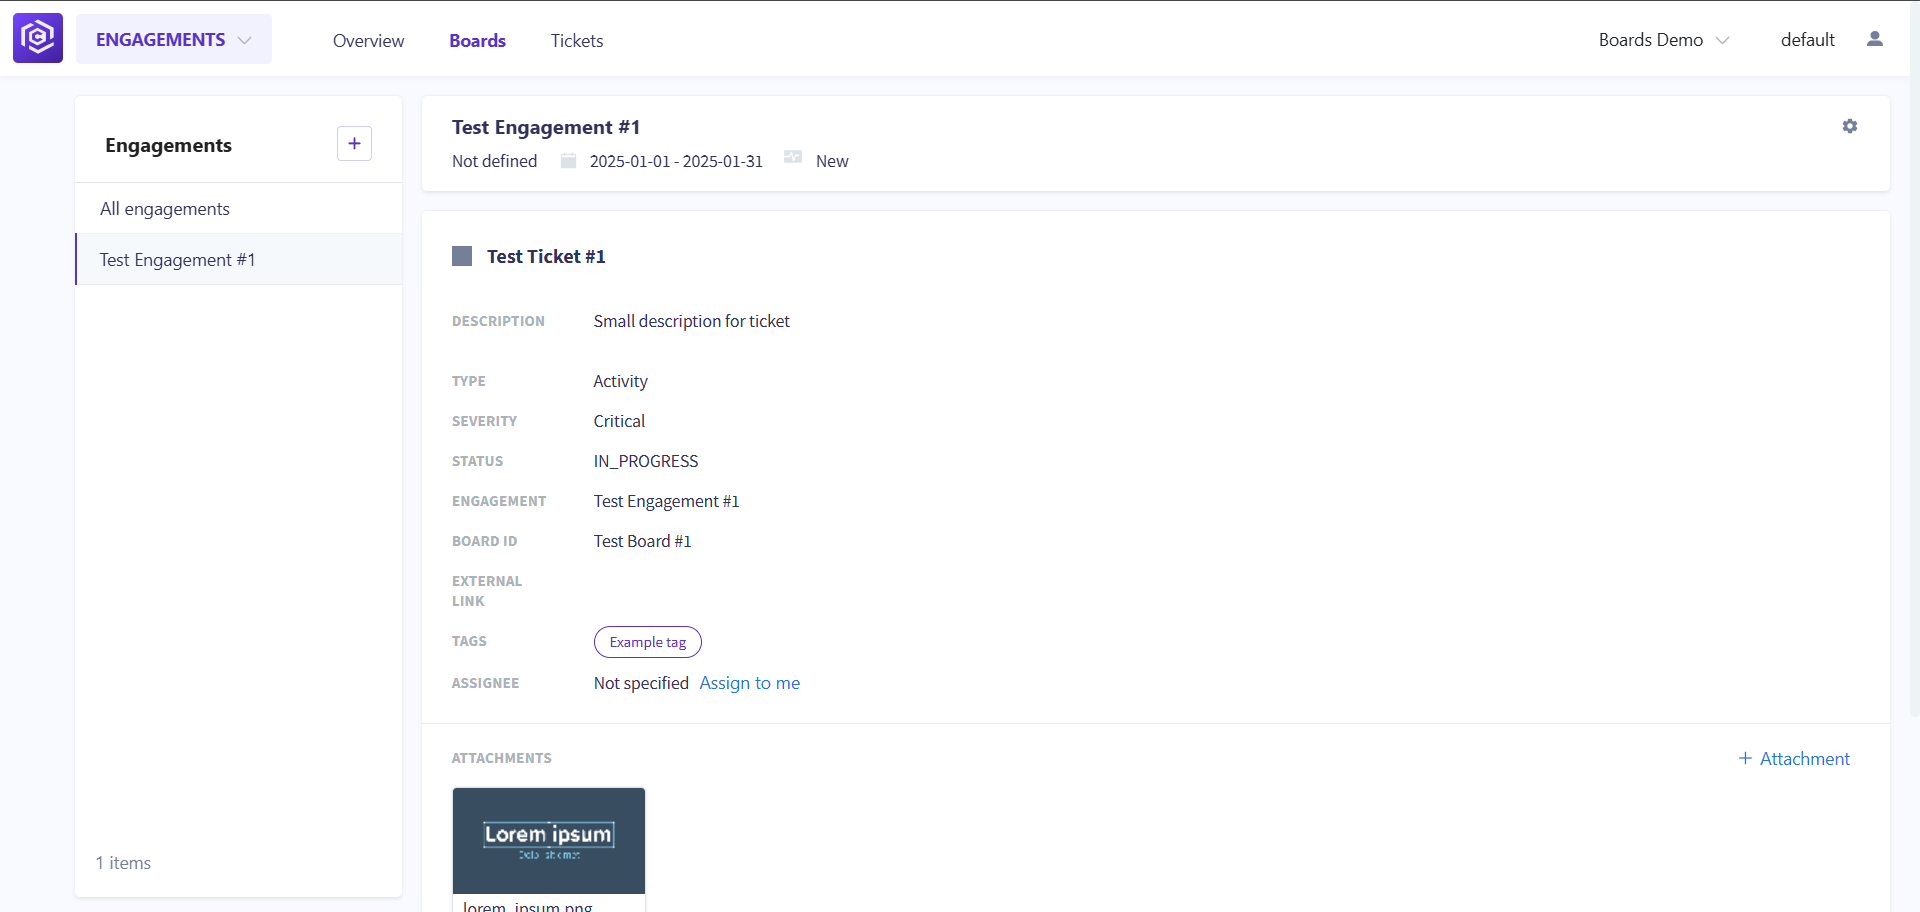
- You can open ticket just clicked on it.
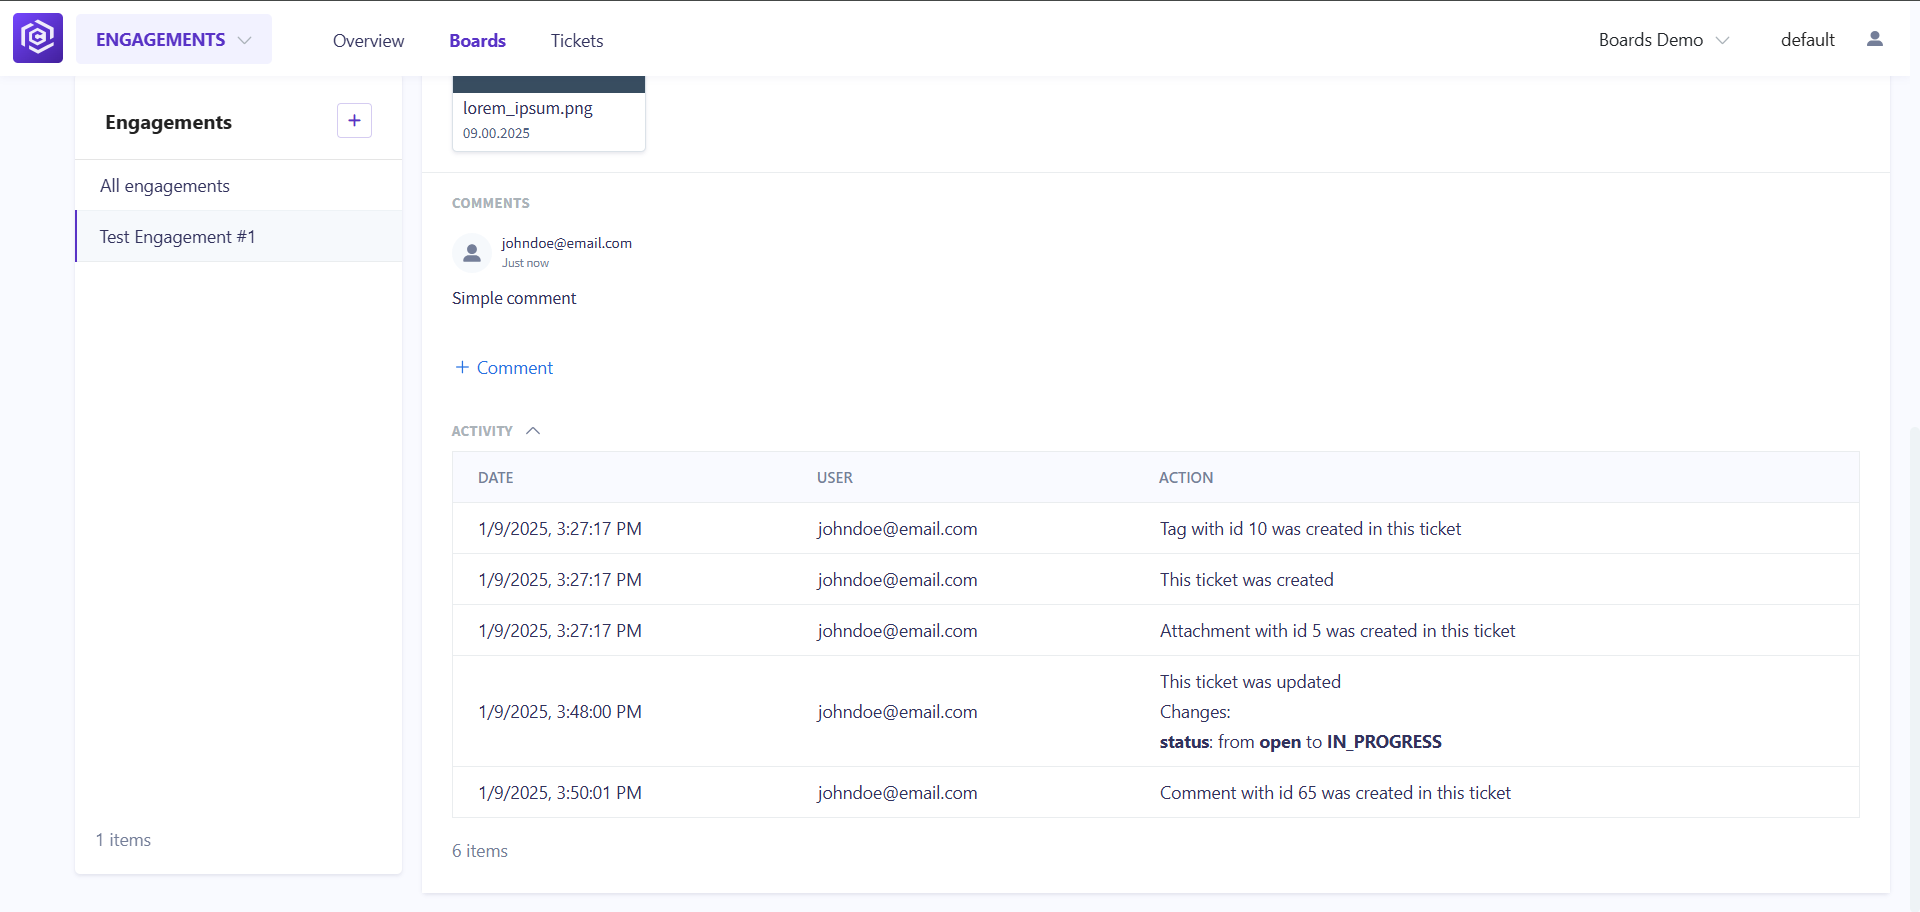
![Ticket Details]() At the bottom of the page you can add or edit comments, and check the latest activities.
At the bottom of the page you can add or edit comments, and check the latest activities. ![Ticket Details]()
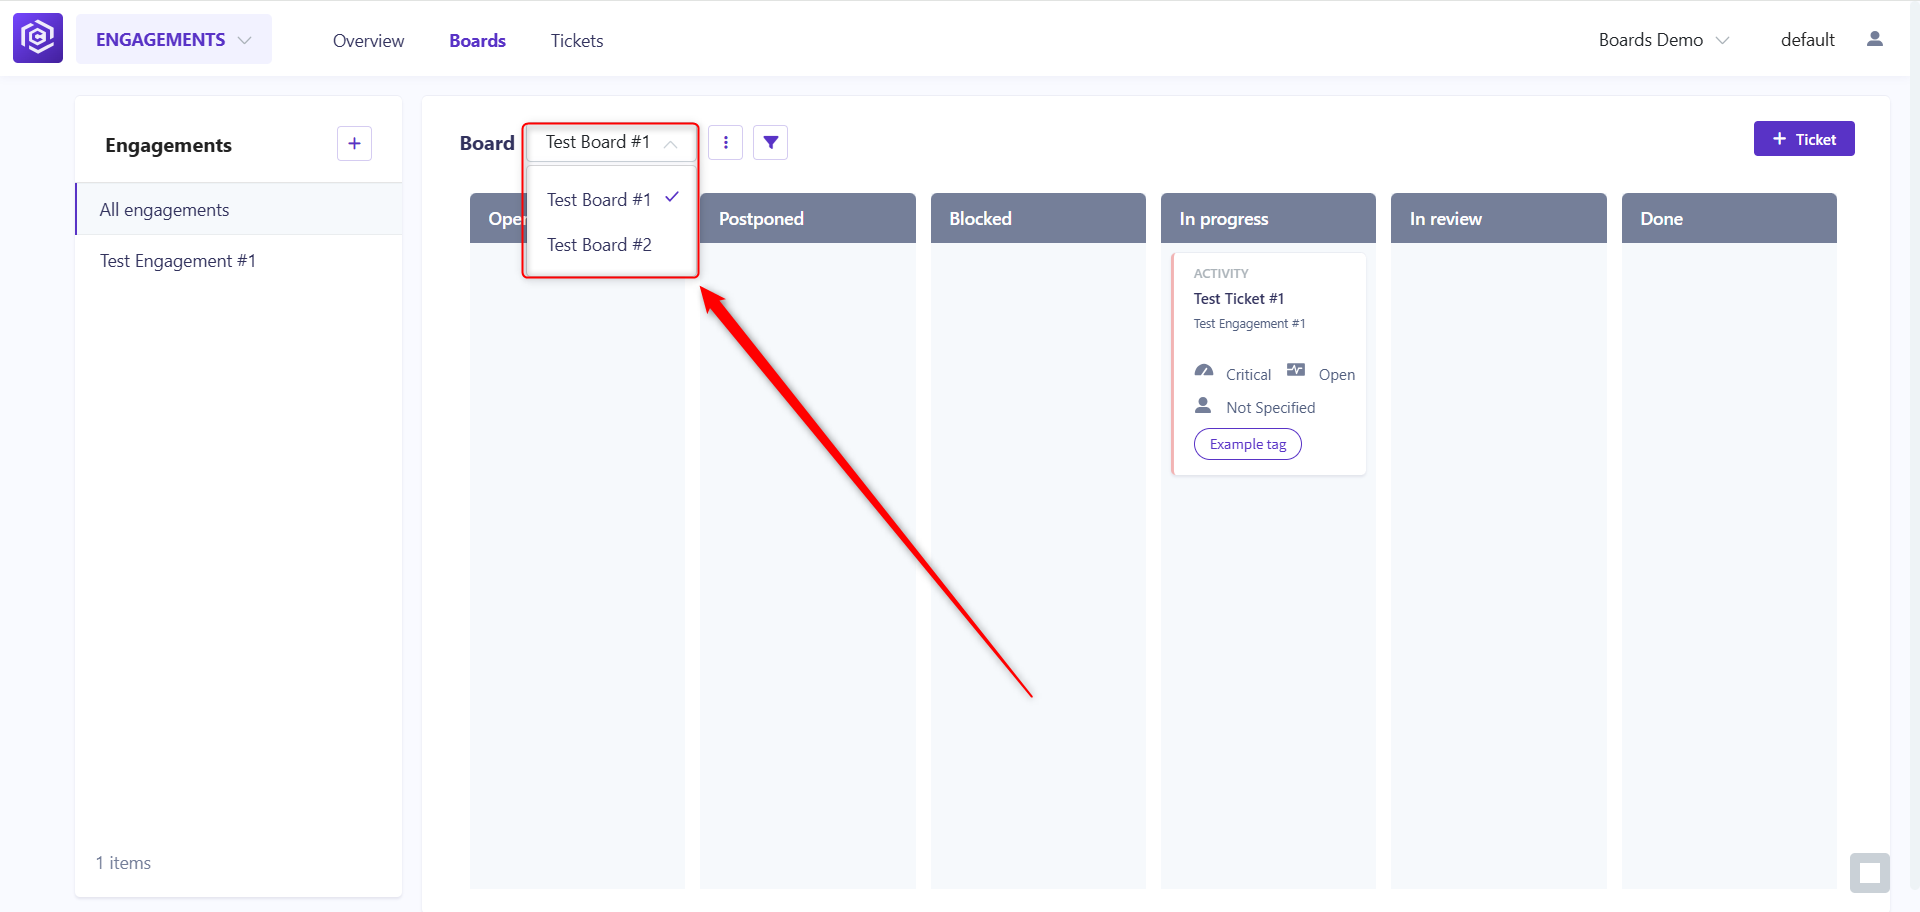
Step 6: Switching between boards and tickets
You can add another board and switch between them using the dropdown menu.
![Switch board]()
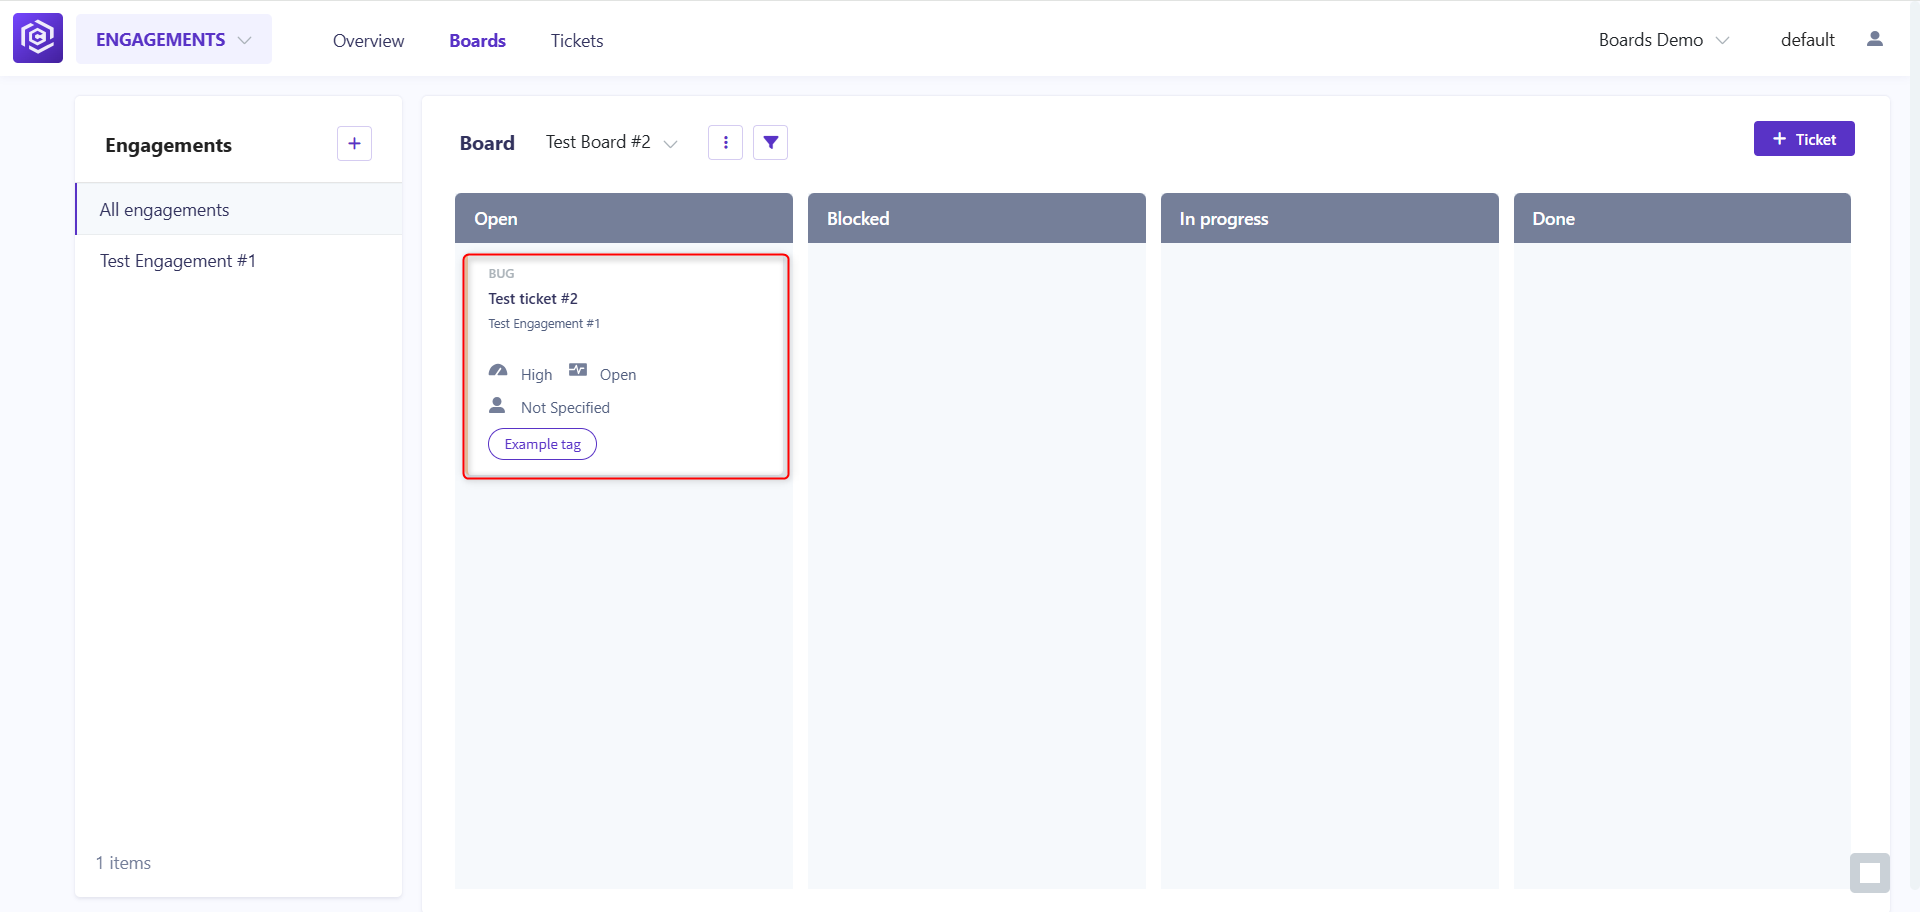
Each ticket assigned to a particular board will be available on it.
![Board with new ticket]()
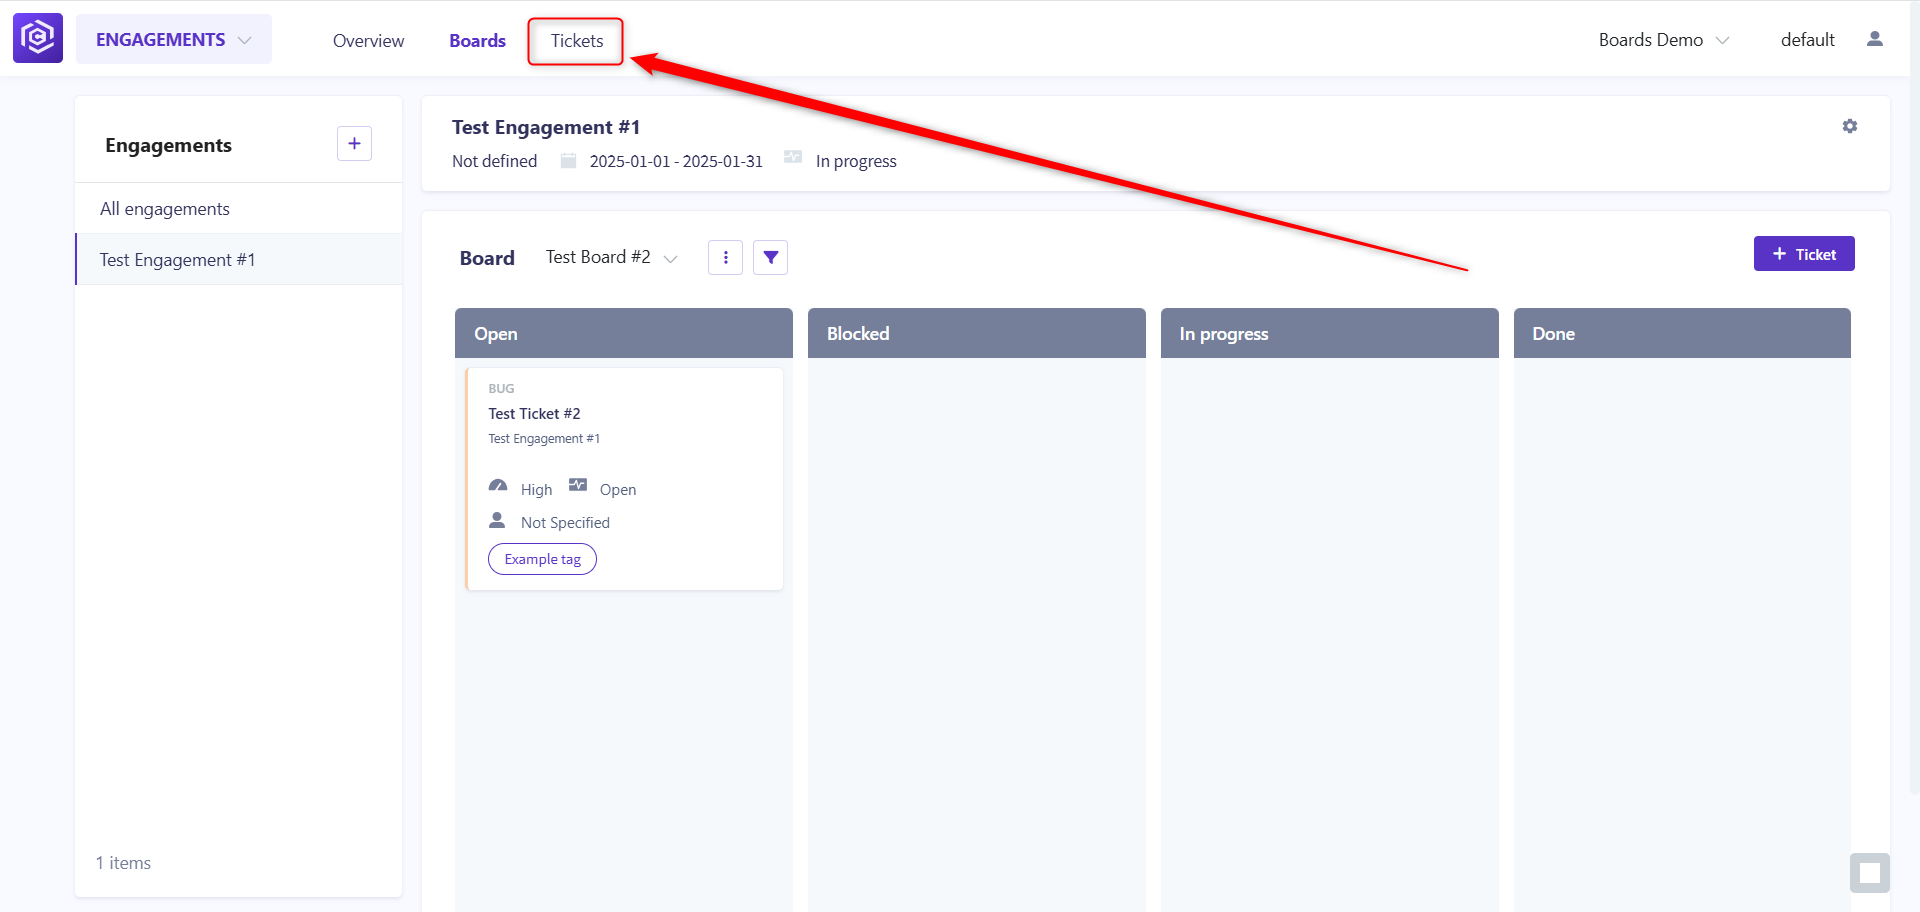
You can check all the tickets in Tickets tab
![Tickets tab]()
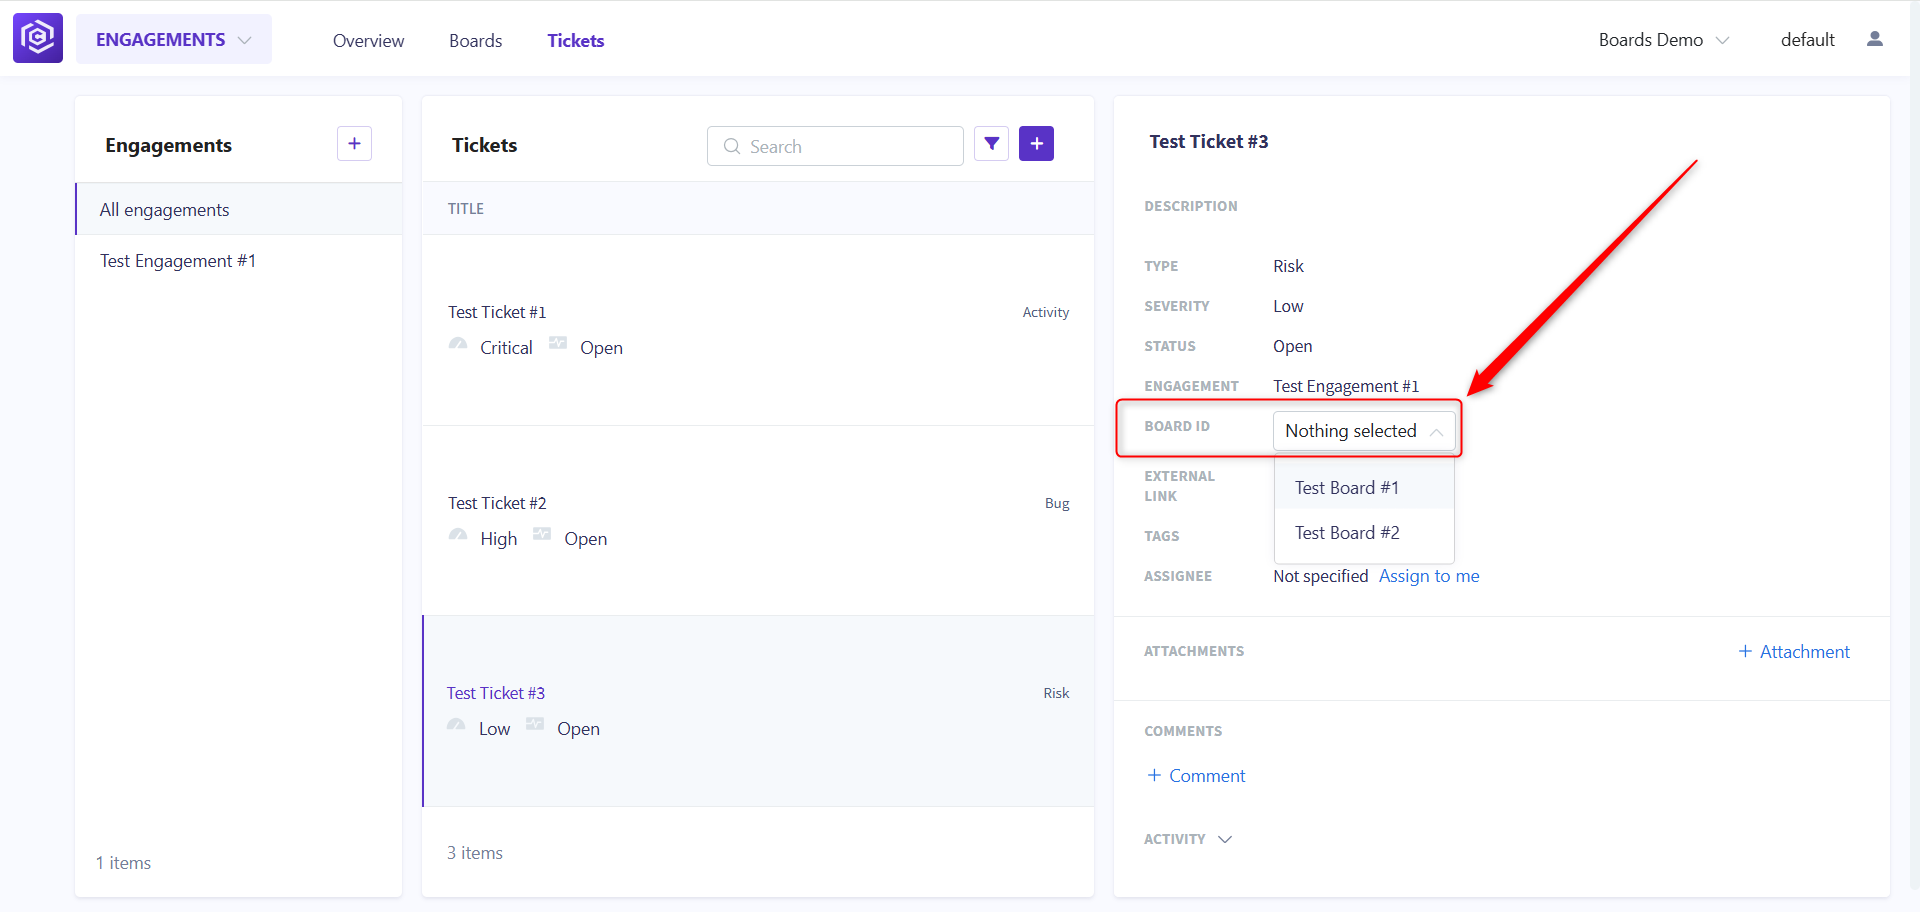
This page contains information about all the tickets, you can click on the ticket name to get more details.
![Ticket page]()
On the following page, you can edit your tickets (for example, assign a ticket to the board).
![Ticket edit page]()