
Overview
This guide provides step-by-step instructions for configuring a Backend test in Carrier. Backend tests are designed to simulate traffic to your application’s backend services and measure their performance.
Prerequisites
Before you begin configuring a Backend test in Carrier, ensure that you have completed the following:
- Installed and set up Carrier successfully
- Created a project in Carrier
Steps
Follow the steps below to configure a Backend test in Carrier:
Step 1: Access the Carrier Web Interface
- Open a web browser and enter the URL of your Carrier installation.
- Log in to the Carrier web interface using your credentials.
Note: Make sure you have logged in using the appropriate user account that has access to the project where you want to configure the Backend test.
Step 2: Select the Project
- From the project dropdown menu, select the desired project where you want to configure the Backend test.
- Click “Go!” to navigate to the project’s configuration page.
Step 3: Navigate to the Backend Section
- In the project configuration page, click on the “Backend” tab located in the left menu.
- This will open the Backend configuration section where you can define and manage your Backend tests.
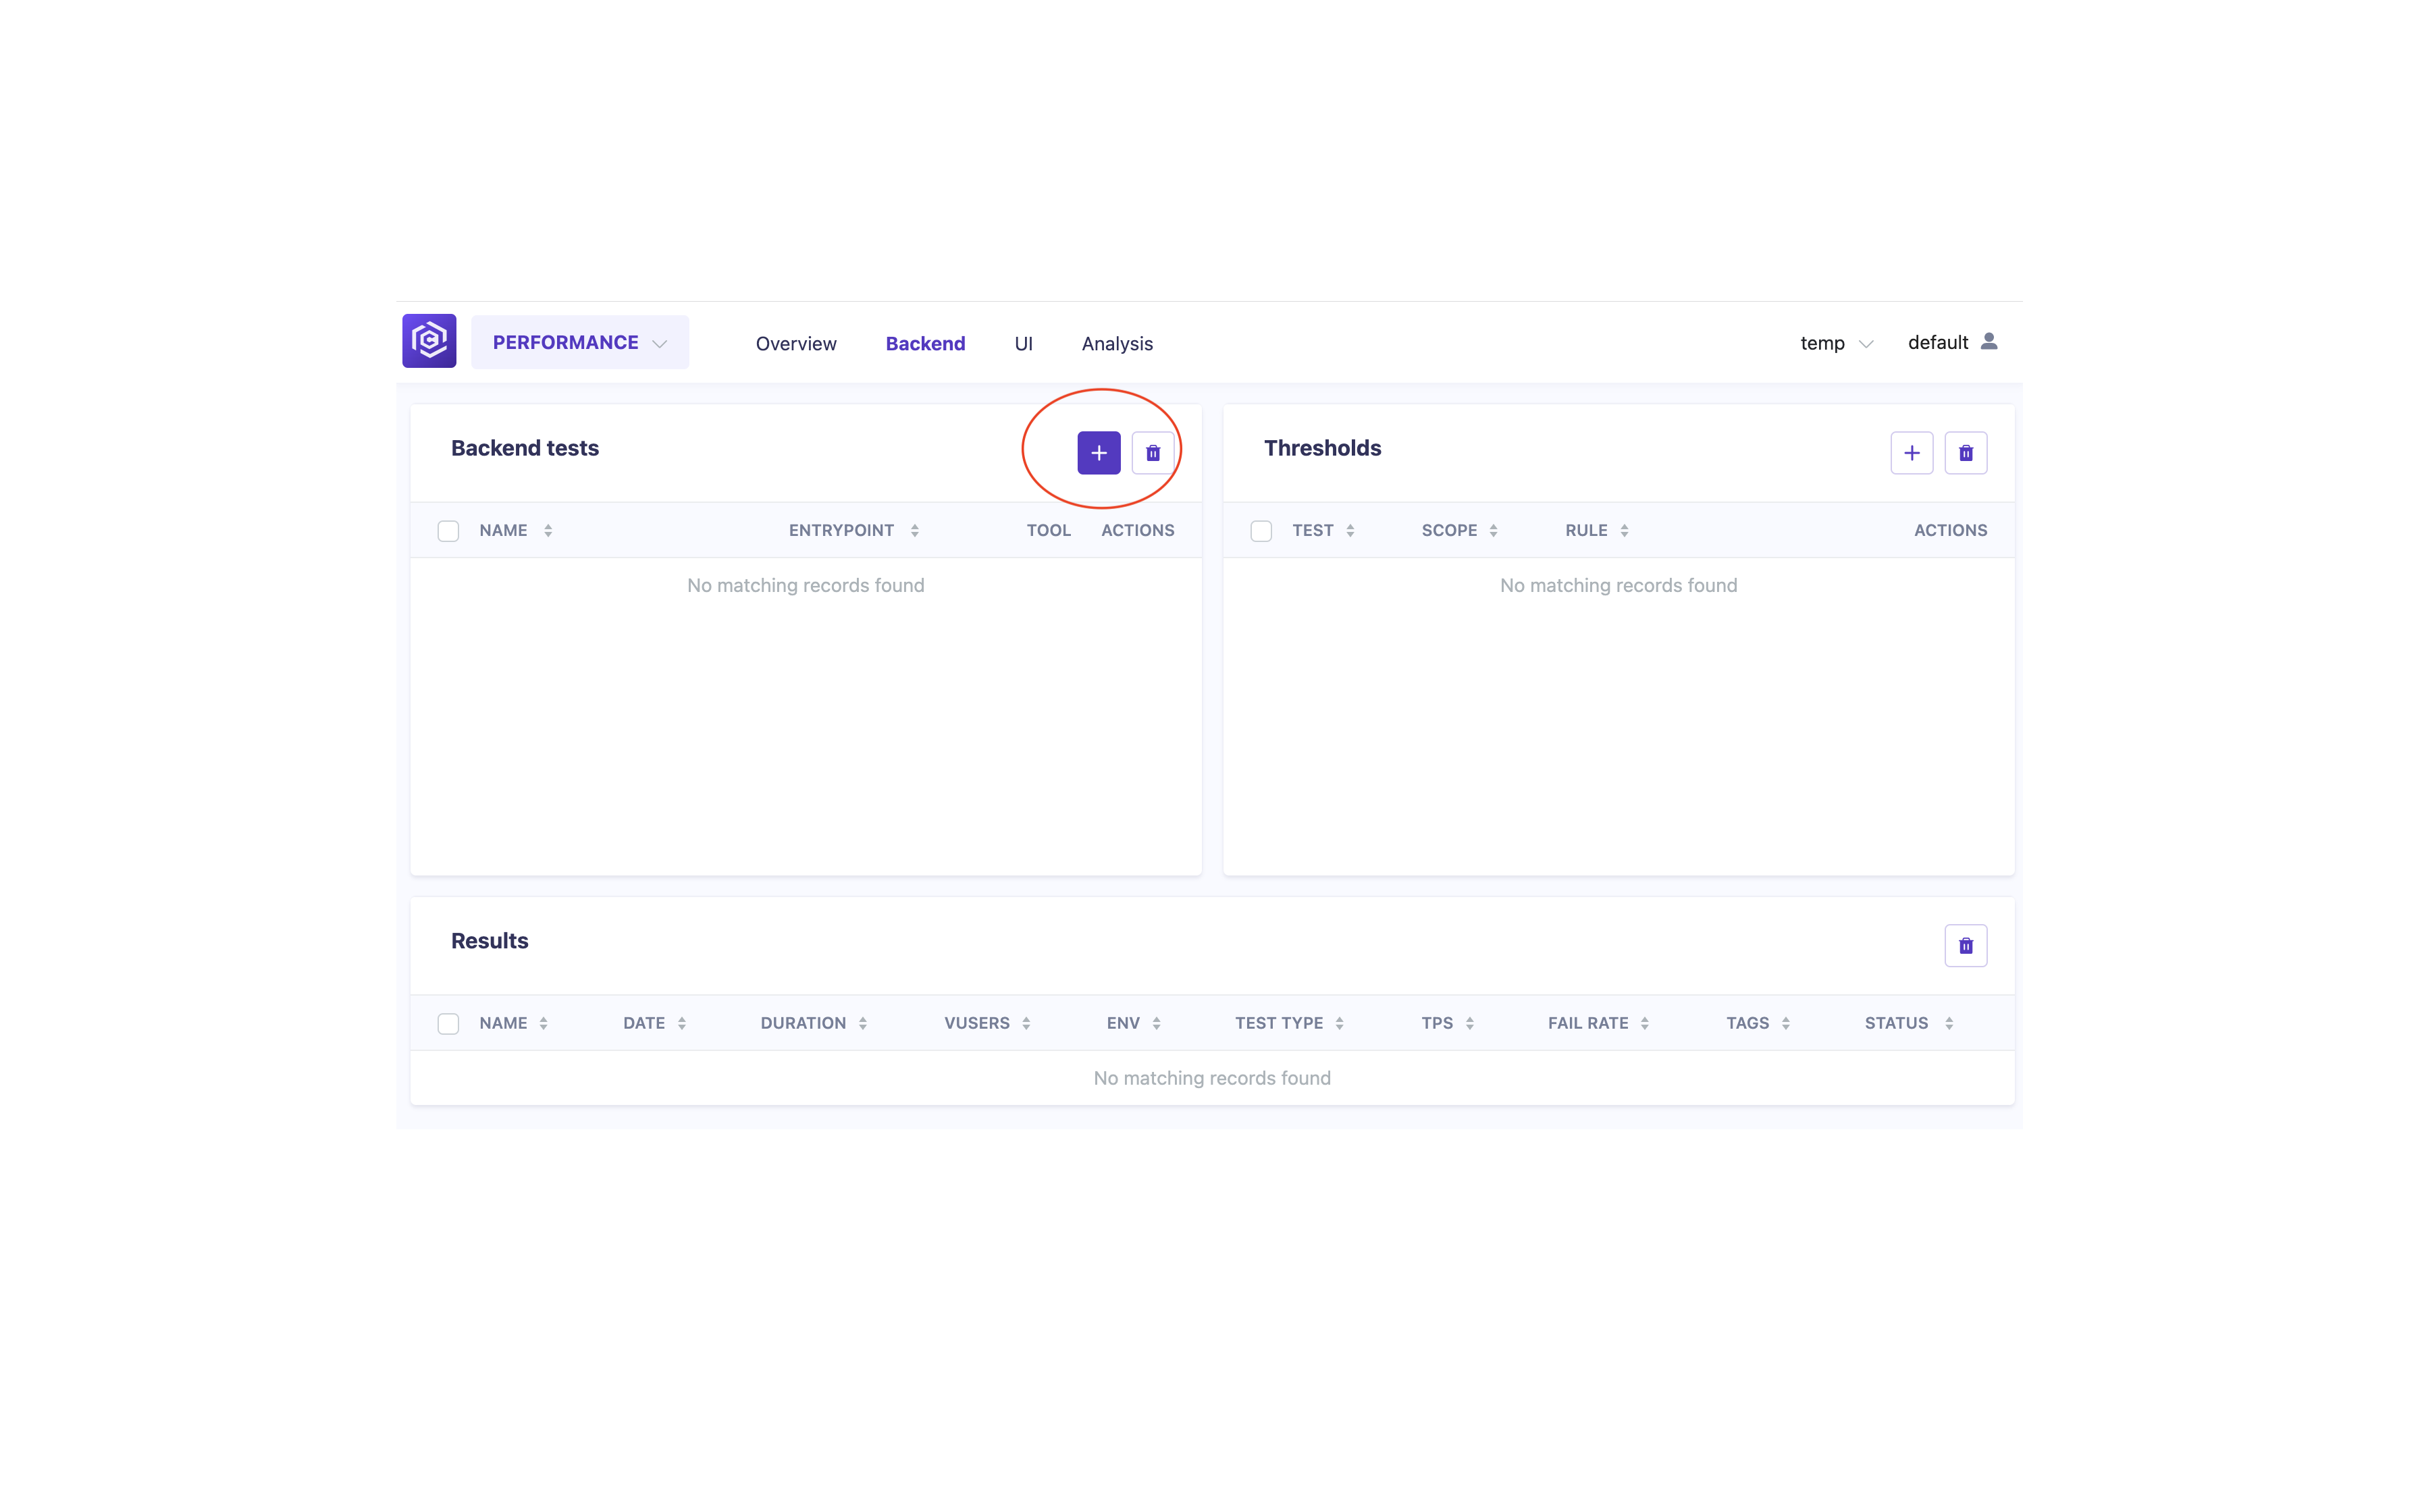
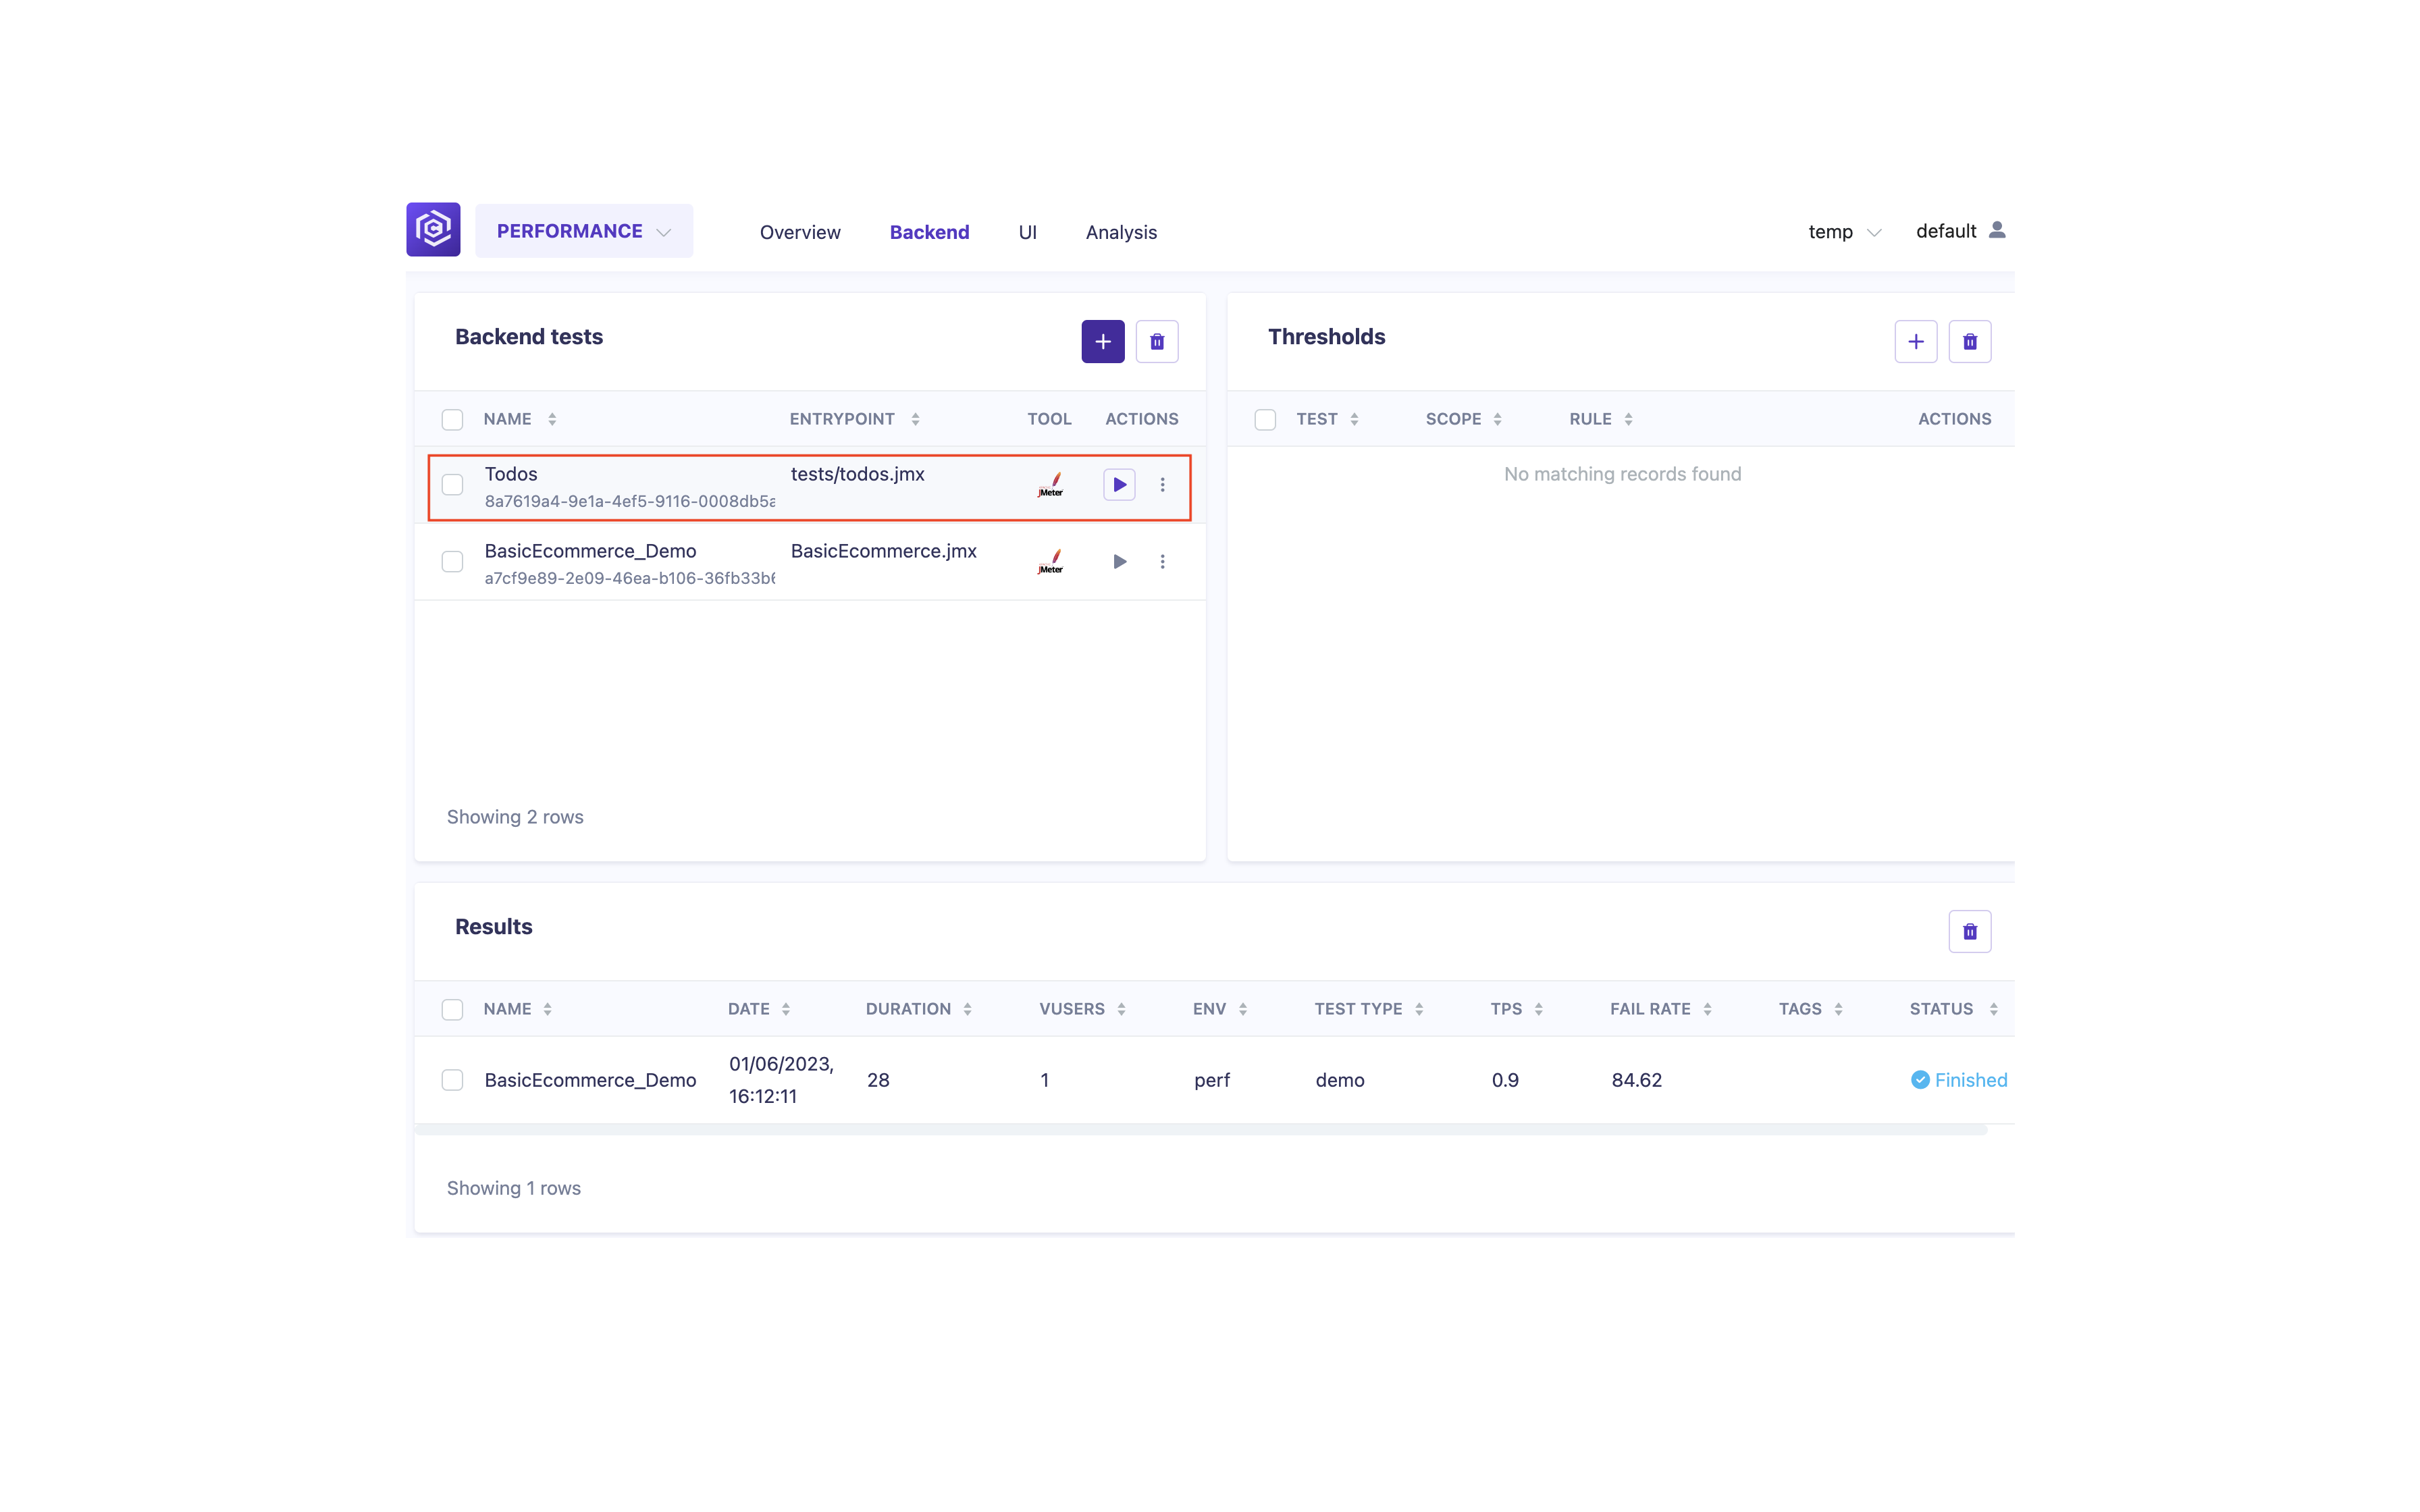
Step 4: Add a New Backend Test
- Click on the “Add Backend Test” button.
![Add Backend Test]()
- Fill in the required details for the Backend test, including the test name, description, and test type.
- Select the desired option to get Source code with test scripts. Options include
GIT,ARTIFACT(upload archive), andLOCAL(path to test scripts on Carrier host). - For the
GIToption, provide the credentials to the repository with test scripts if required. - Specify the entrypoint, which is the path to the test script to run.
![Configure Backend Test]()
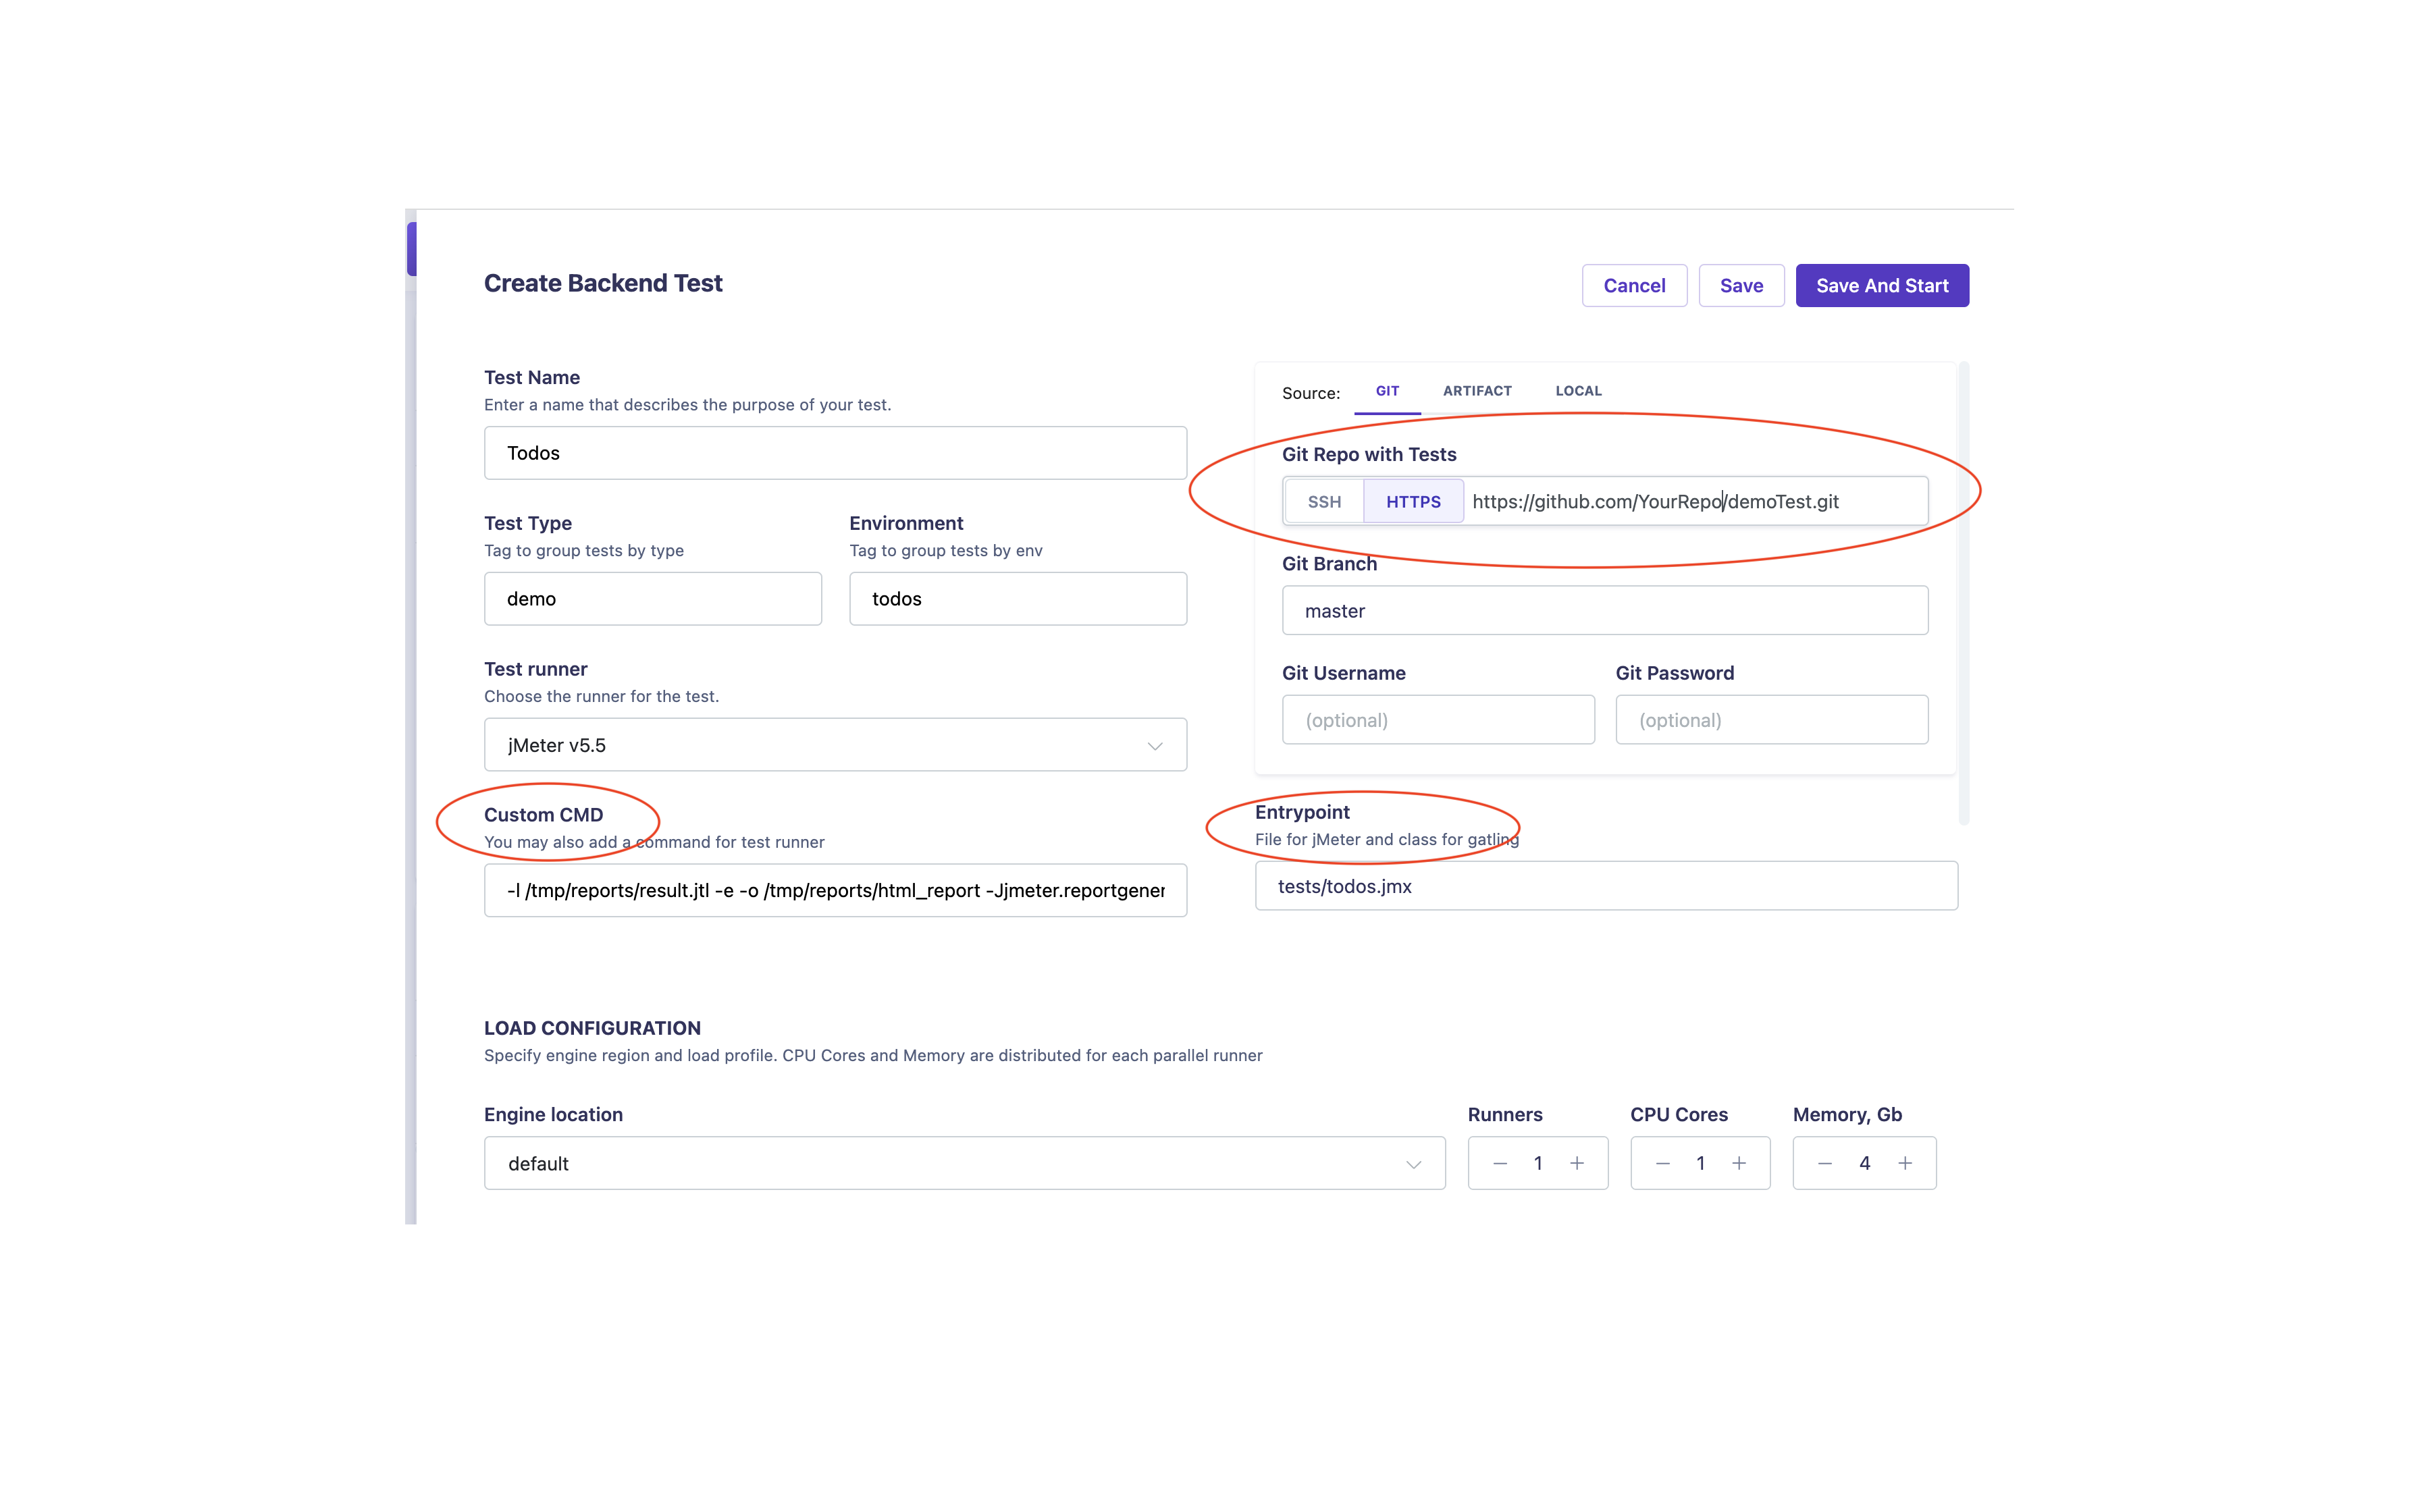
It is recommended to use Git integration to automatically update scripts.
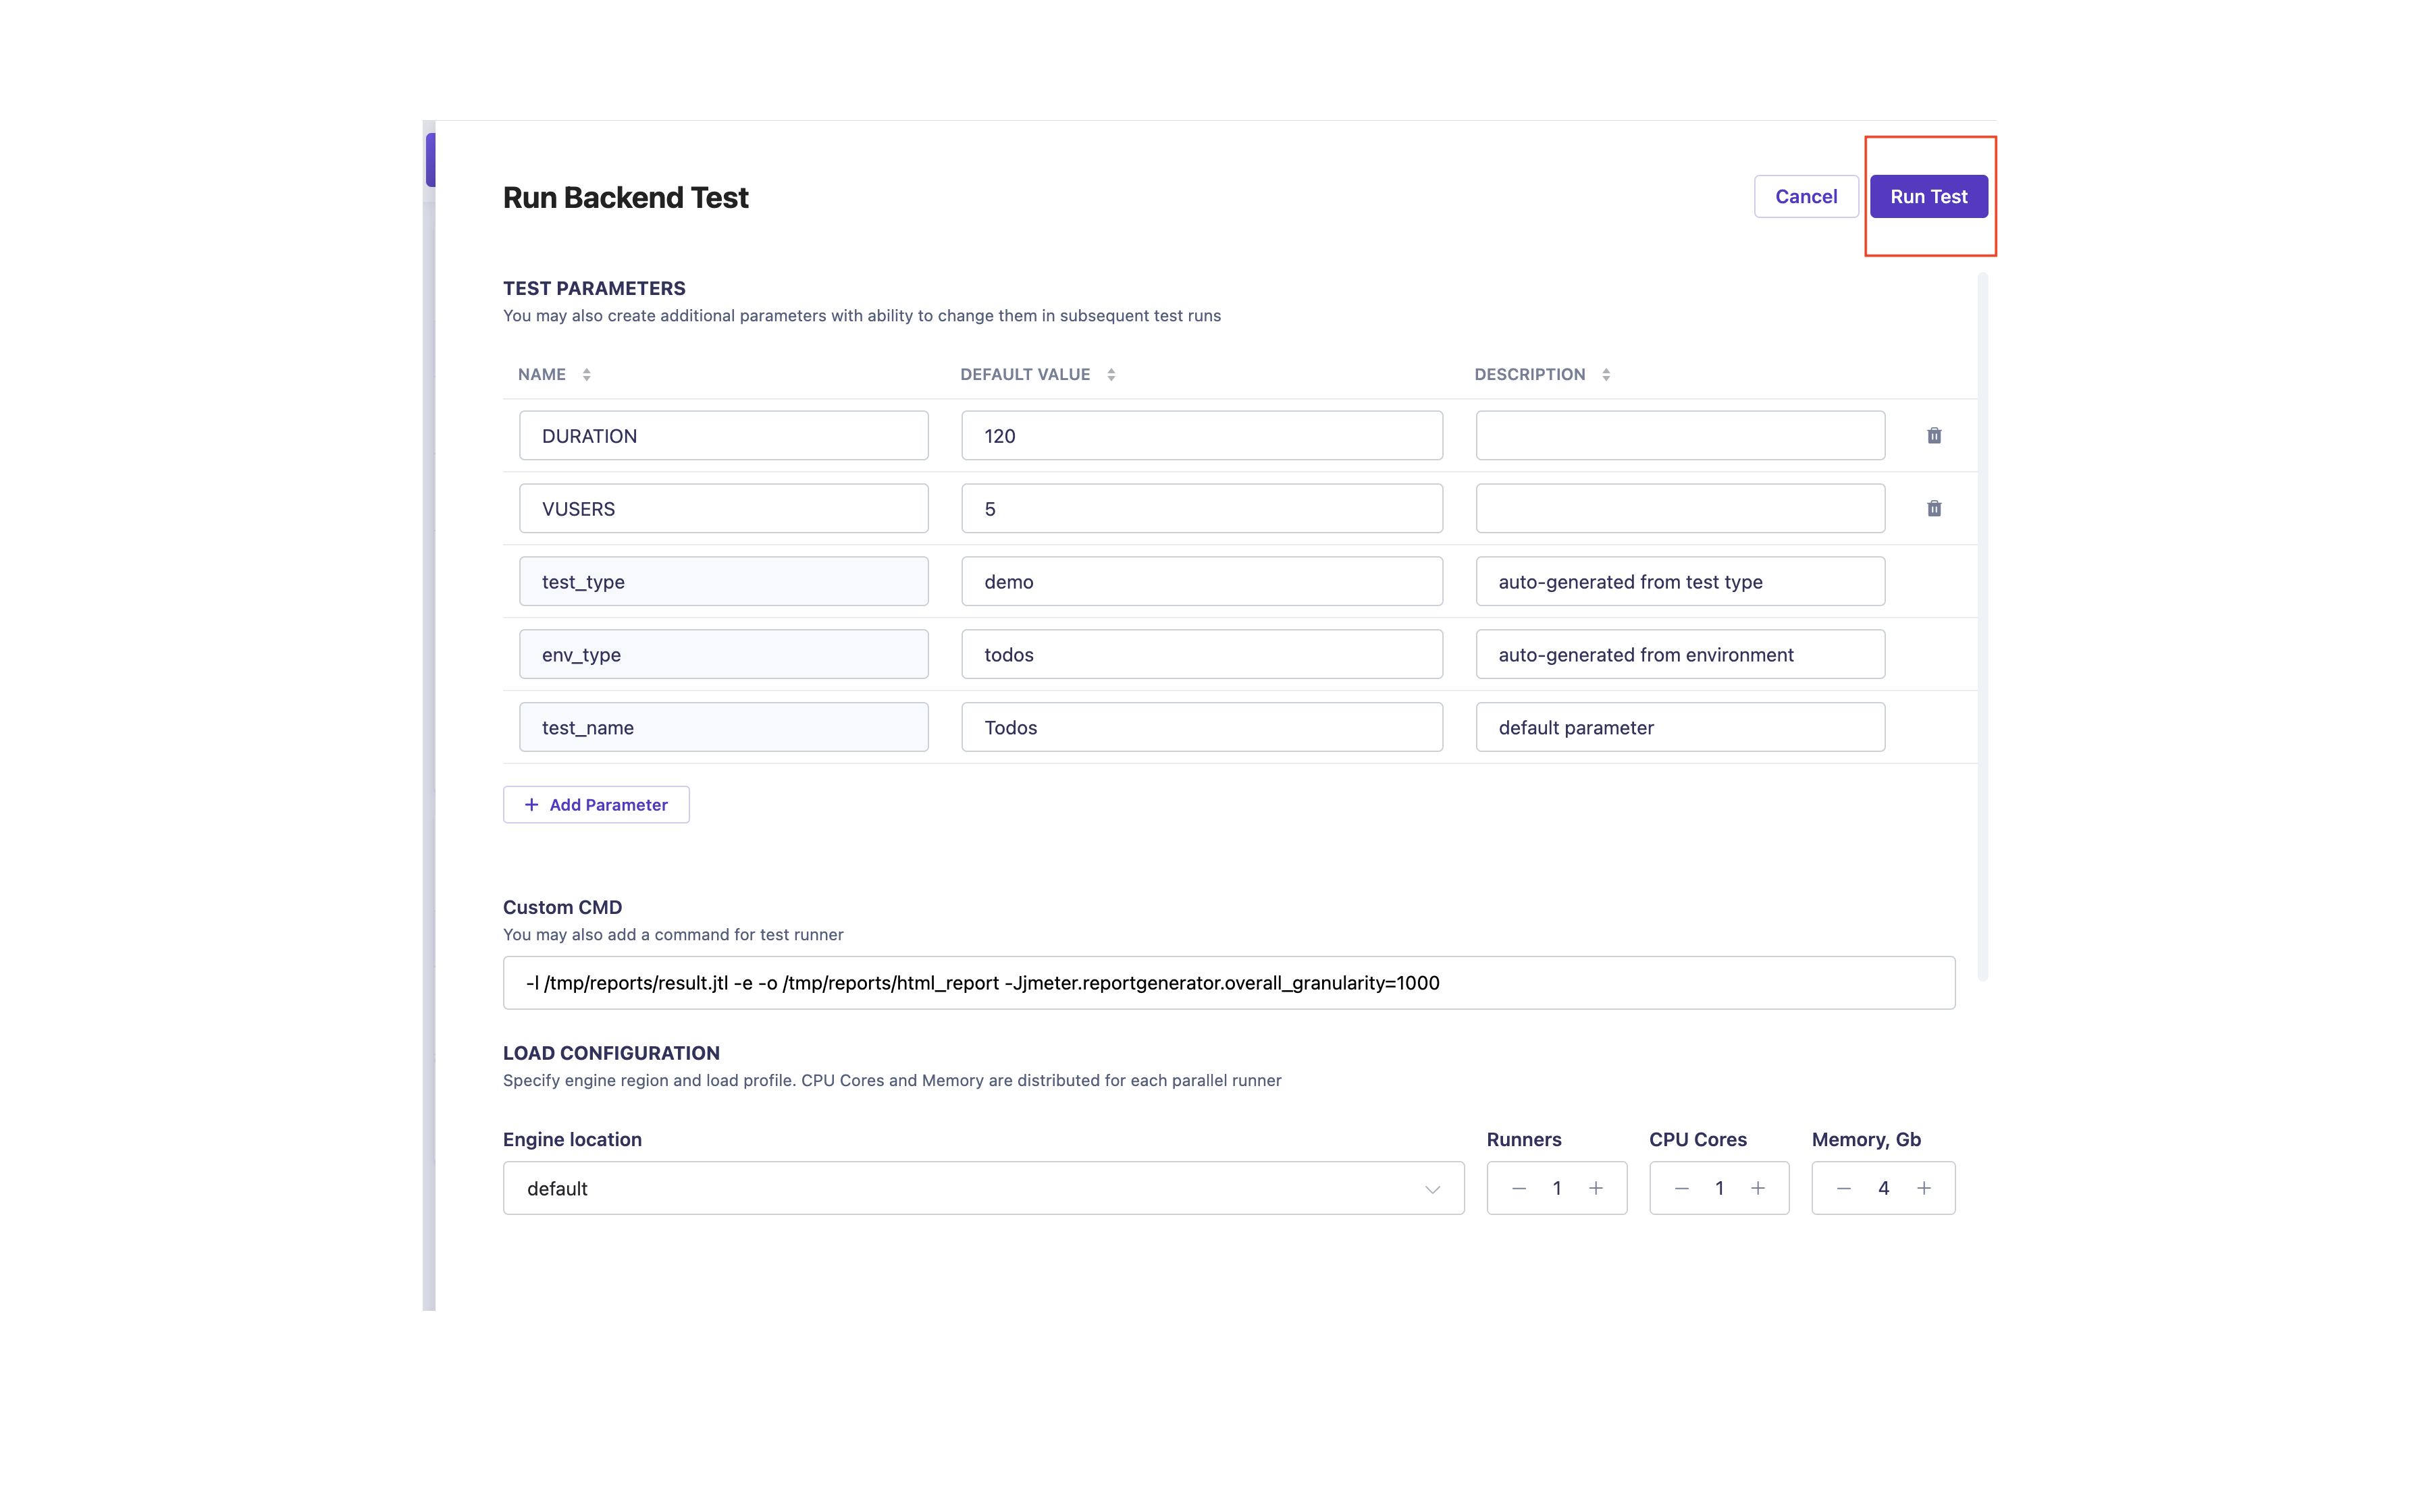
Step 5: Configure Backend Test Parameters
In the Backend test configuration page, set various parameters for your test:
- Test Name: Enter the name of the Backend test. The test name should describe its purpose.
- Test Type: Specify the type to group similar tests.
- Test Environment: Specify the environment name to group related tests.
- Test Runner: Select the tool to use for load generation, such as JMeter or Gatling.
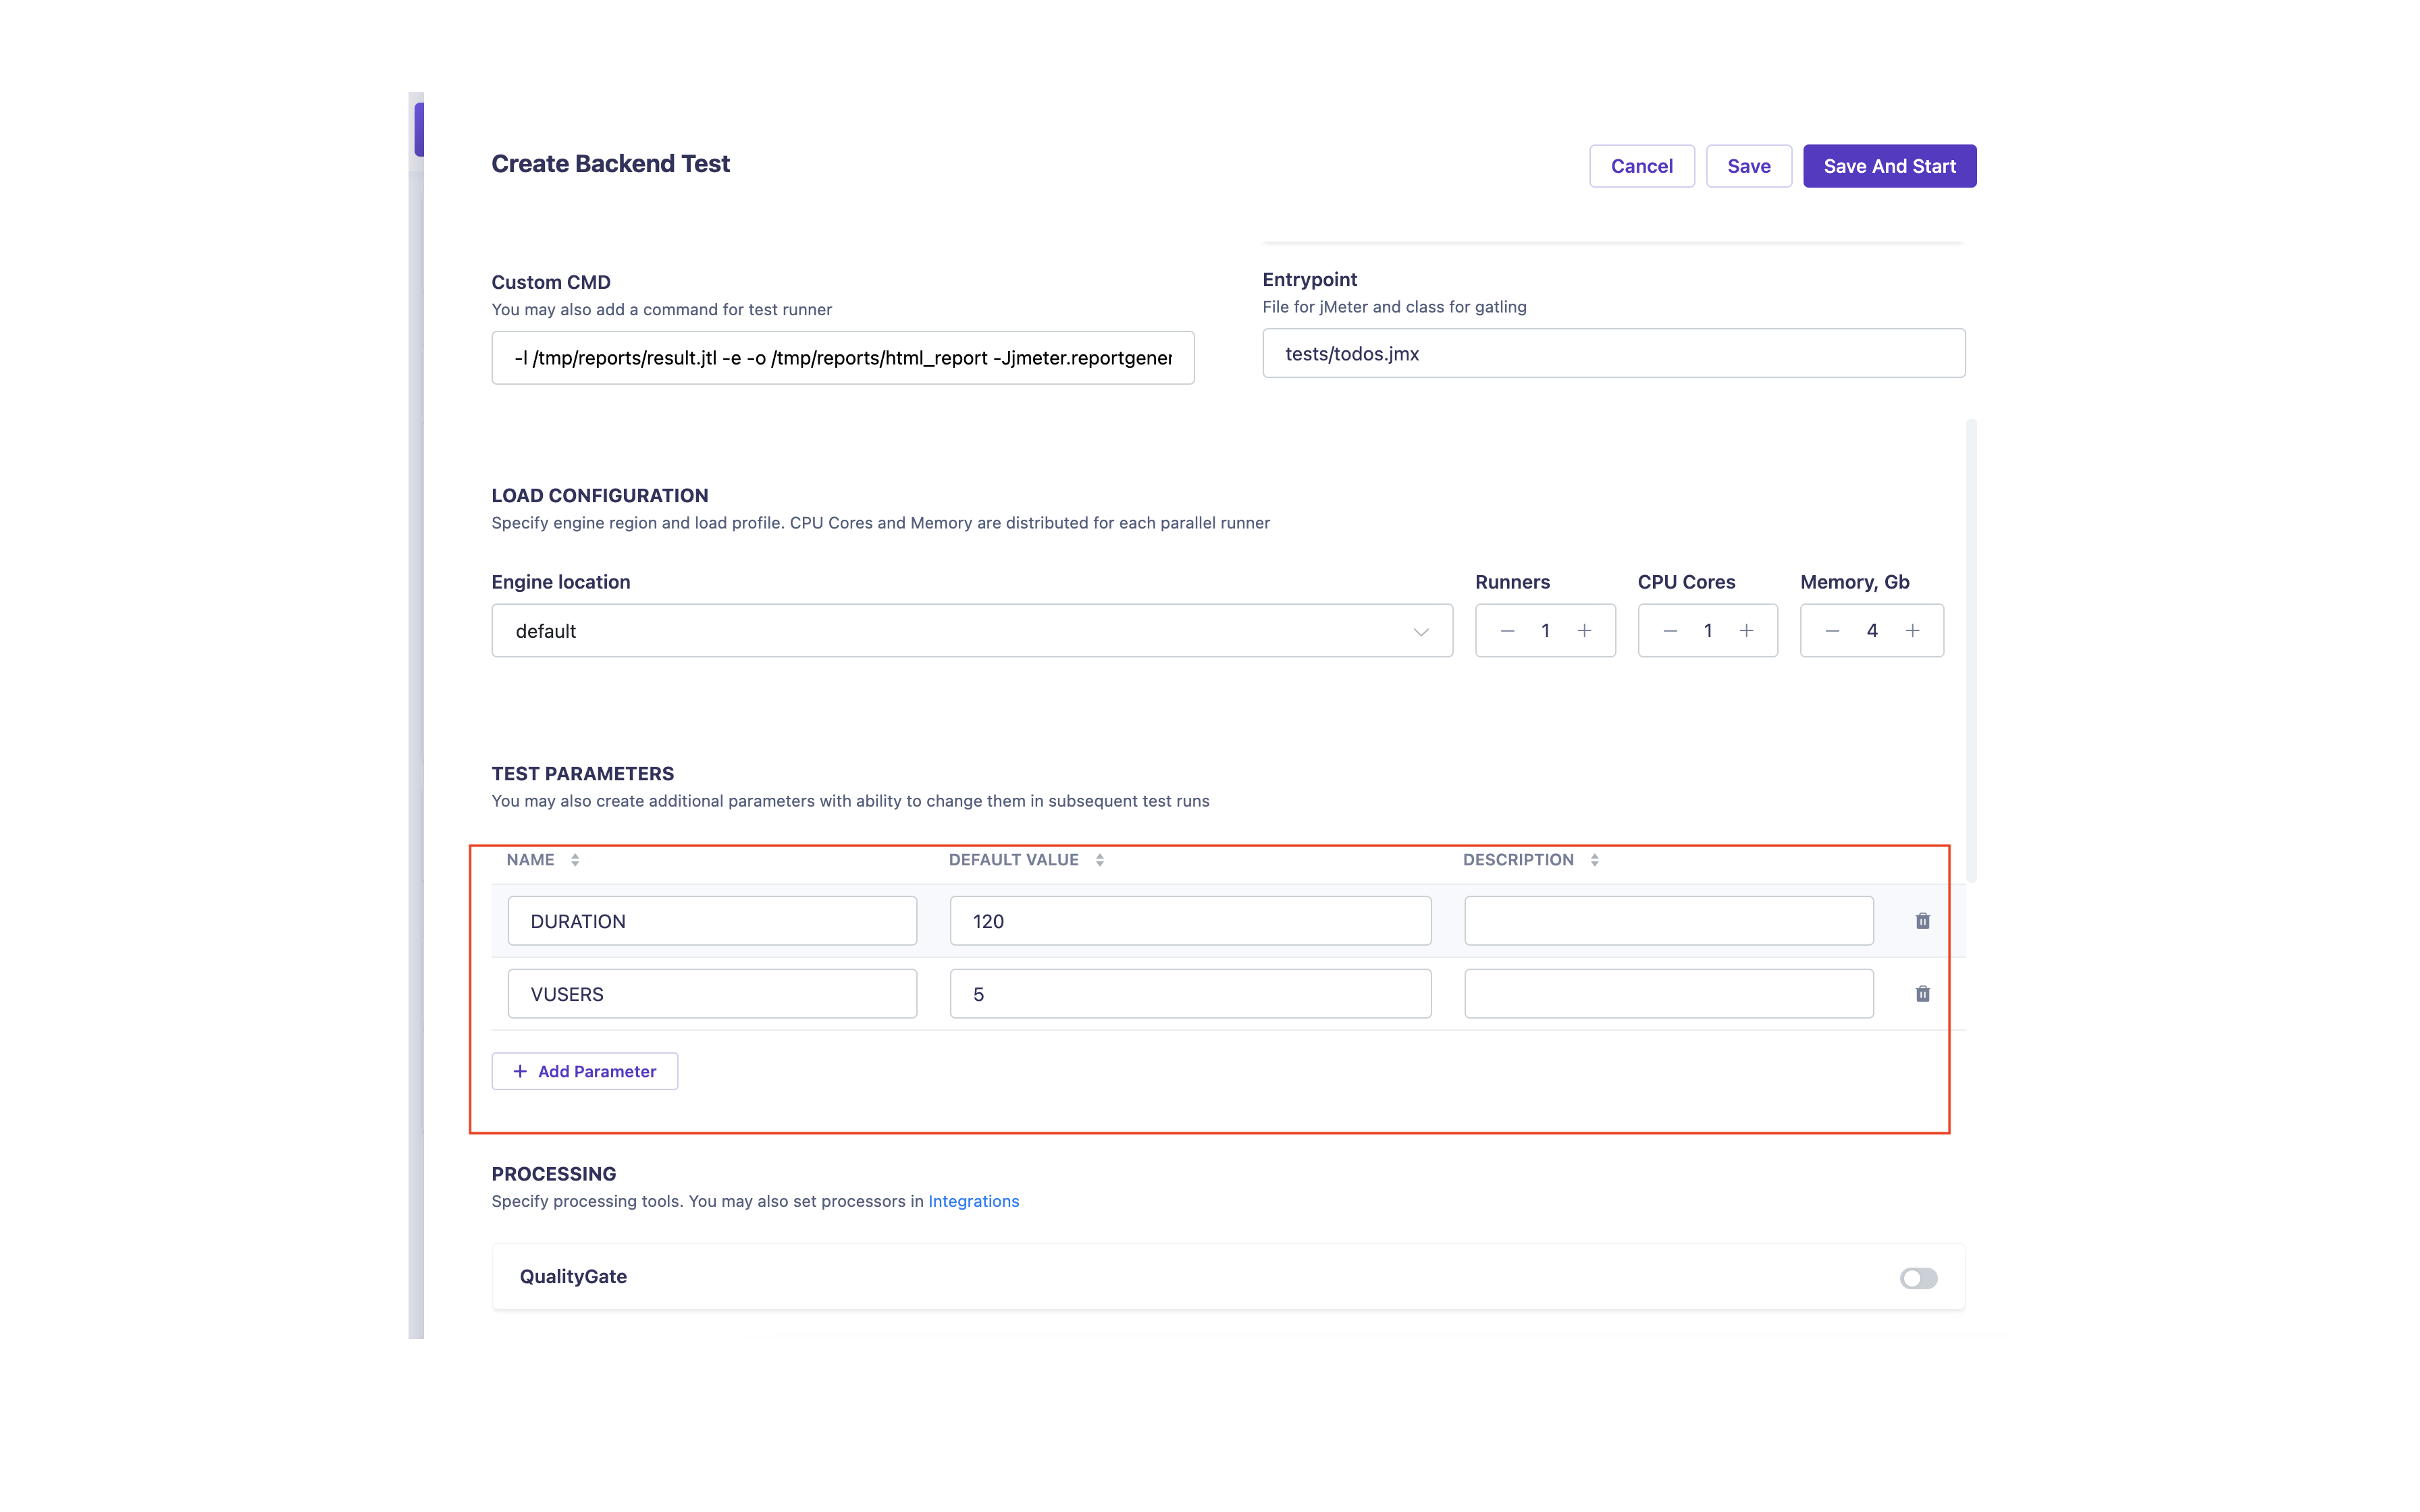
- Custom CMD: Configure additional parameters for the test run if required. For example, JMeter script (-J variables) or Gatling simulation (-D variables).
- Load Configuration: Specify the engine region and load profile. By default, the test will run on the Carrier host. CPU cores and memory are distributed for each parallel runner.
- Test Parameters: Create additional parameters that can be changed in subsequent test runs. For example, the number of virtual users, duration, and ramp-up period.
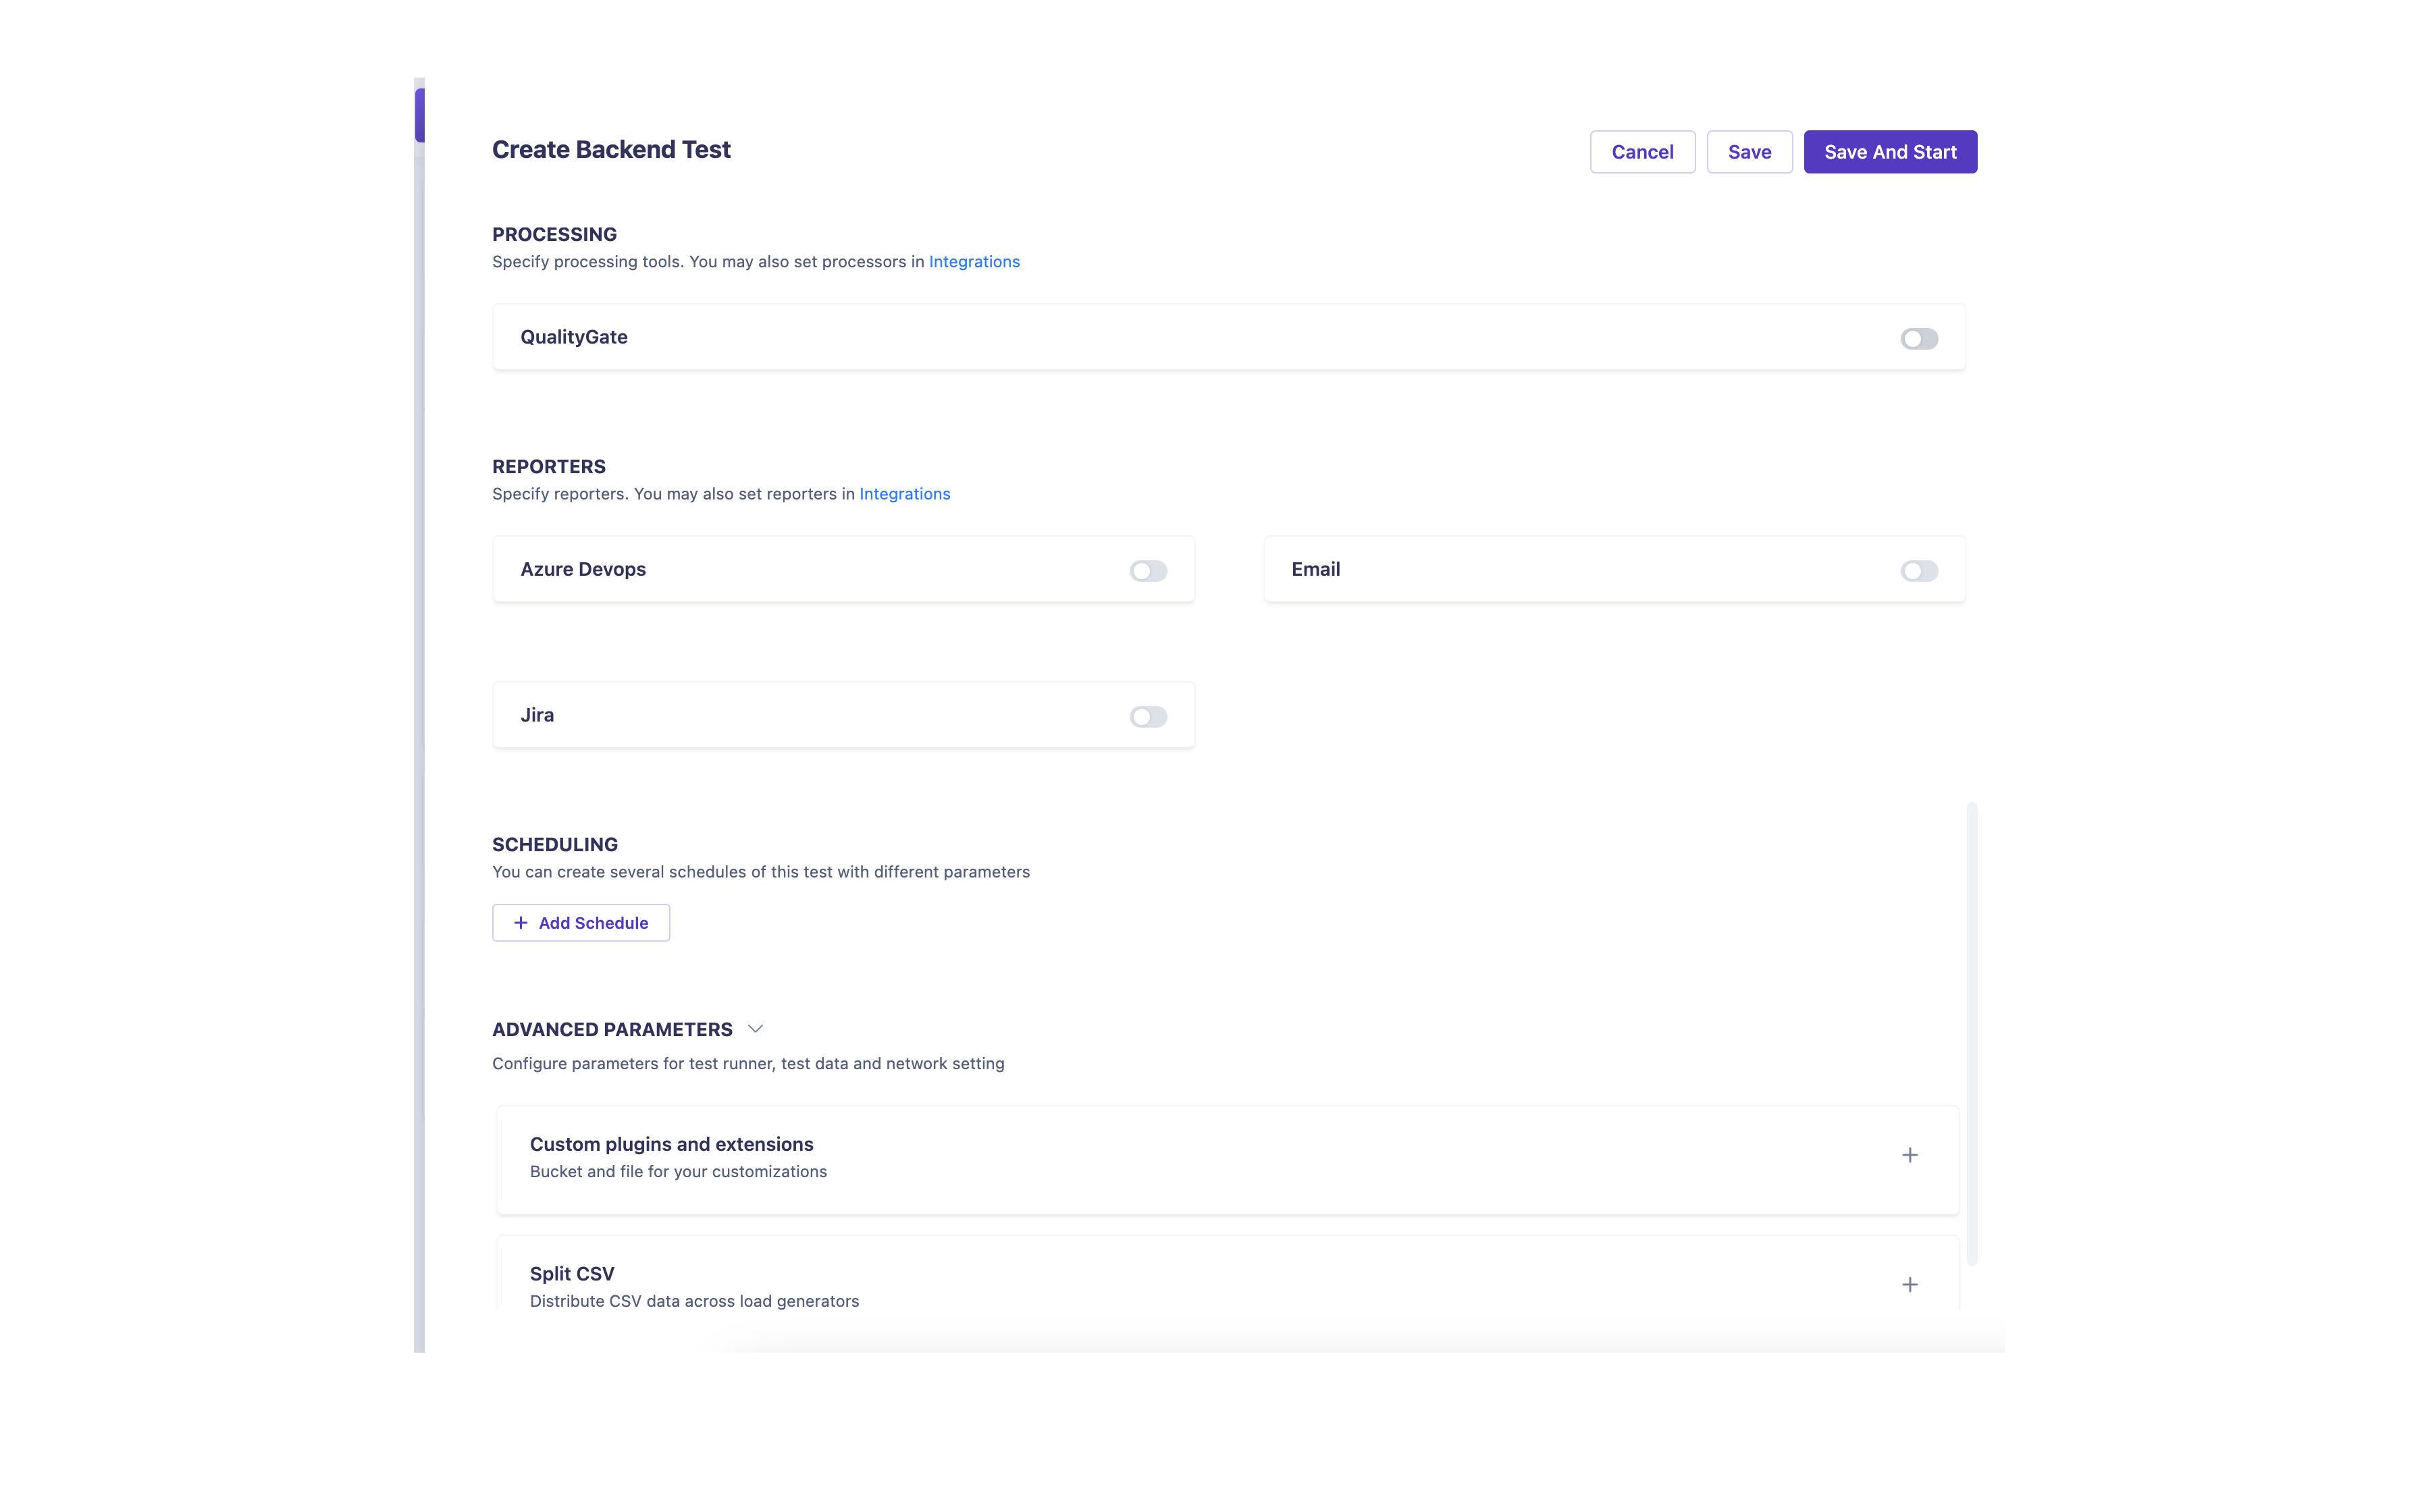
- Integrations: Configure integrations to compare test results with SLAs using
QualityGate. - Reporters: Specify the reporters for test results. You can also set reporters in the Integrations section.
- Scheduling: Create schedules for the test with different parameters.
- Advanced Parameters: Configure additional parameters for the test runner, test data, and network settings.
It is recommended to define Test Execution Parameters and update test scripts to use them.
![Backend Test Parameters]()
Adjust these parameters based on your specific test scenario and system under test requirements.
![Menu Configuration Backend]()
Step 6: Save and Run the Backend Test
- After configuring all the necessary parameters and settings for the Backend test, click the “Save” button to save your changes.
![Saved Backend Test]()
- To run the test, click the “Run” button.
![Run Backend Test]()
You can also schedule the test to run at specific intervals or on a recurring basis using the scheduling options provided in the Carrier web interface.
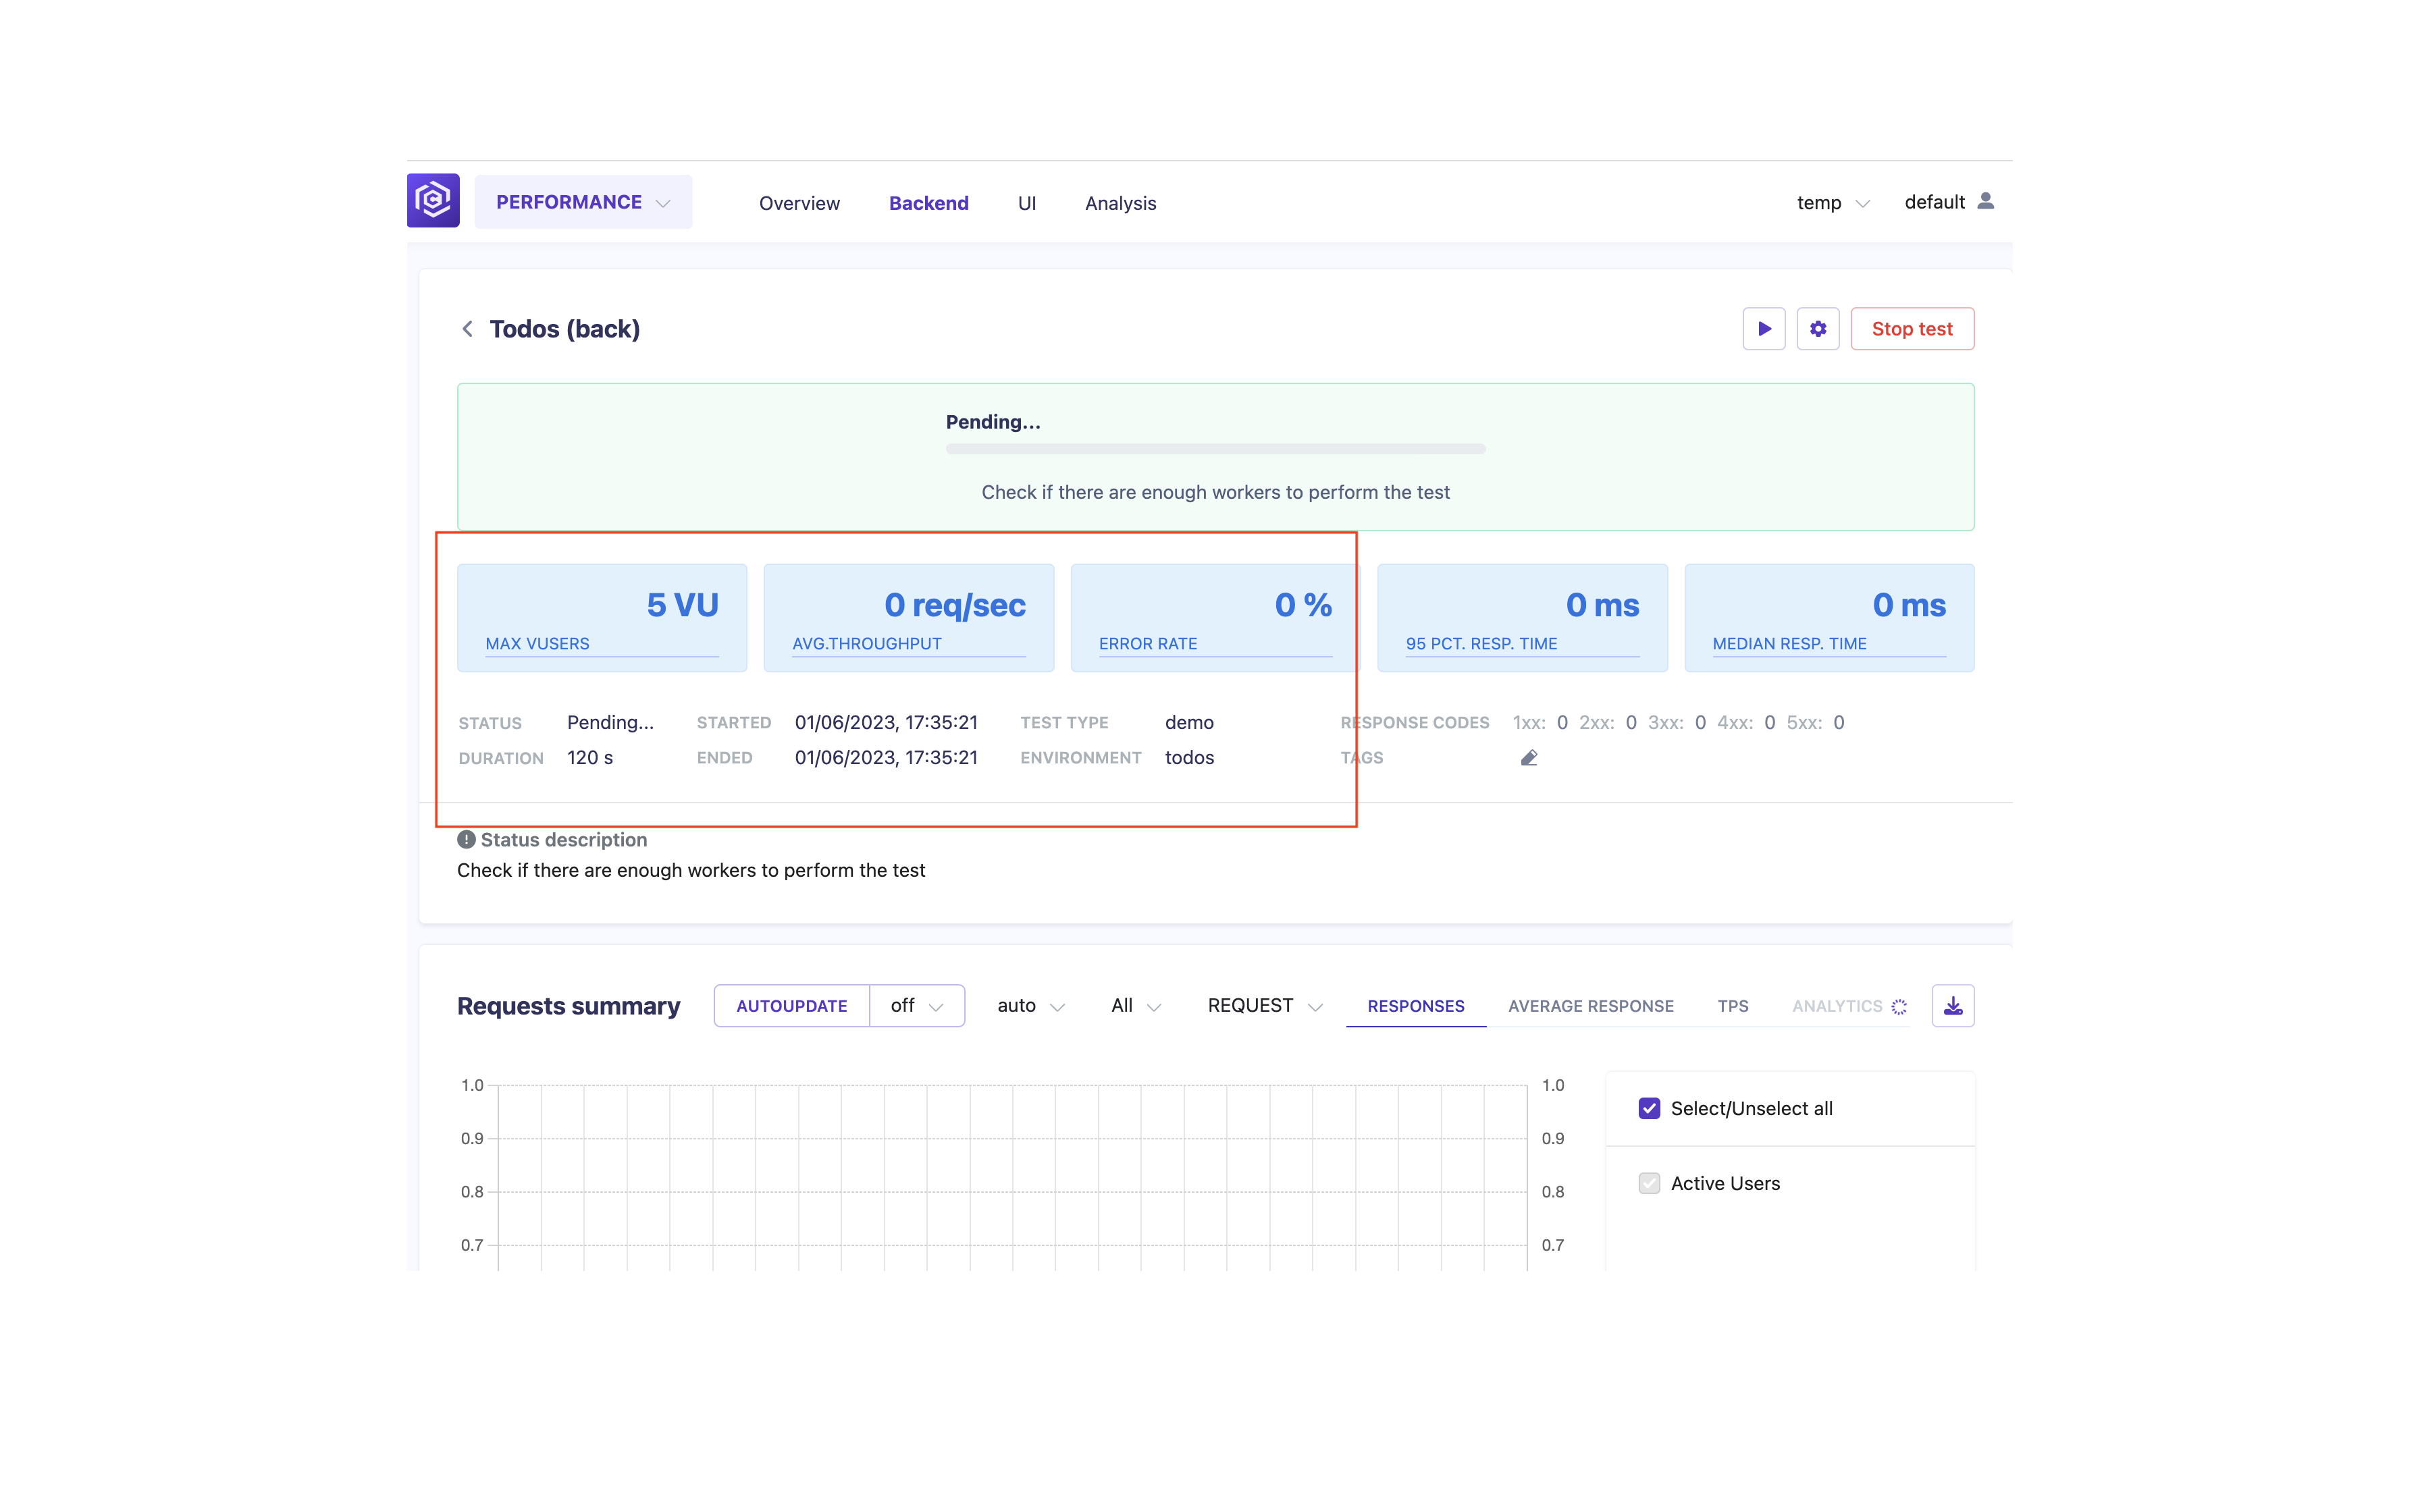
Step 7: Monitor Test Execution and Results
- Once the Backend test is running, you can monitor its execution and view the results.
- In the Carrier web interface, navigate to the “Performance” tab to access the test run details and performance metrics.
![Monitor Backend Test]()
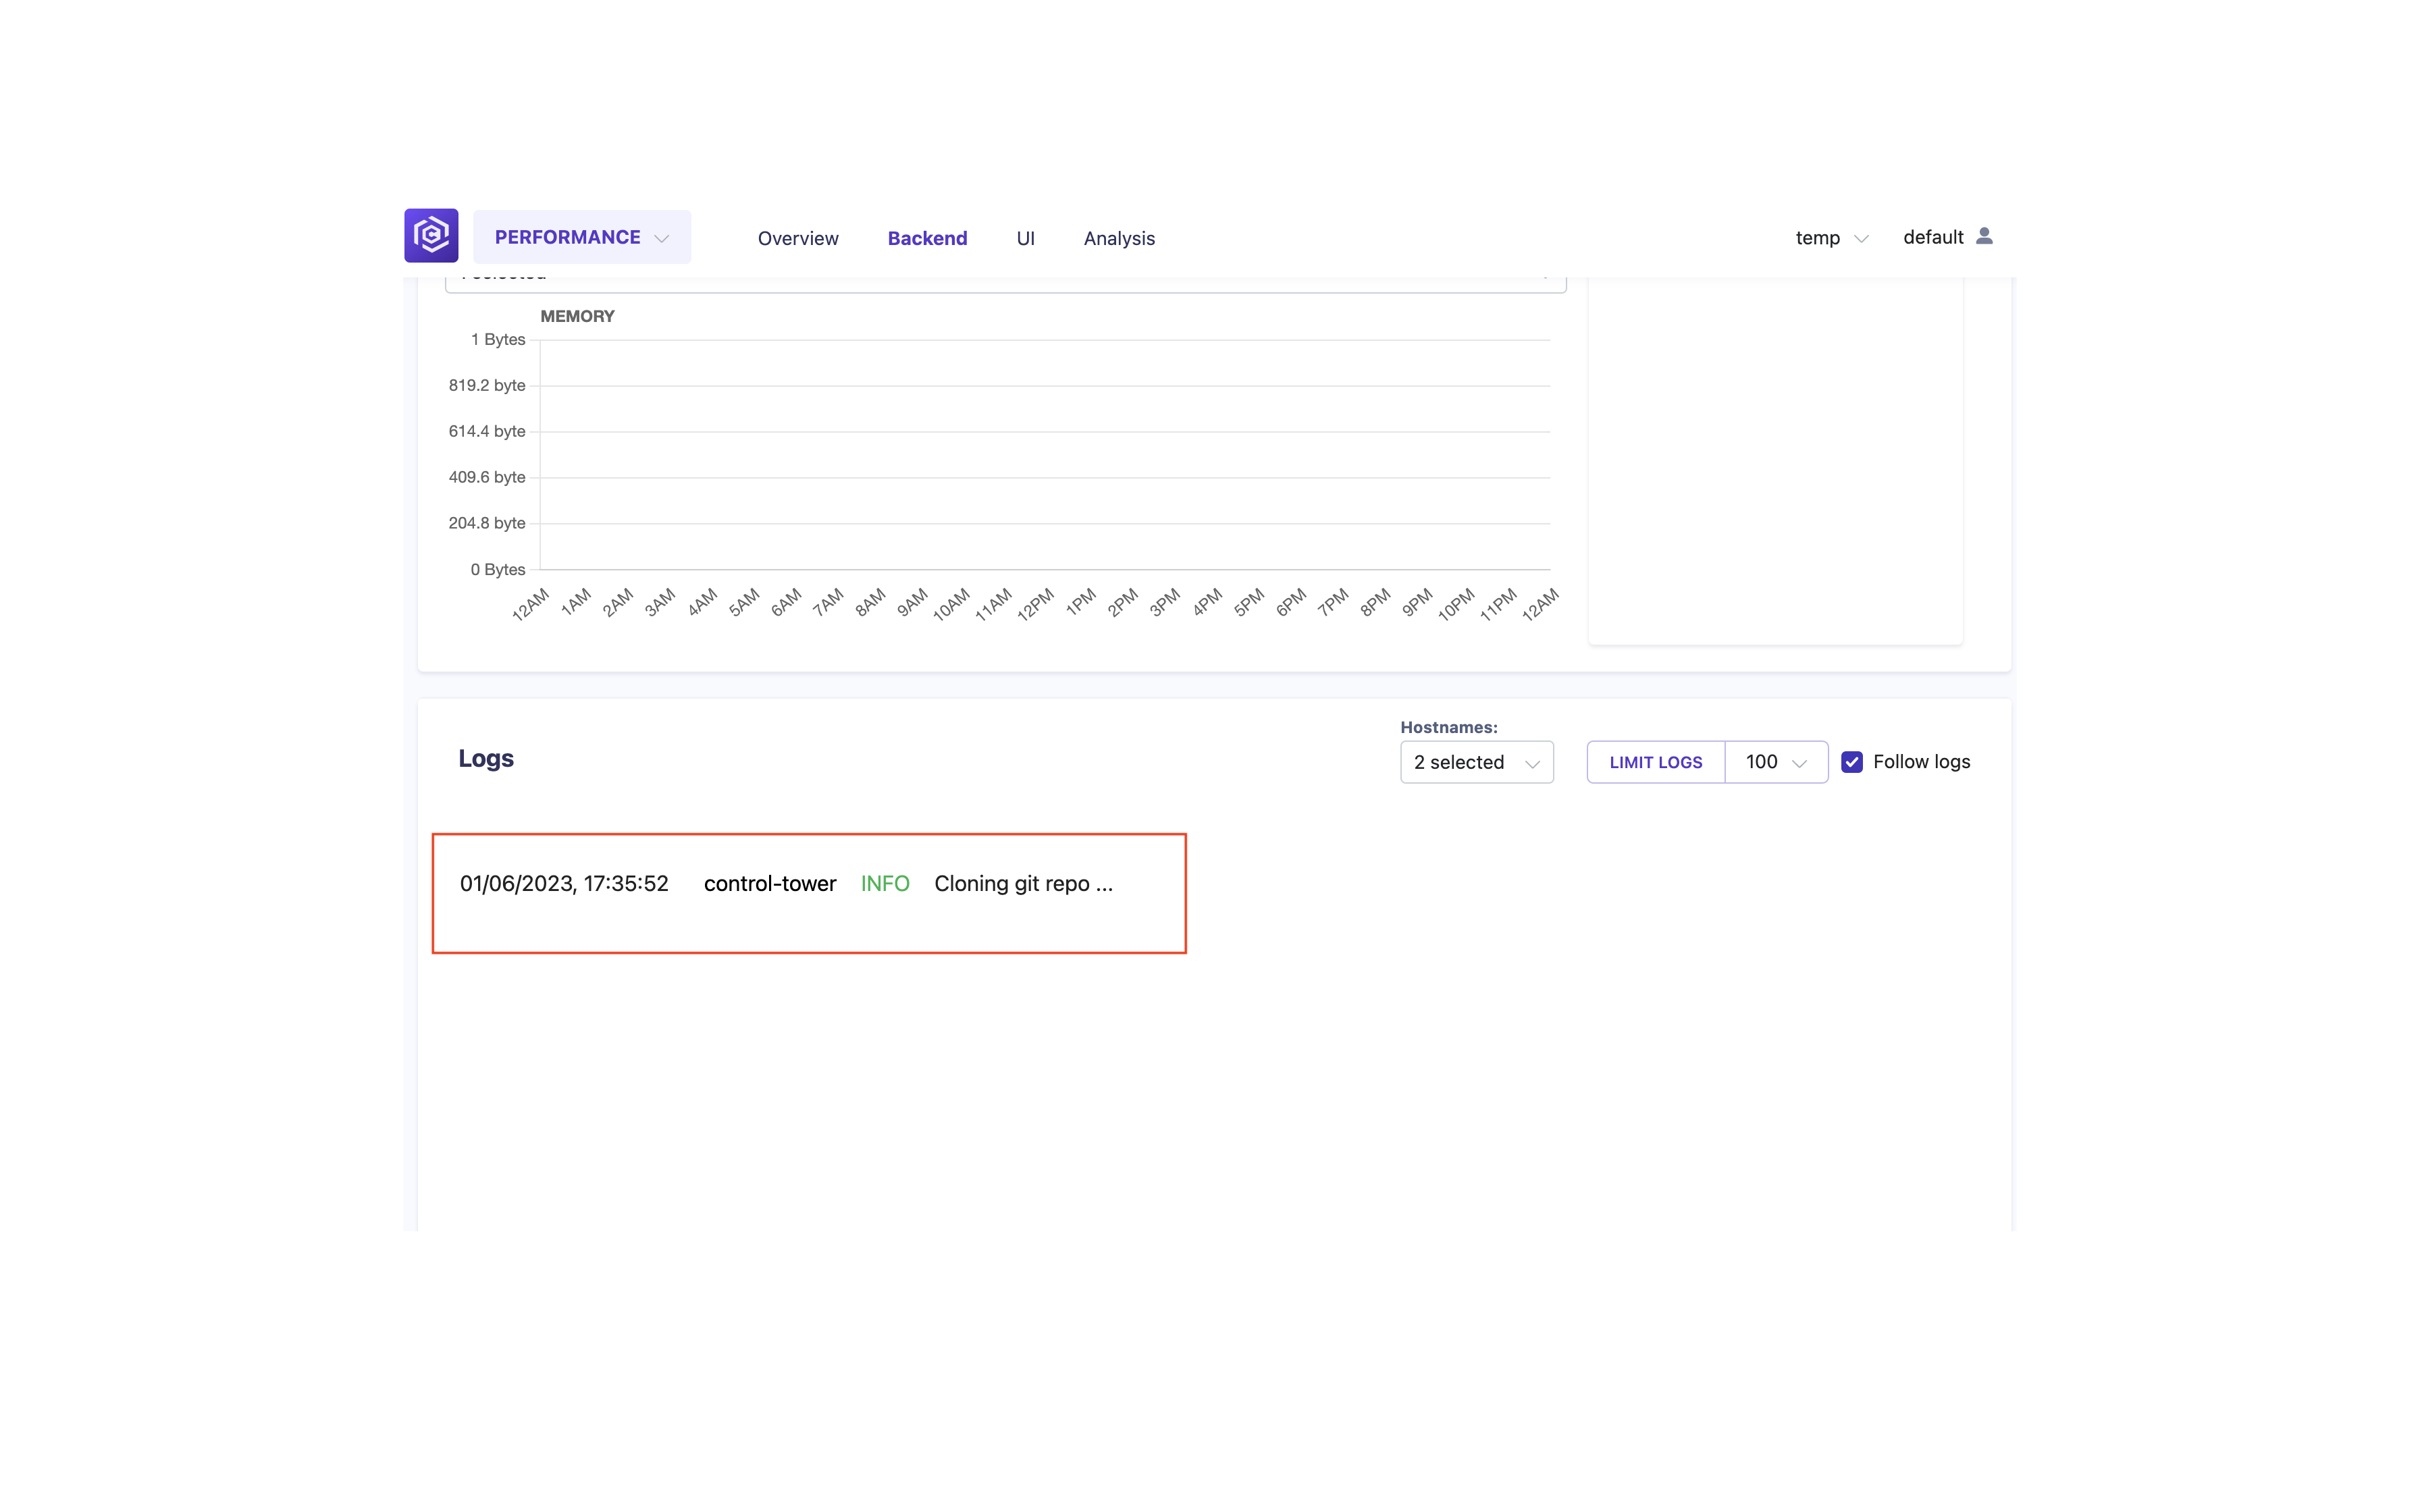
- The test progress and logs can be found at the bottom of the page.
![Backend Test Progress and Logs]()
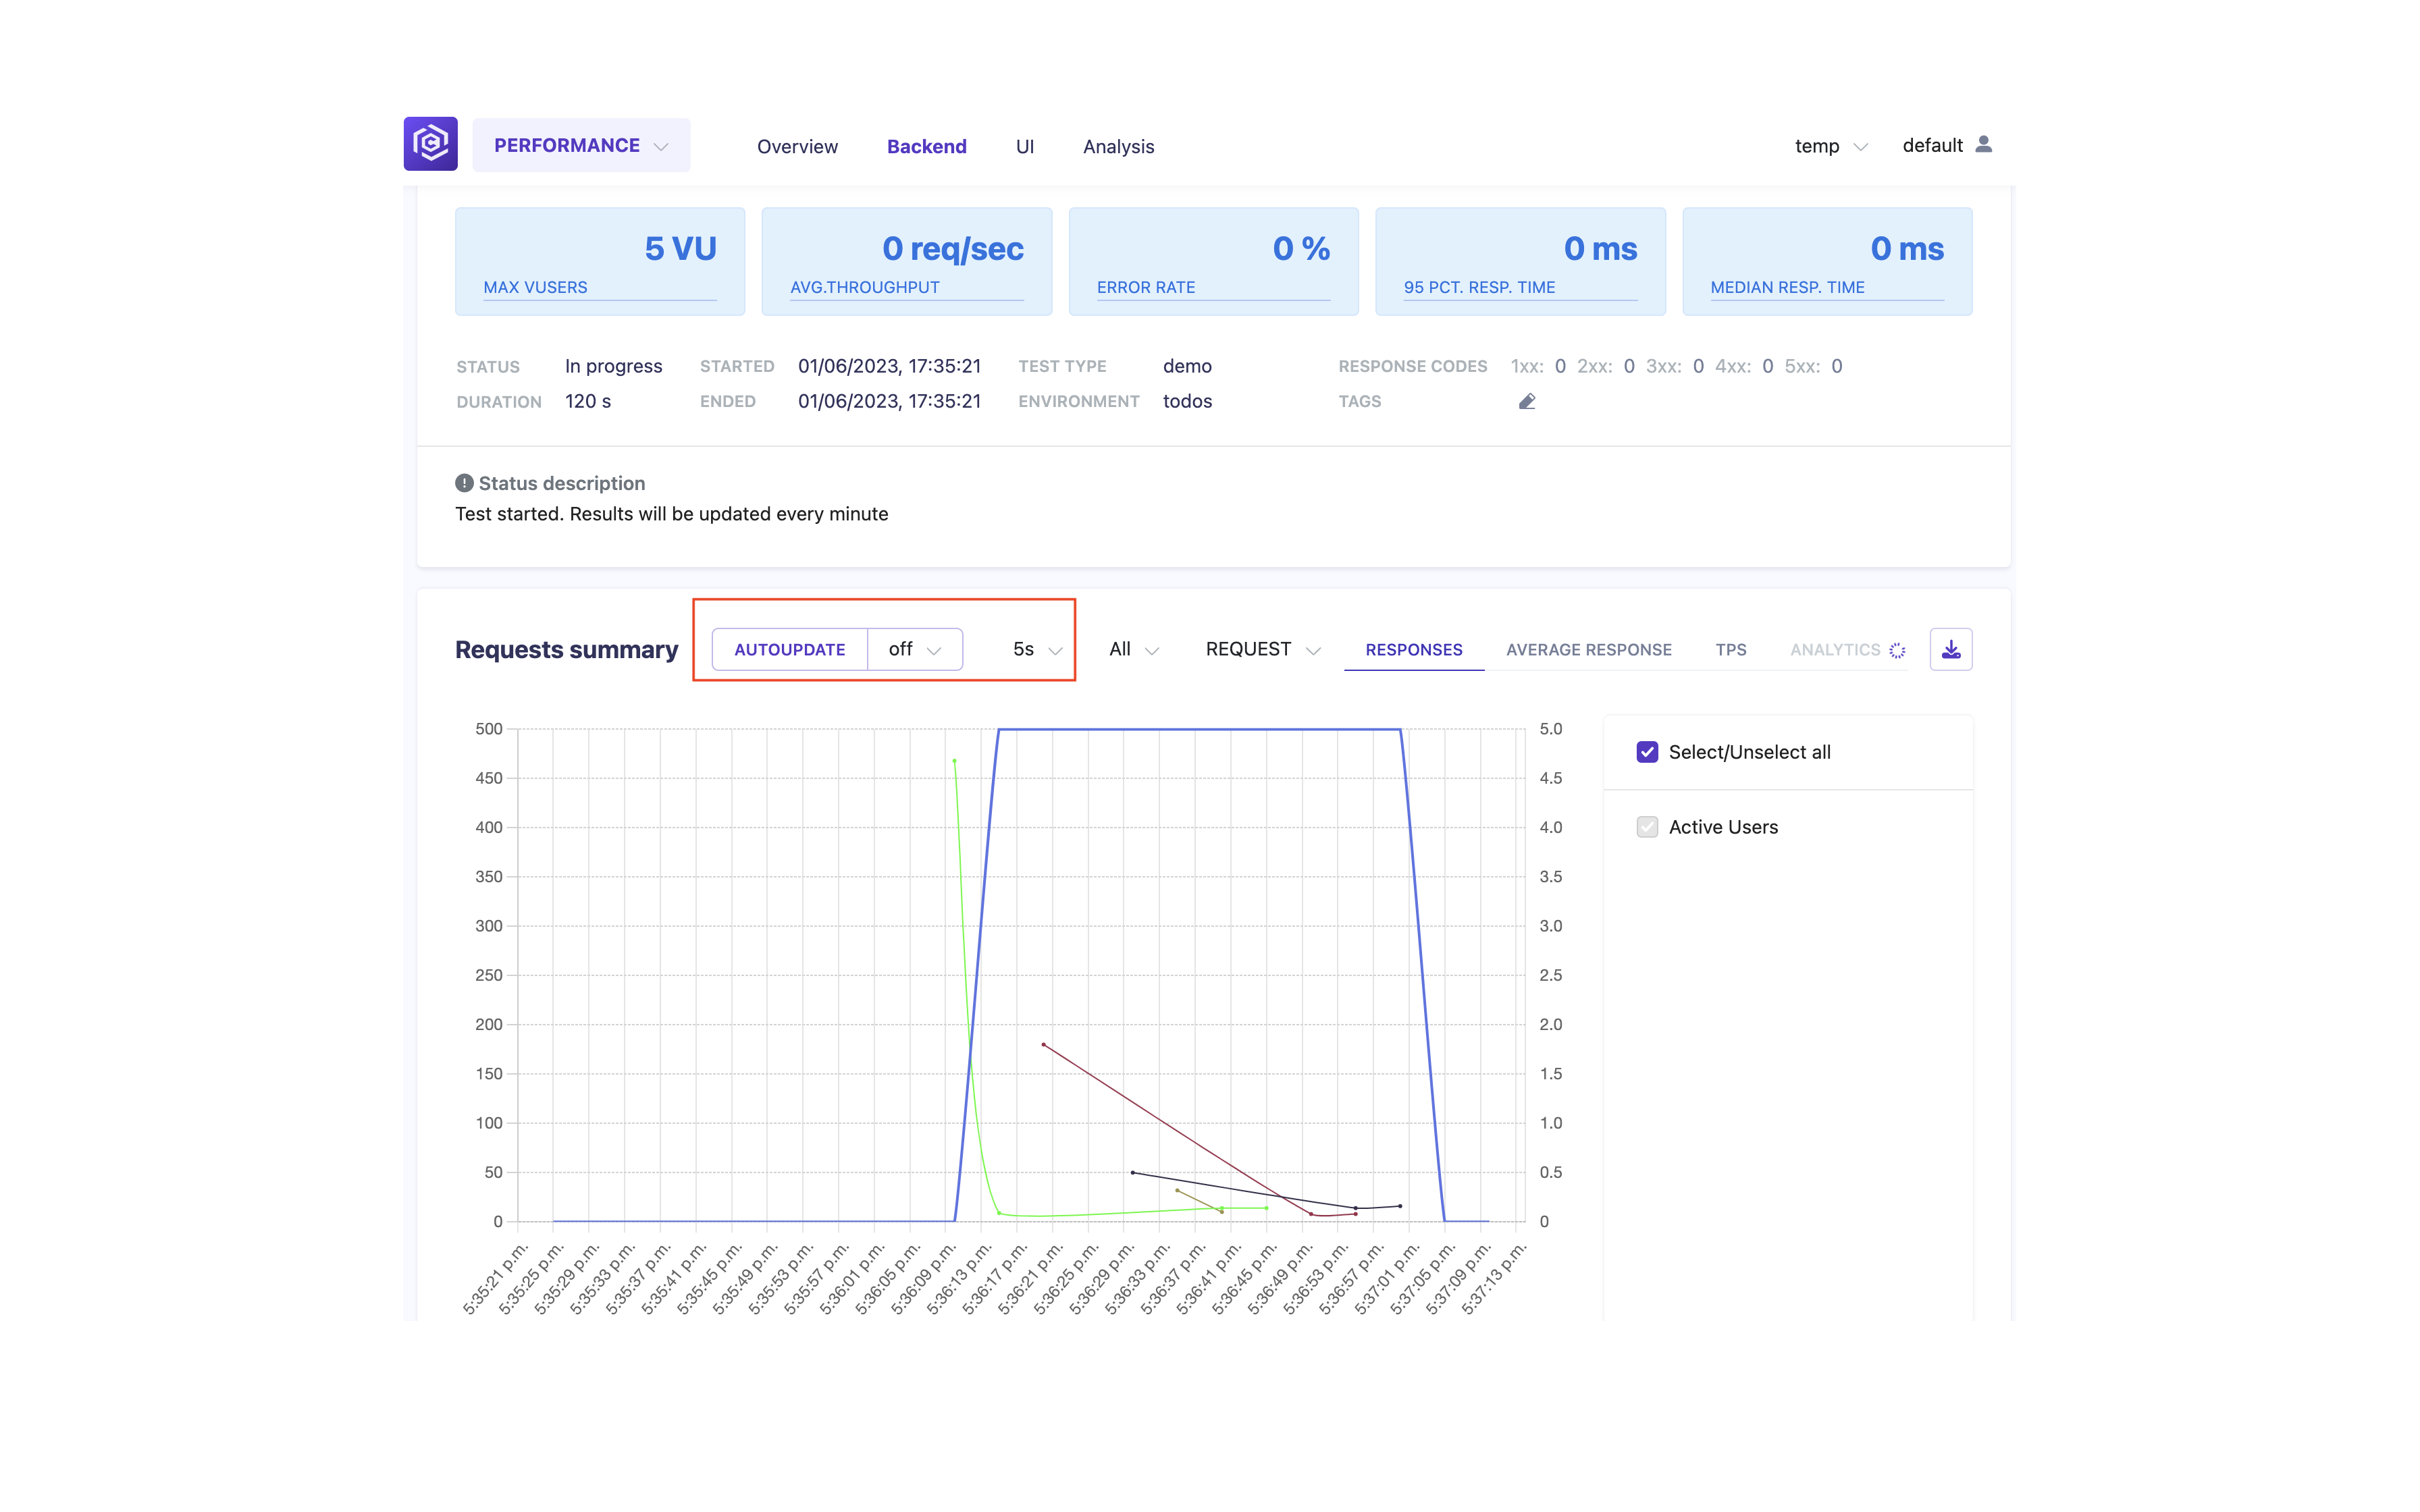
- You can set the “autoupdate” and results aggregation time.
![Set Autoupdate and Aggregation Time]()
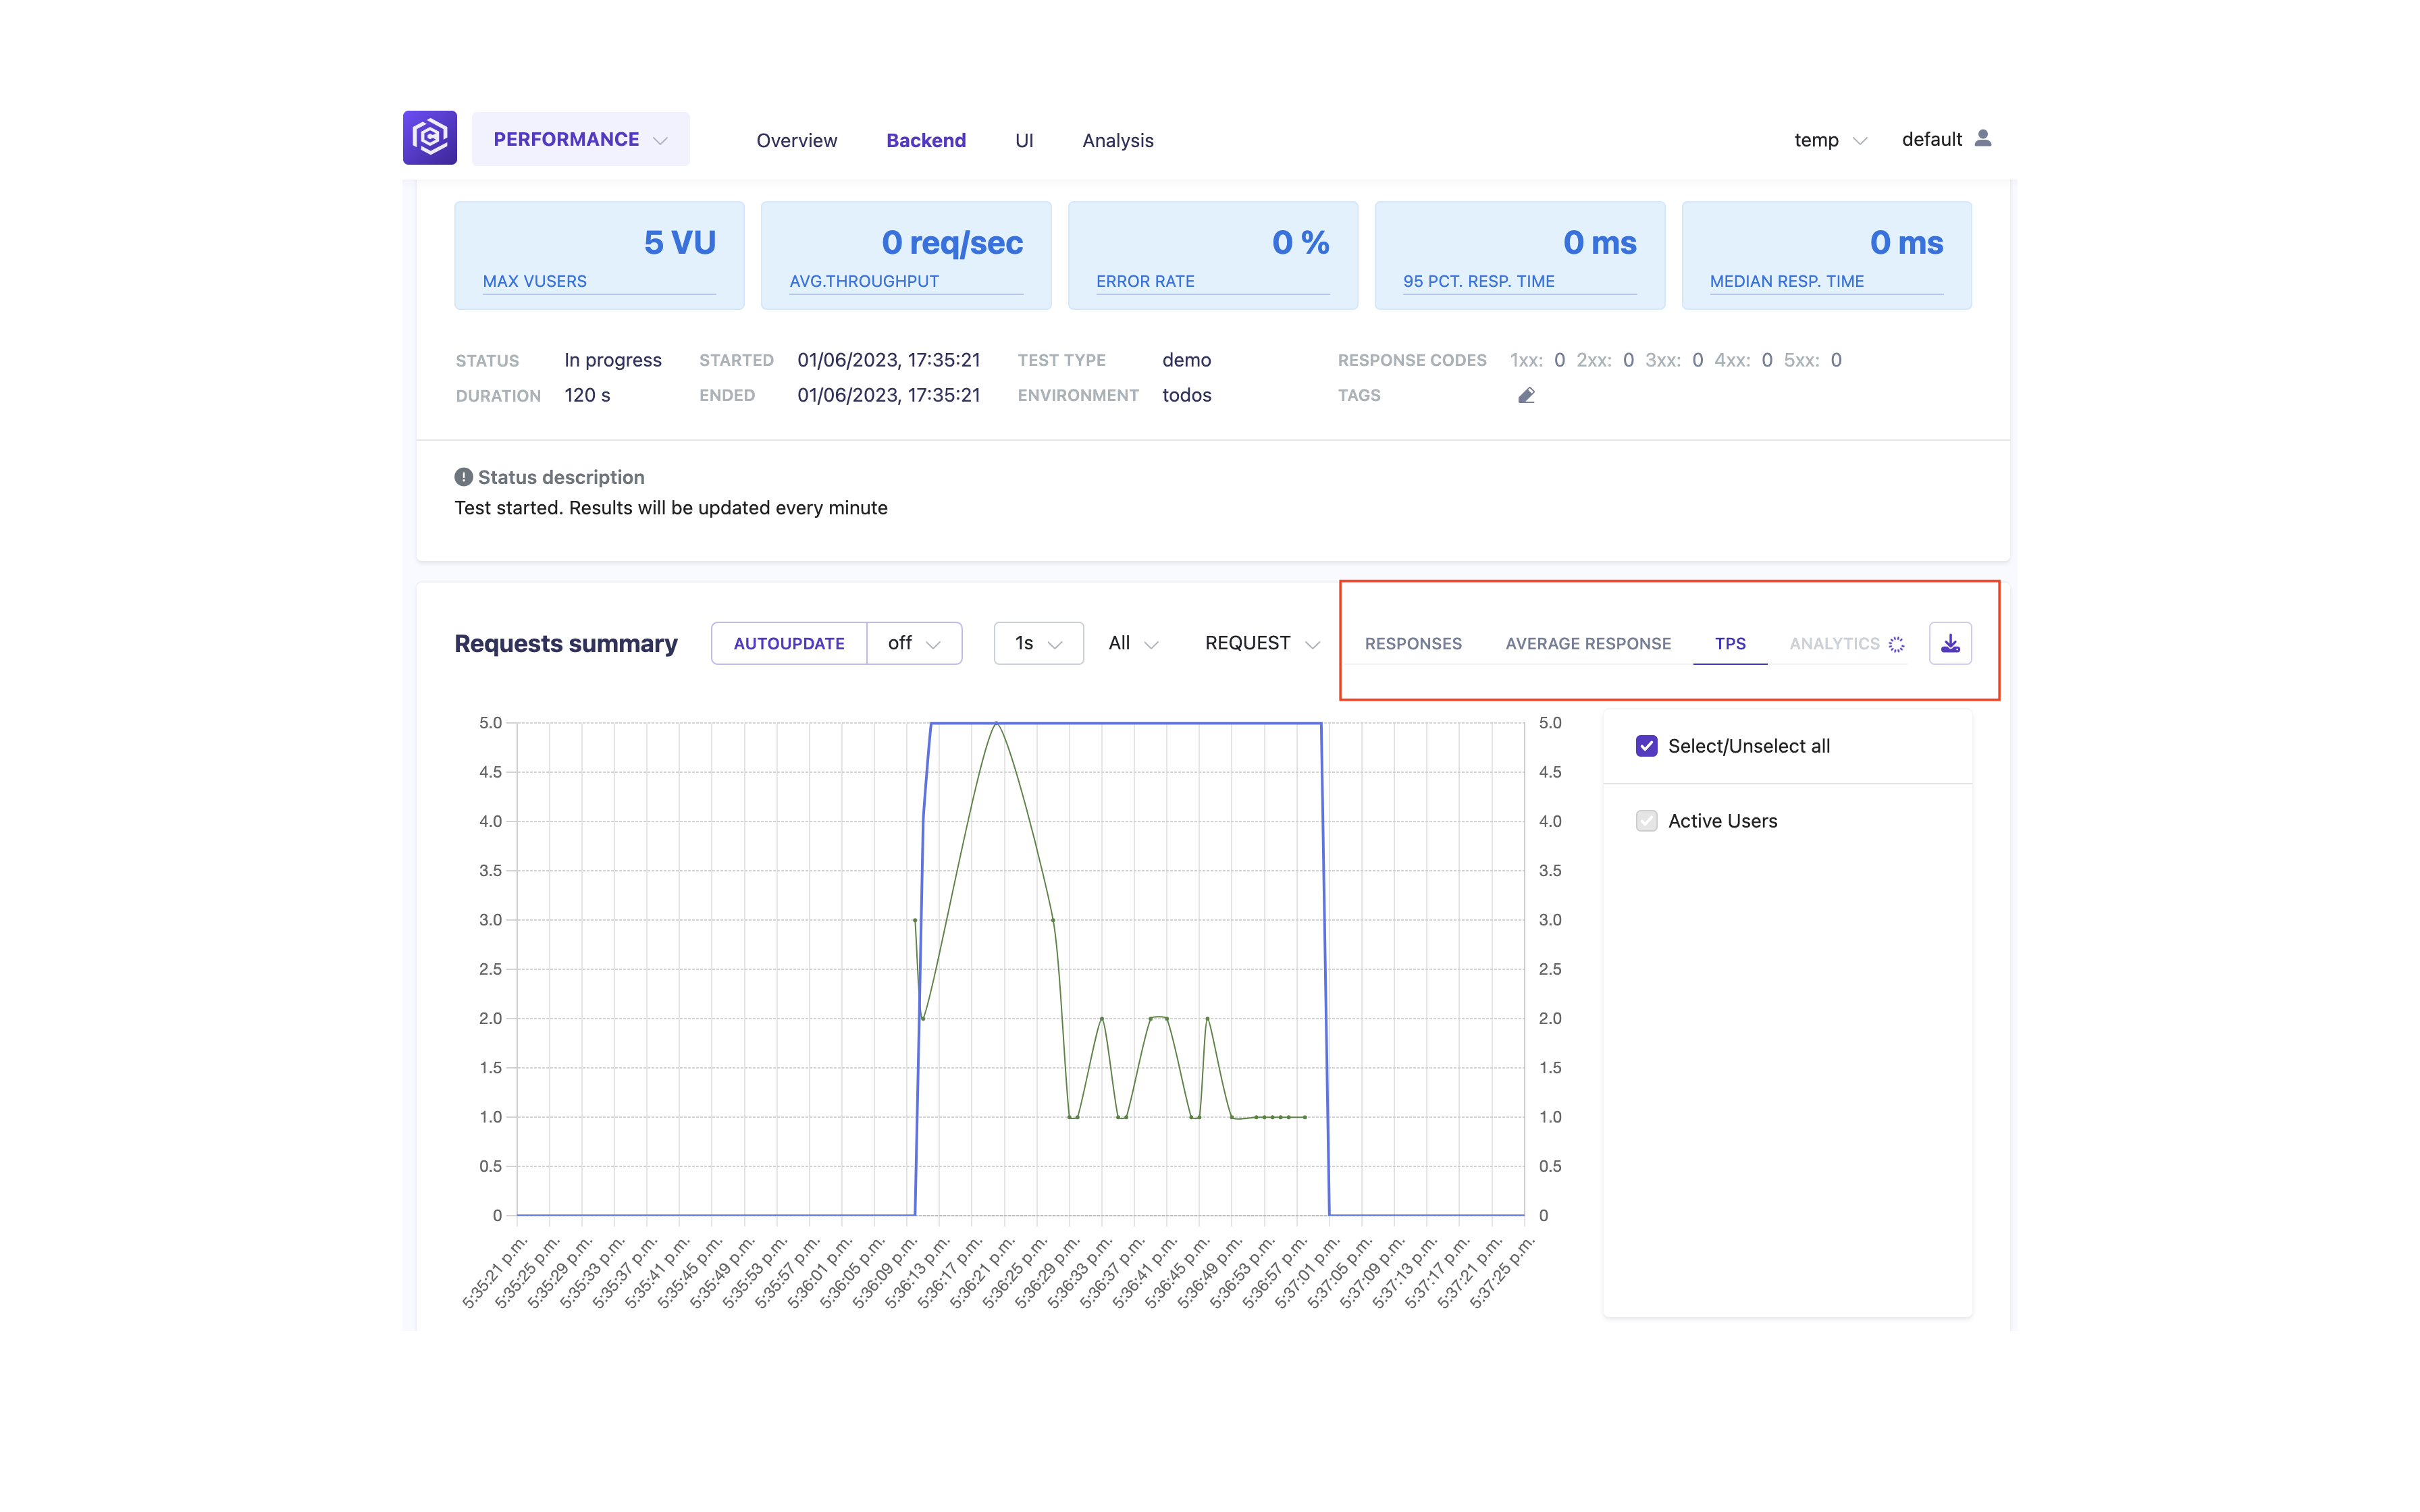
- Analyze the test results to evaluate the performance of your backend services.
![Backend Test Results]()
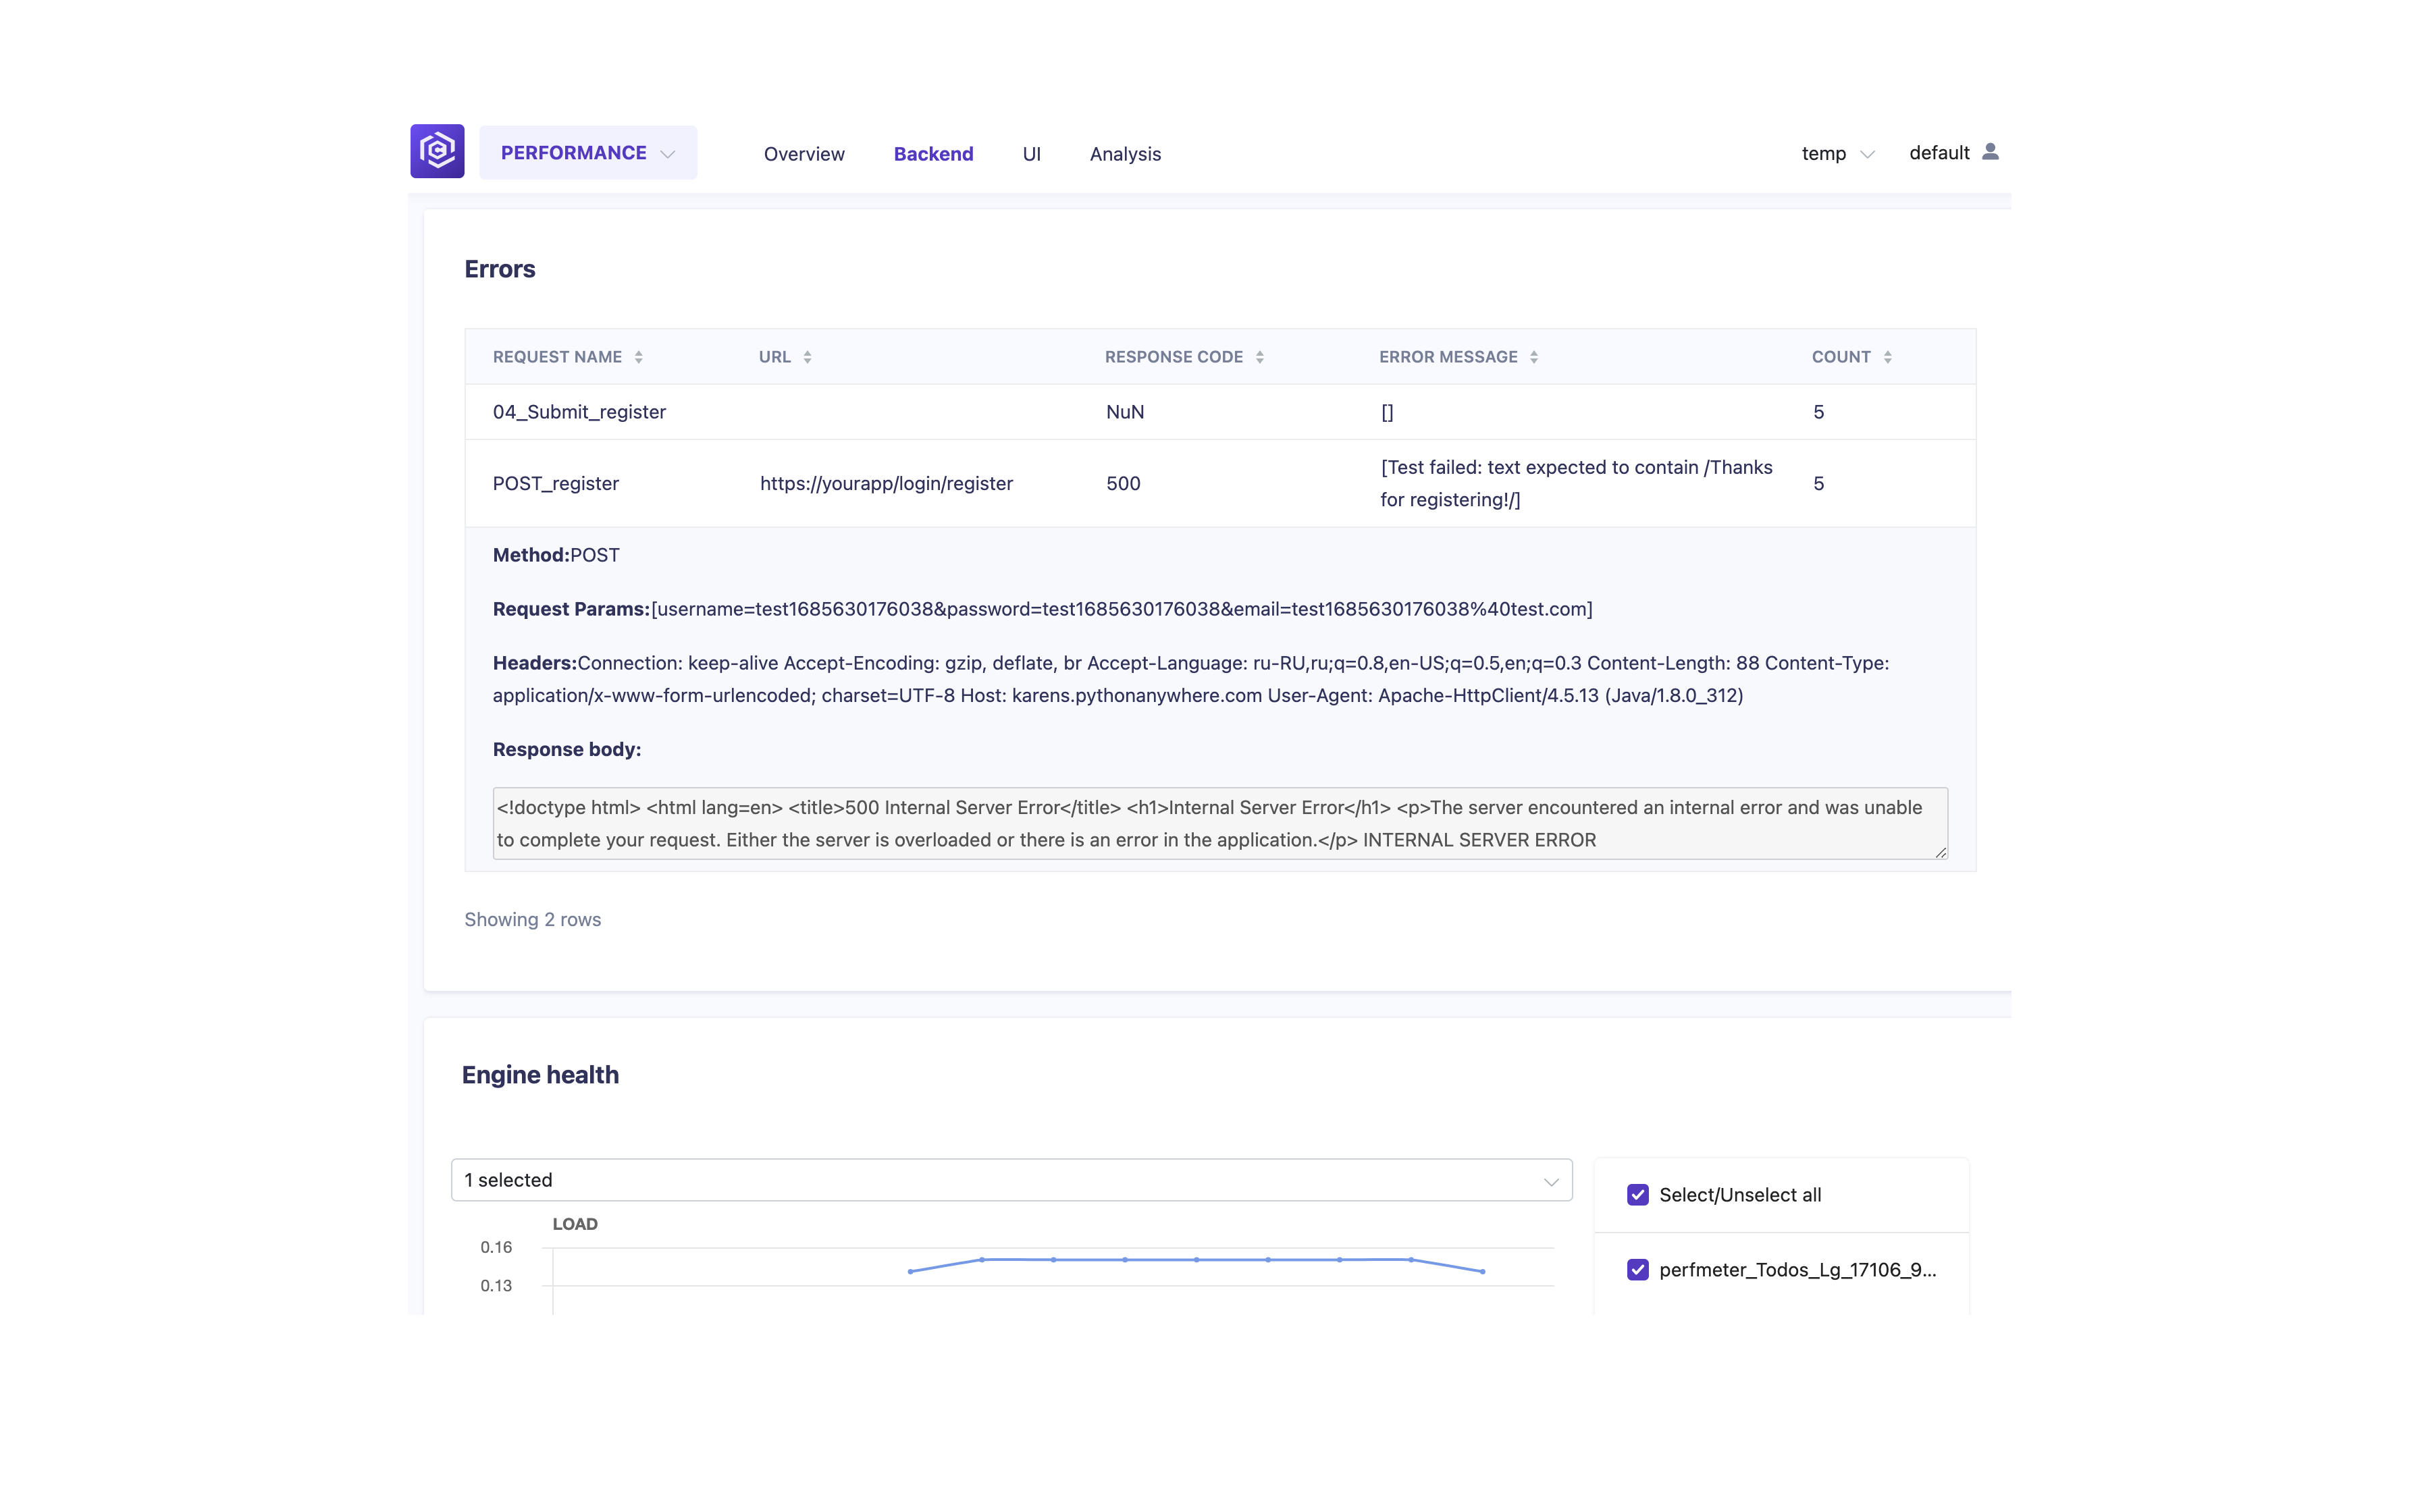
- The errors panel can be found below the graphs.
![Errors Panel]()
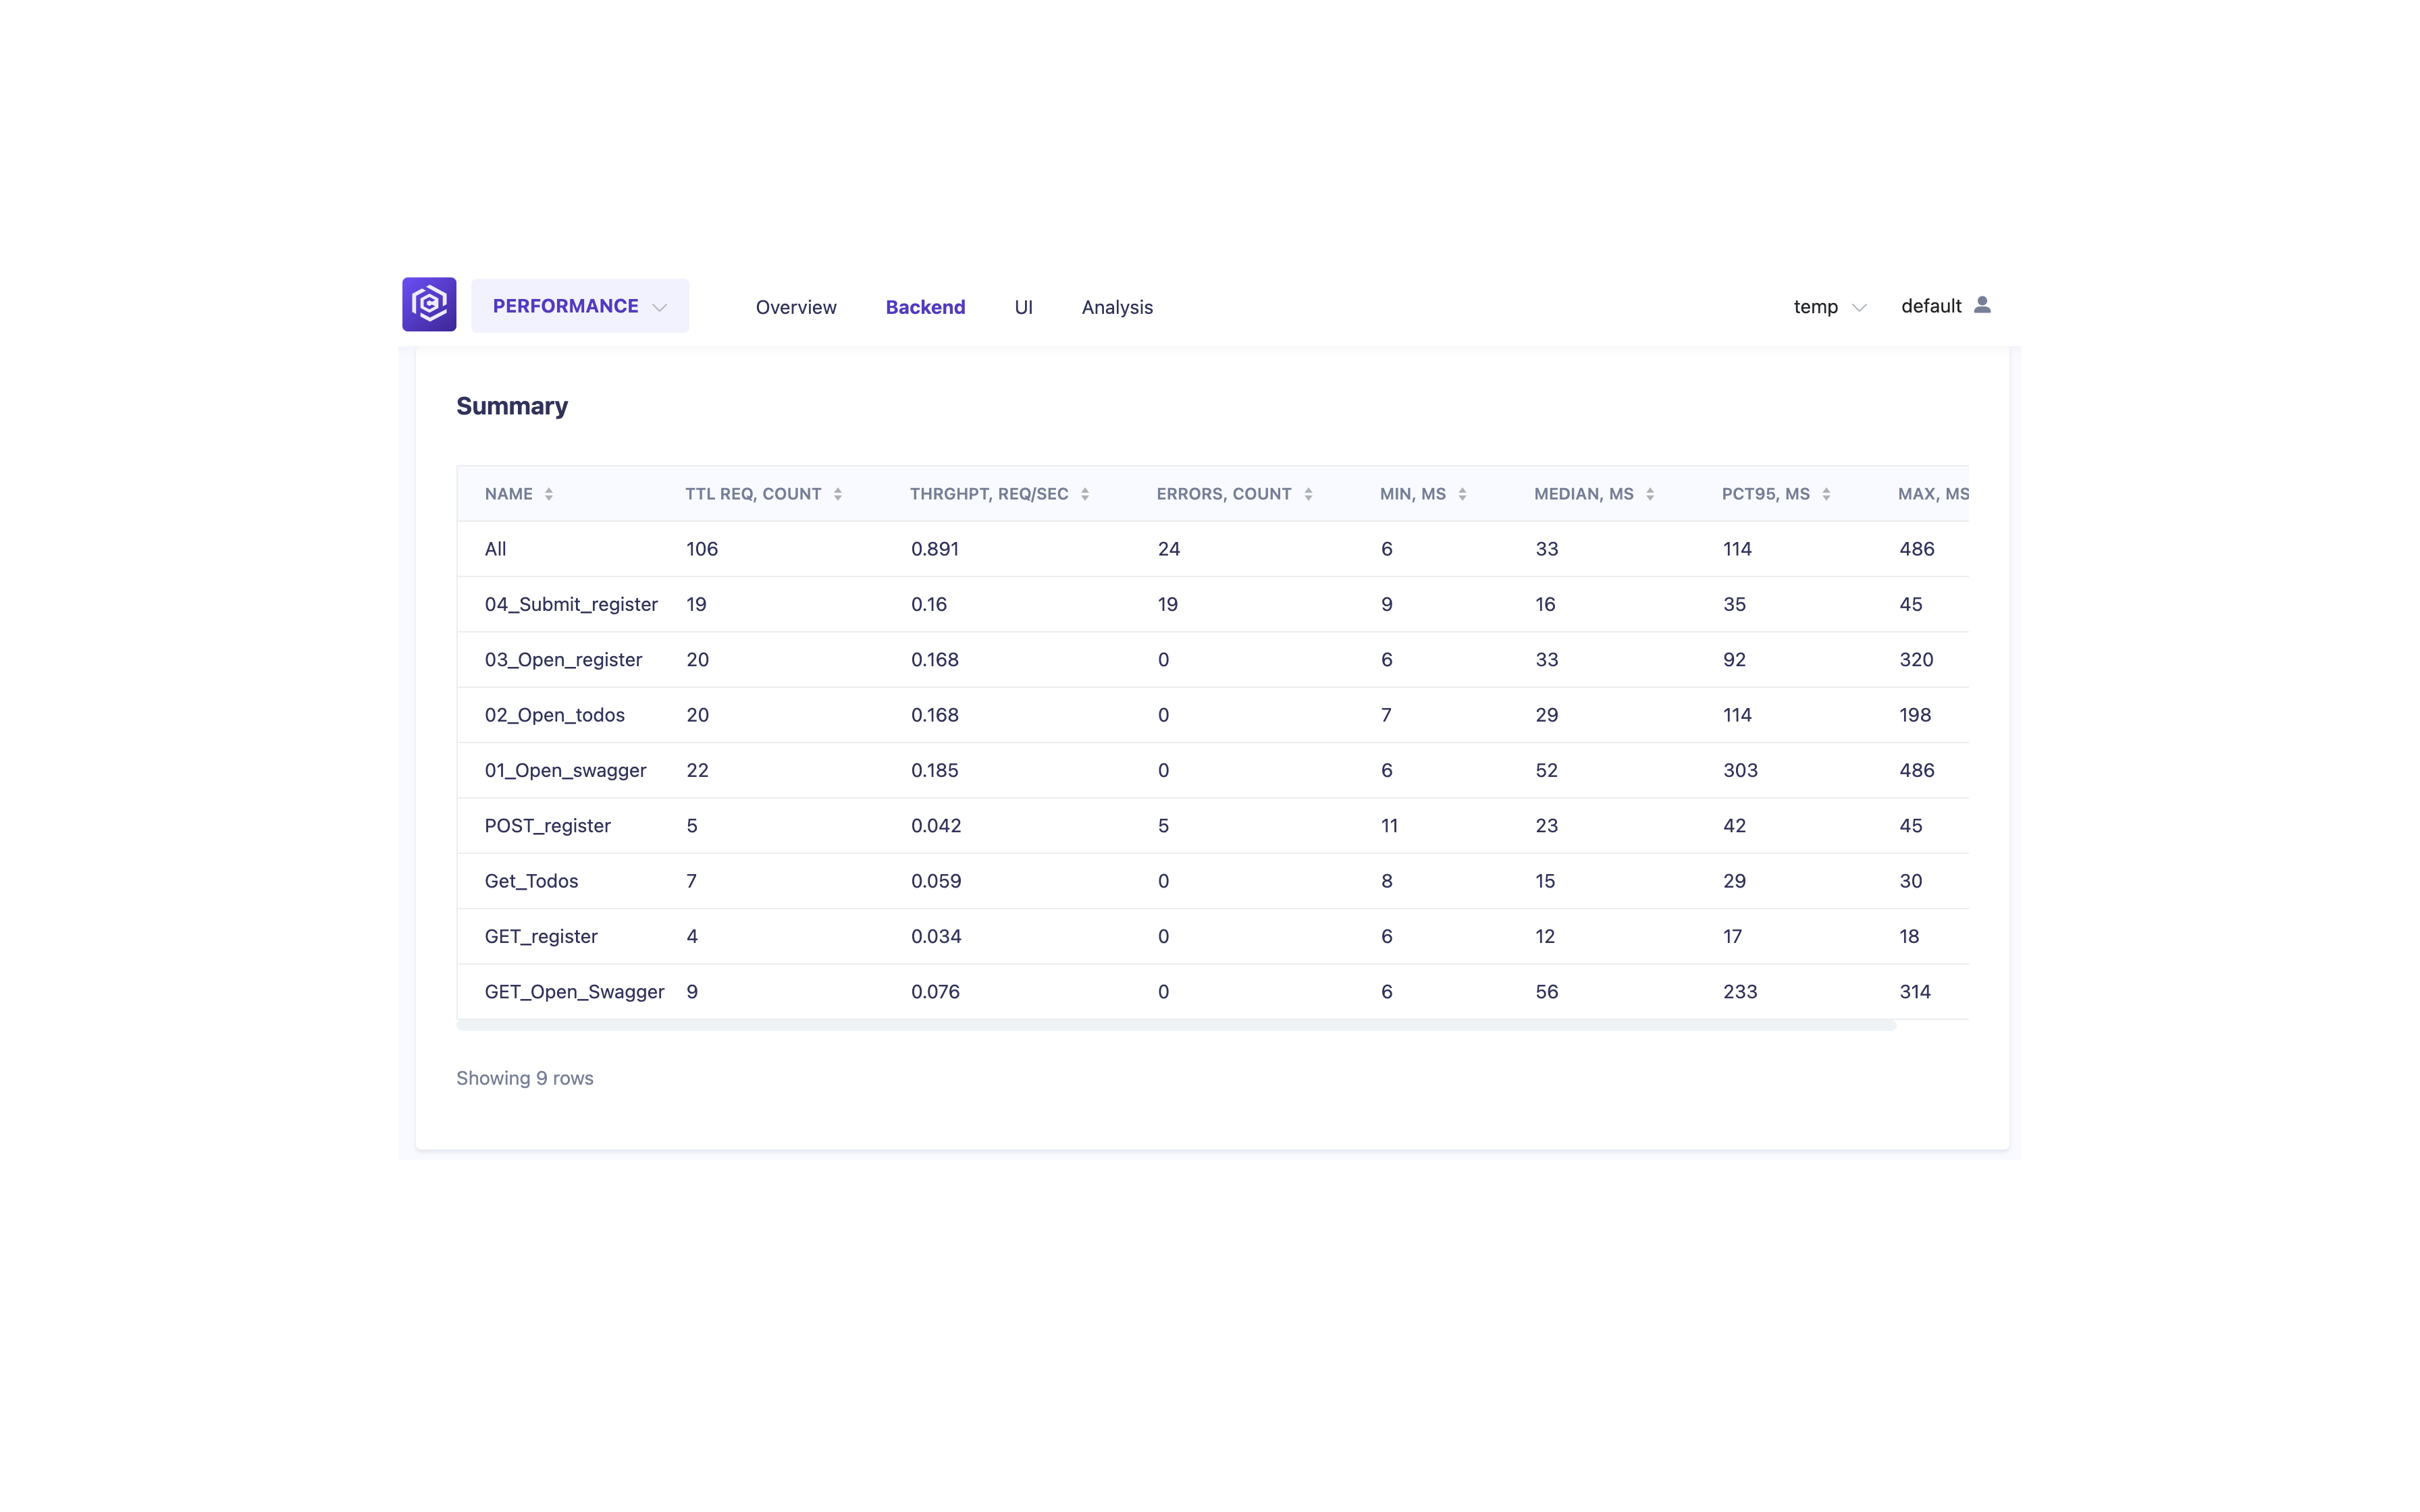
- Summary table for test metrics.
![Summary Table]()
Congratulations! You have successfully configured and run the Backend test in Carrier. You can now run and monitor the test to measure the performance of your backend services.
Next Steps
Once you have configured and executed your Backend test in Carrier, you may want to explore other testing capabilities and features offered by Carrier, such as Frontend testing, Security testing, and advanced reporting and analysis options. Follow the guide on how to analyze and compare test runs in Carrier to get started.