
Overview
This guide provides step-by-step instructions for configuring a UI performance test in Carrier. UI performance tests allow you to assess the performance of your website or web application using tools like Lighthouse and Sitespeed.
Prerequisites
Before configuring a UI performance test in Carrier, ensure that you have completed the following:
- Installed and set up Carrier successfully
- Created a project in Carrier
Steps
Follow the steps below to configure a UI performance test in Carrier:
Step 1: Log in to Carrier
- Open a web browser and enter the URL of your Carrier installation.
- Log in to the Carrier web interface using your credentials.
Note: Make sure you have logged in using the appropriate user account that has access to the project where you want to configure the UI performance test.
Step 2: Select the Project
- From the project dropdown menu, select the desired project where you want to configure the UI performance test.
- Click “Go!” to navigate to the project’s configuration page.
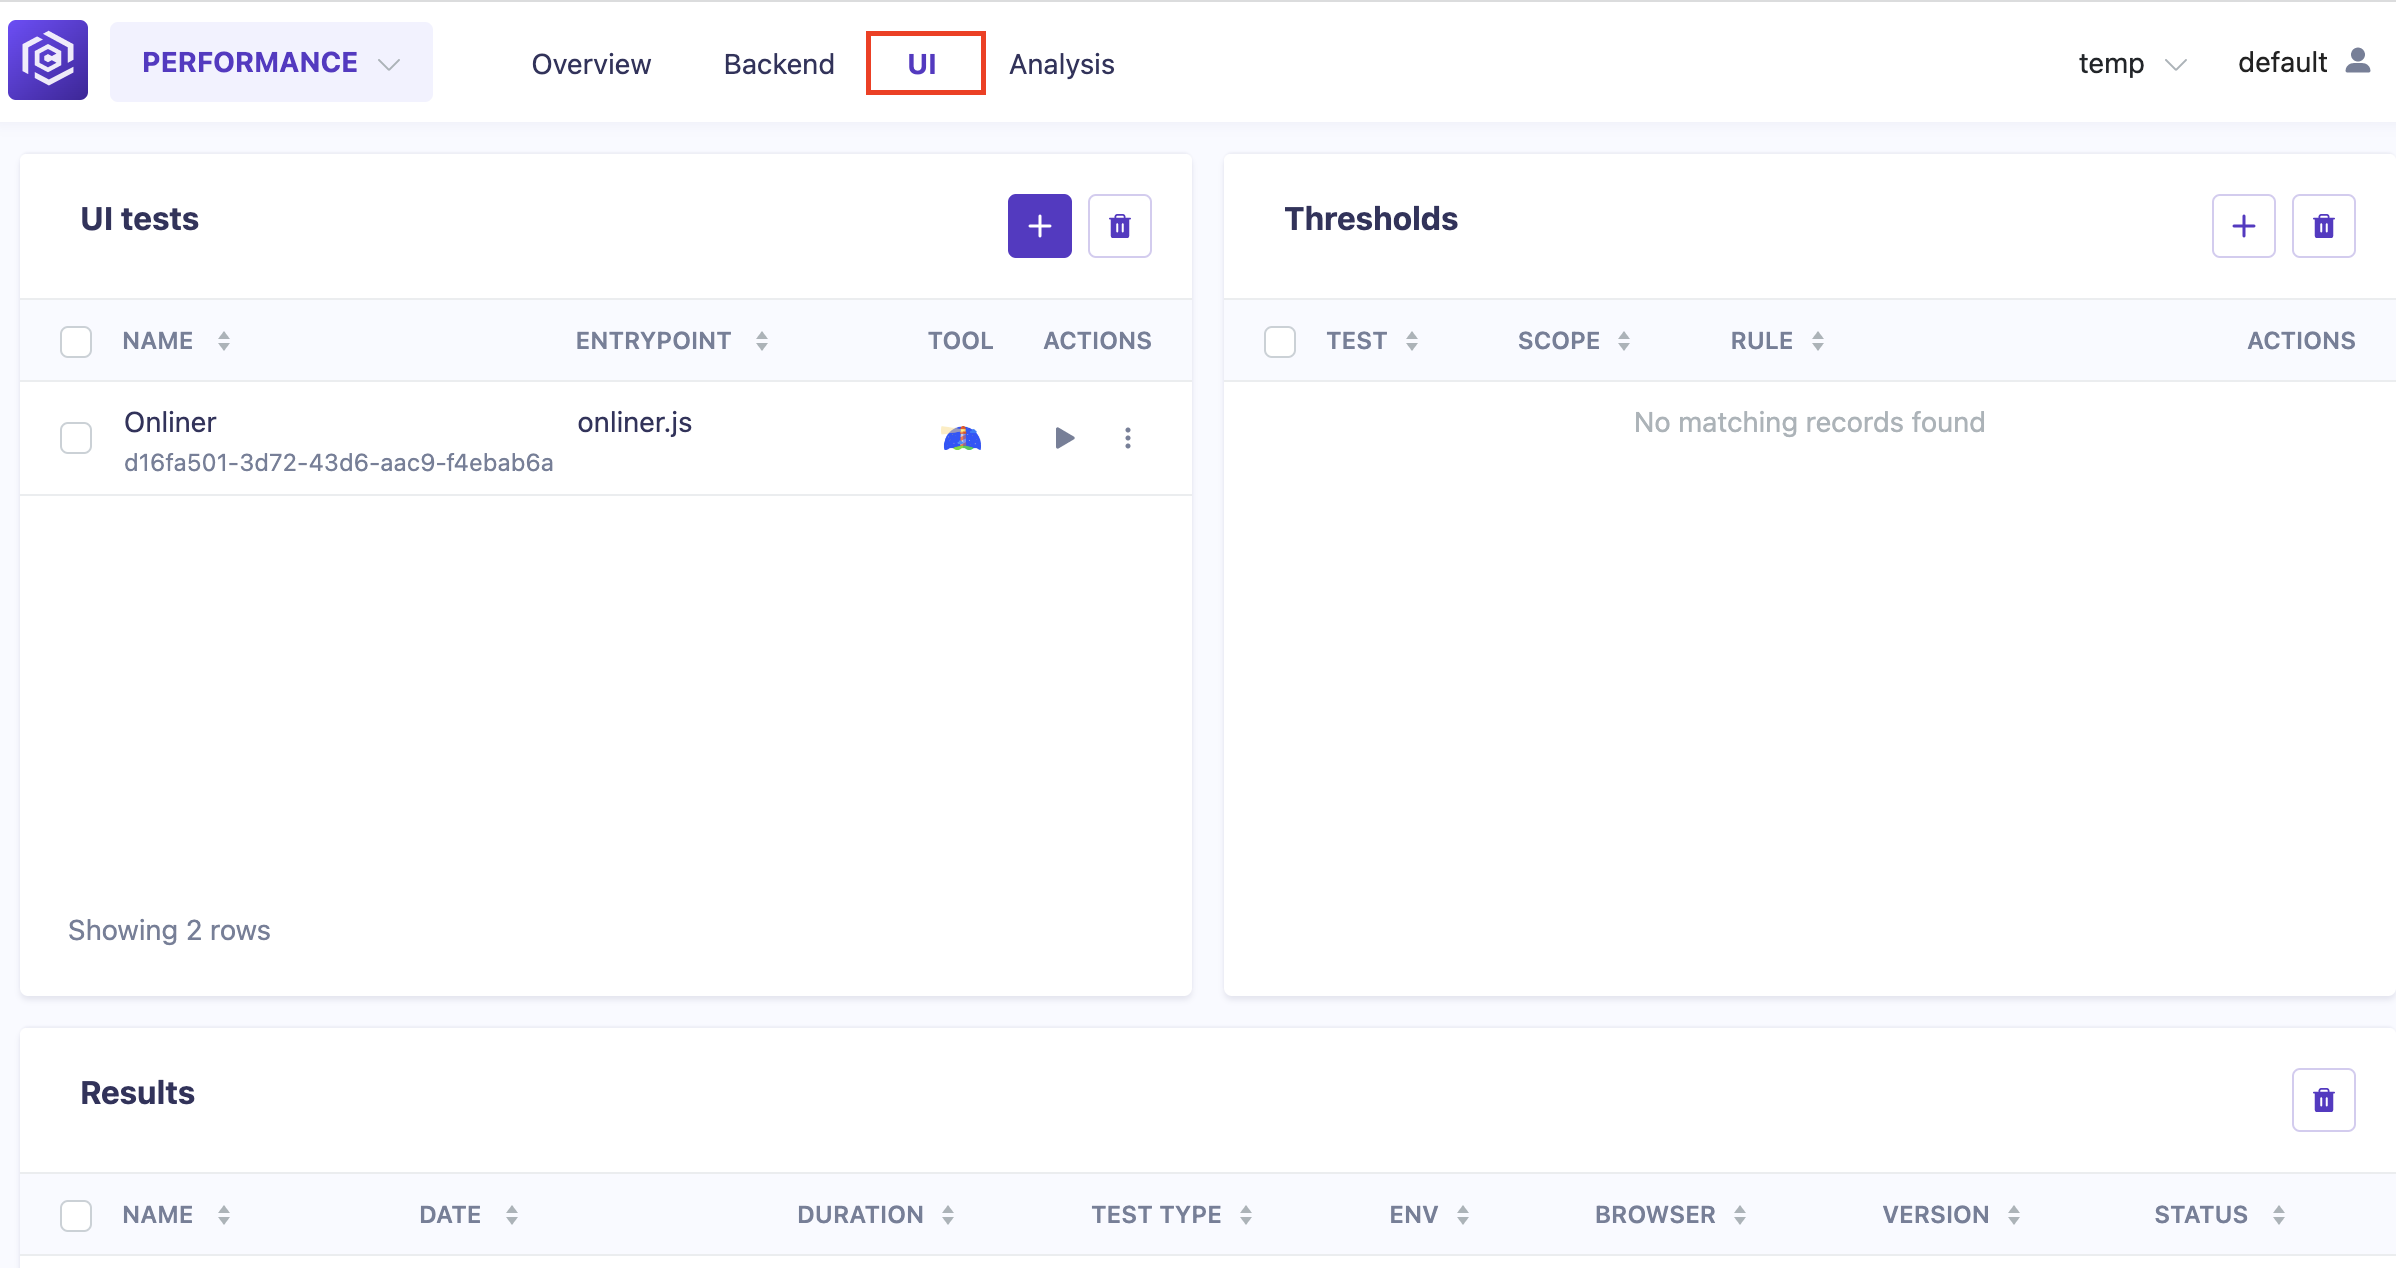
Step 3: Navigate to the “Performance” Tab
- In the project configuration page, click on the “Performance” tab located in the left menu.
- Select
UItab.![Navigate to Performance]()
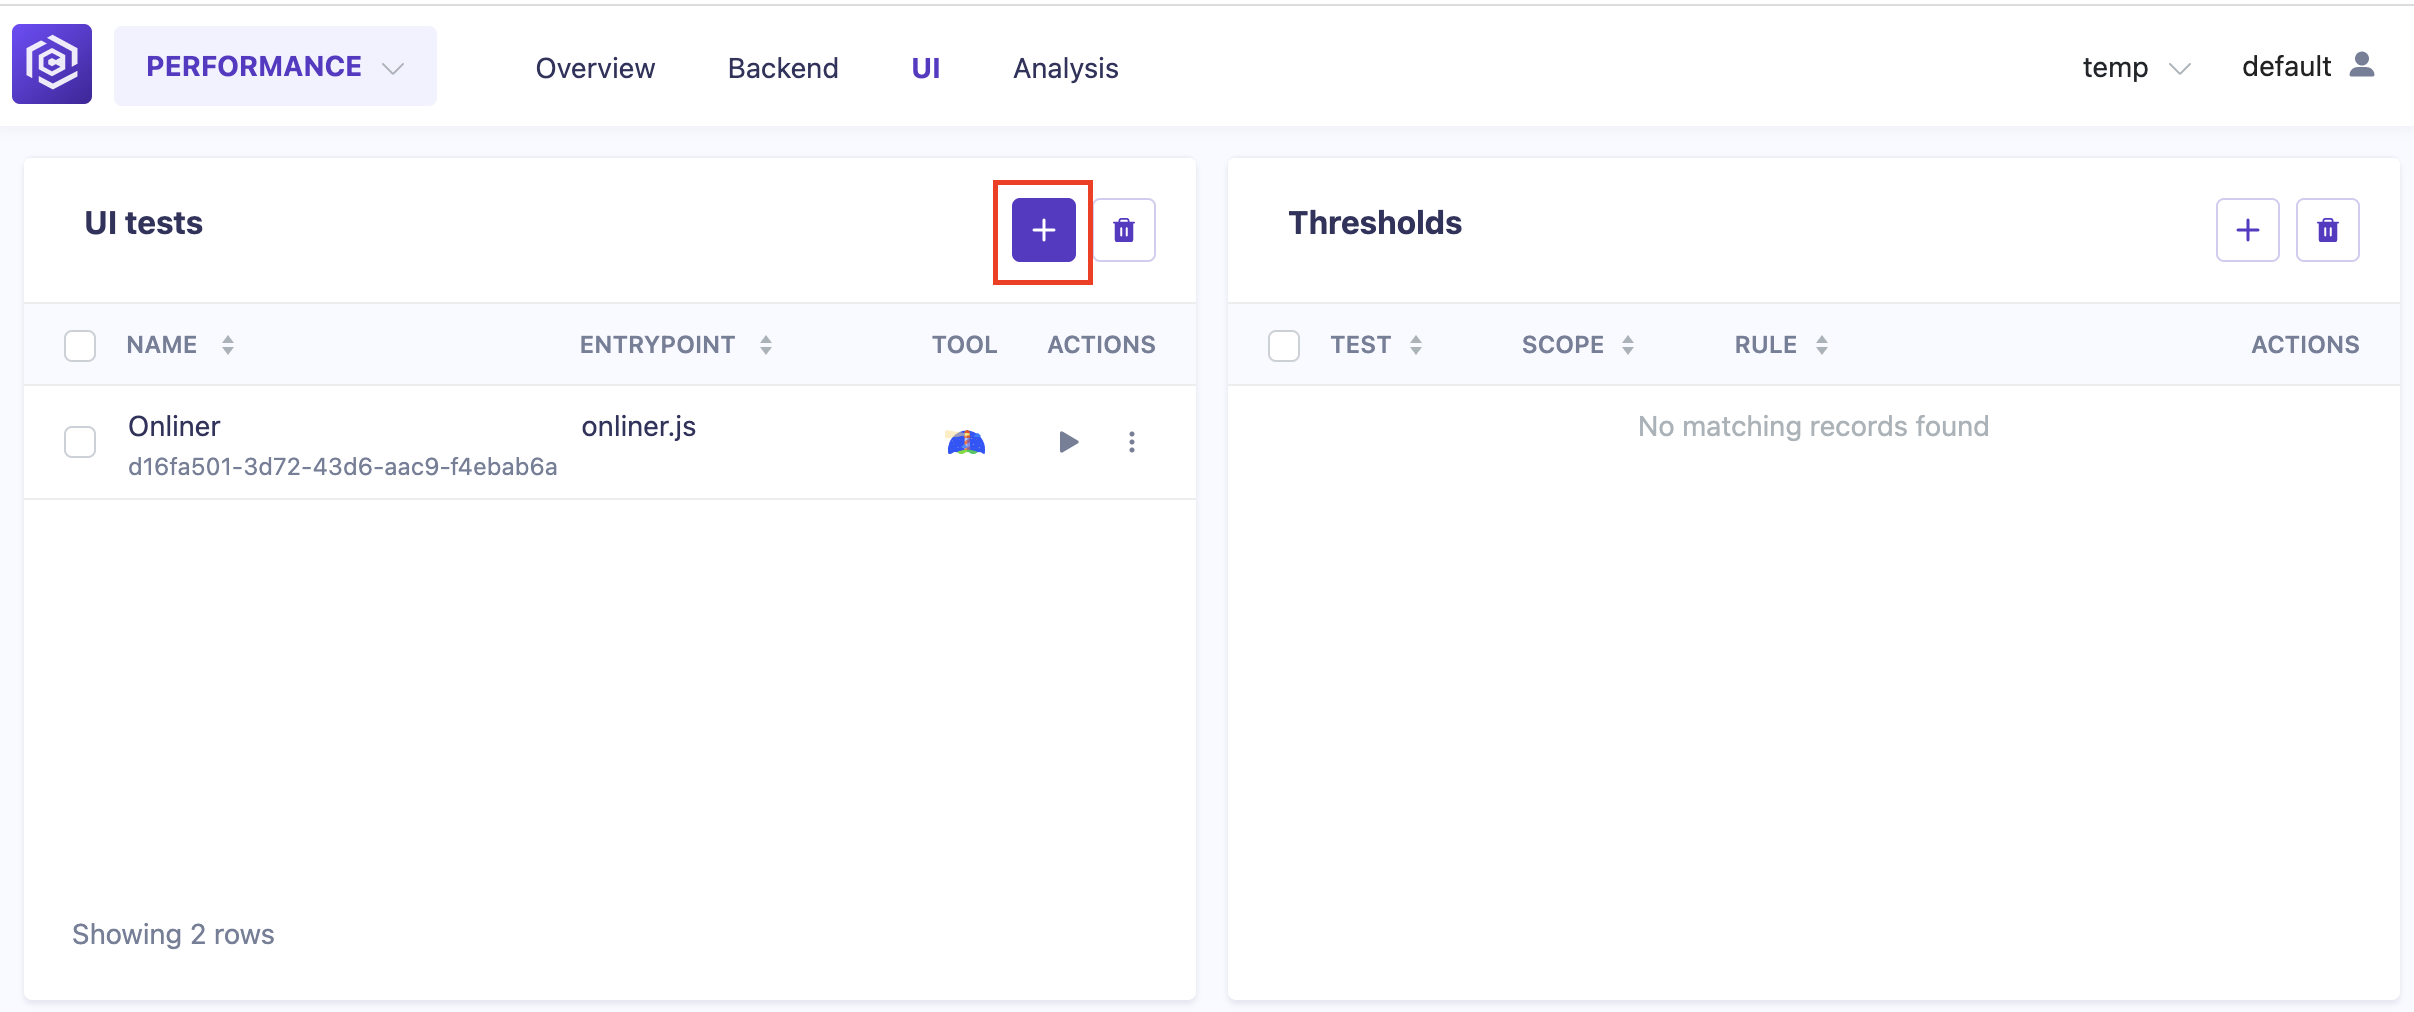
Step 4: Add a New UI Performance Test
- In the performance section, click on the “Add Test” button.
![Add New Test]()
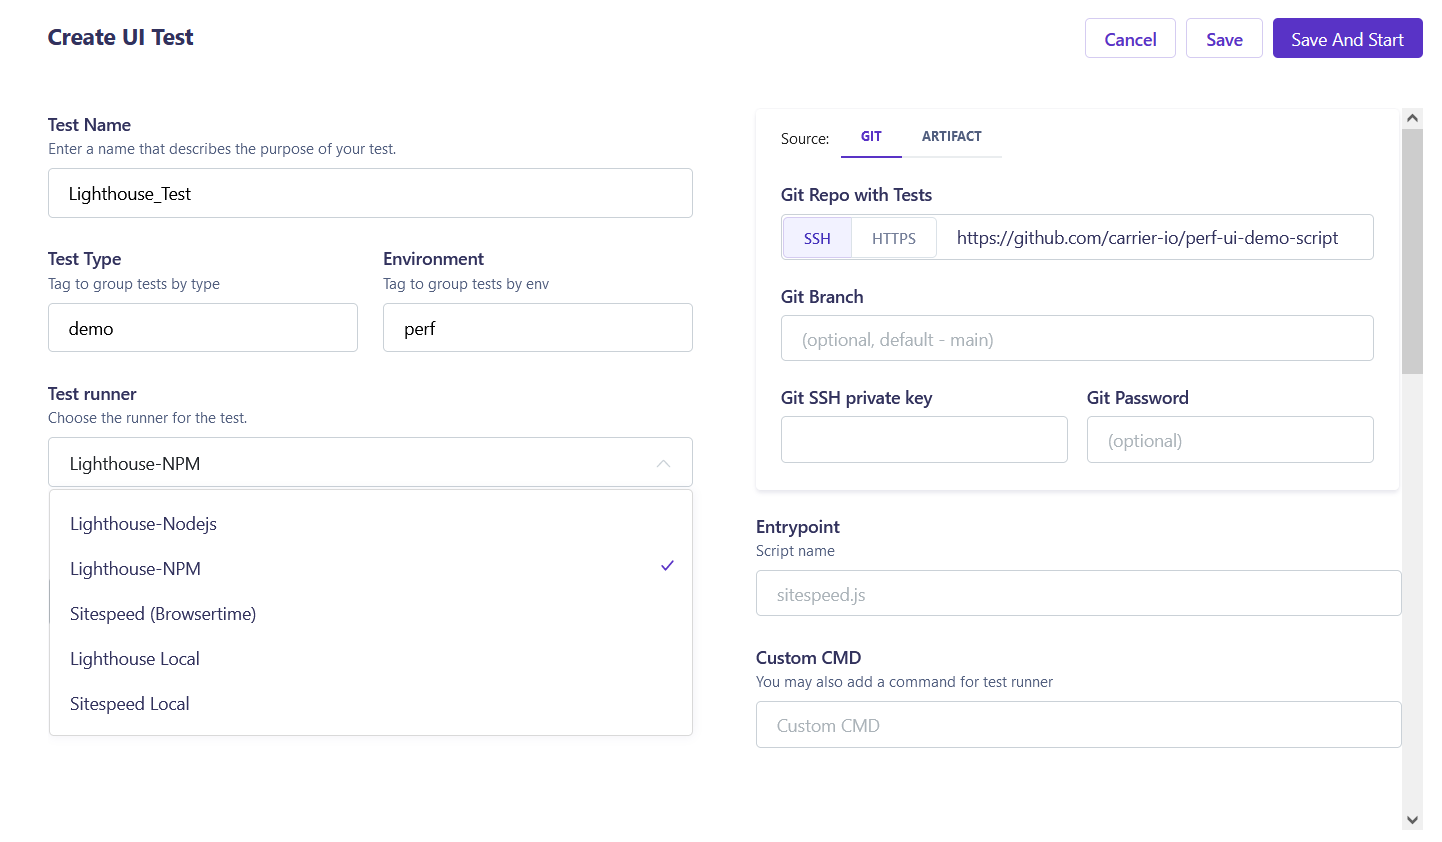
Step 5: Configure UI Performance Test
In the UI test configuration page, set various parameters for your test:
- Source: Select the desired option to get Source code with test scripts. Options include
GIT,ARTIFACT(upload archive) - Entrypoint: Enter the name of the Backend test. The test name should describe its purpose.
- Custom CMD: You may also add a command for test runner. For example:
{{secret.testuser}} {{secret.testpassword}} desktop headless https://yoursystem.com/ happypath - Test Name: Enter the name of the UI test. The test name should describe its purpose.
- Test Type: Specify the type to group similar tests.
- Environment: Specify the environment name to group related tests.
- Test Runner: Select the tool to use for running the script.
- Lighthouse-Nodejs: Uses Lighthouse with Node.js as the test runner.
- Lighthouse-NPM: Uses Lighthouse NPM as the test runner.
- Sitespeed (browsertime): Uses Sitespeed with browsertime as the test runner.
- Lighthouse local: Uses Lighthouse installed locally in Carrier box as the test runner.
- Sitespeed local: Uses Sitespeed.io installed locally in Carrier box as the test runner.
- Entrypoint: Specify the script name to be used as the entrypoint for the test.
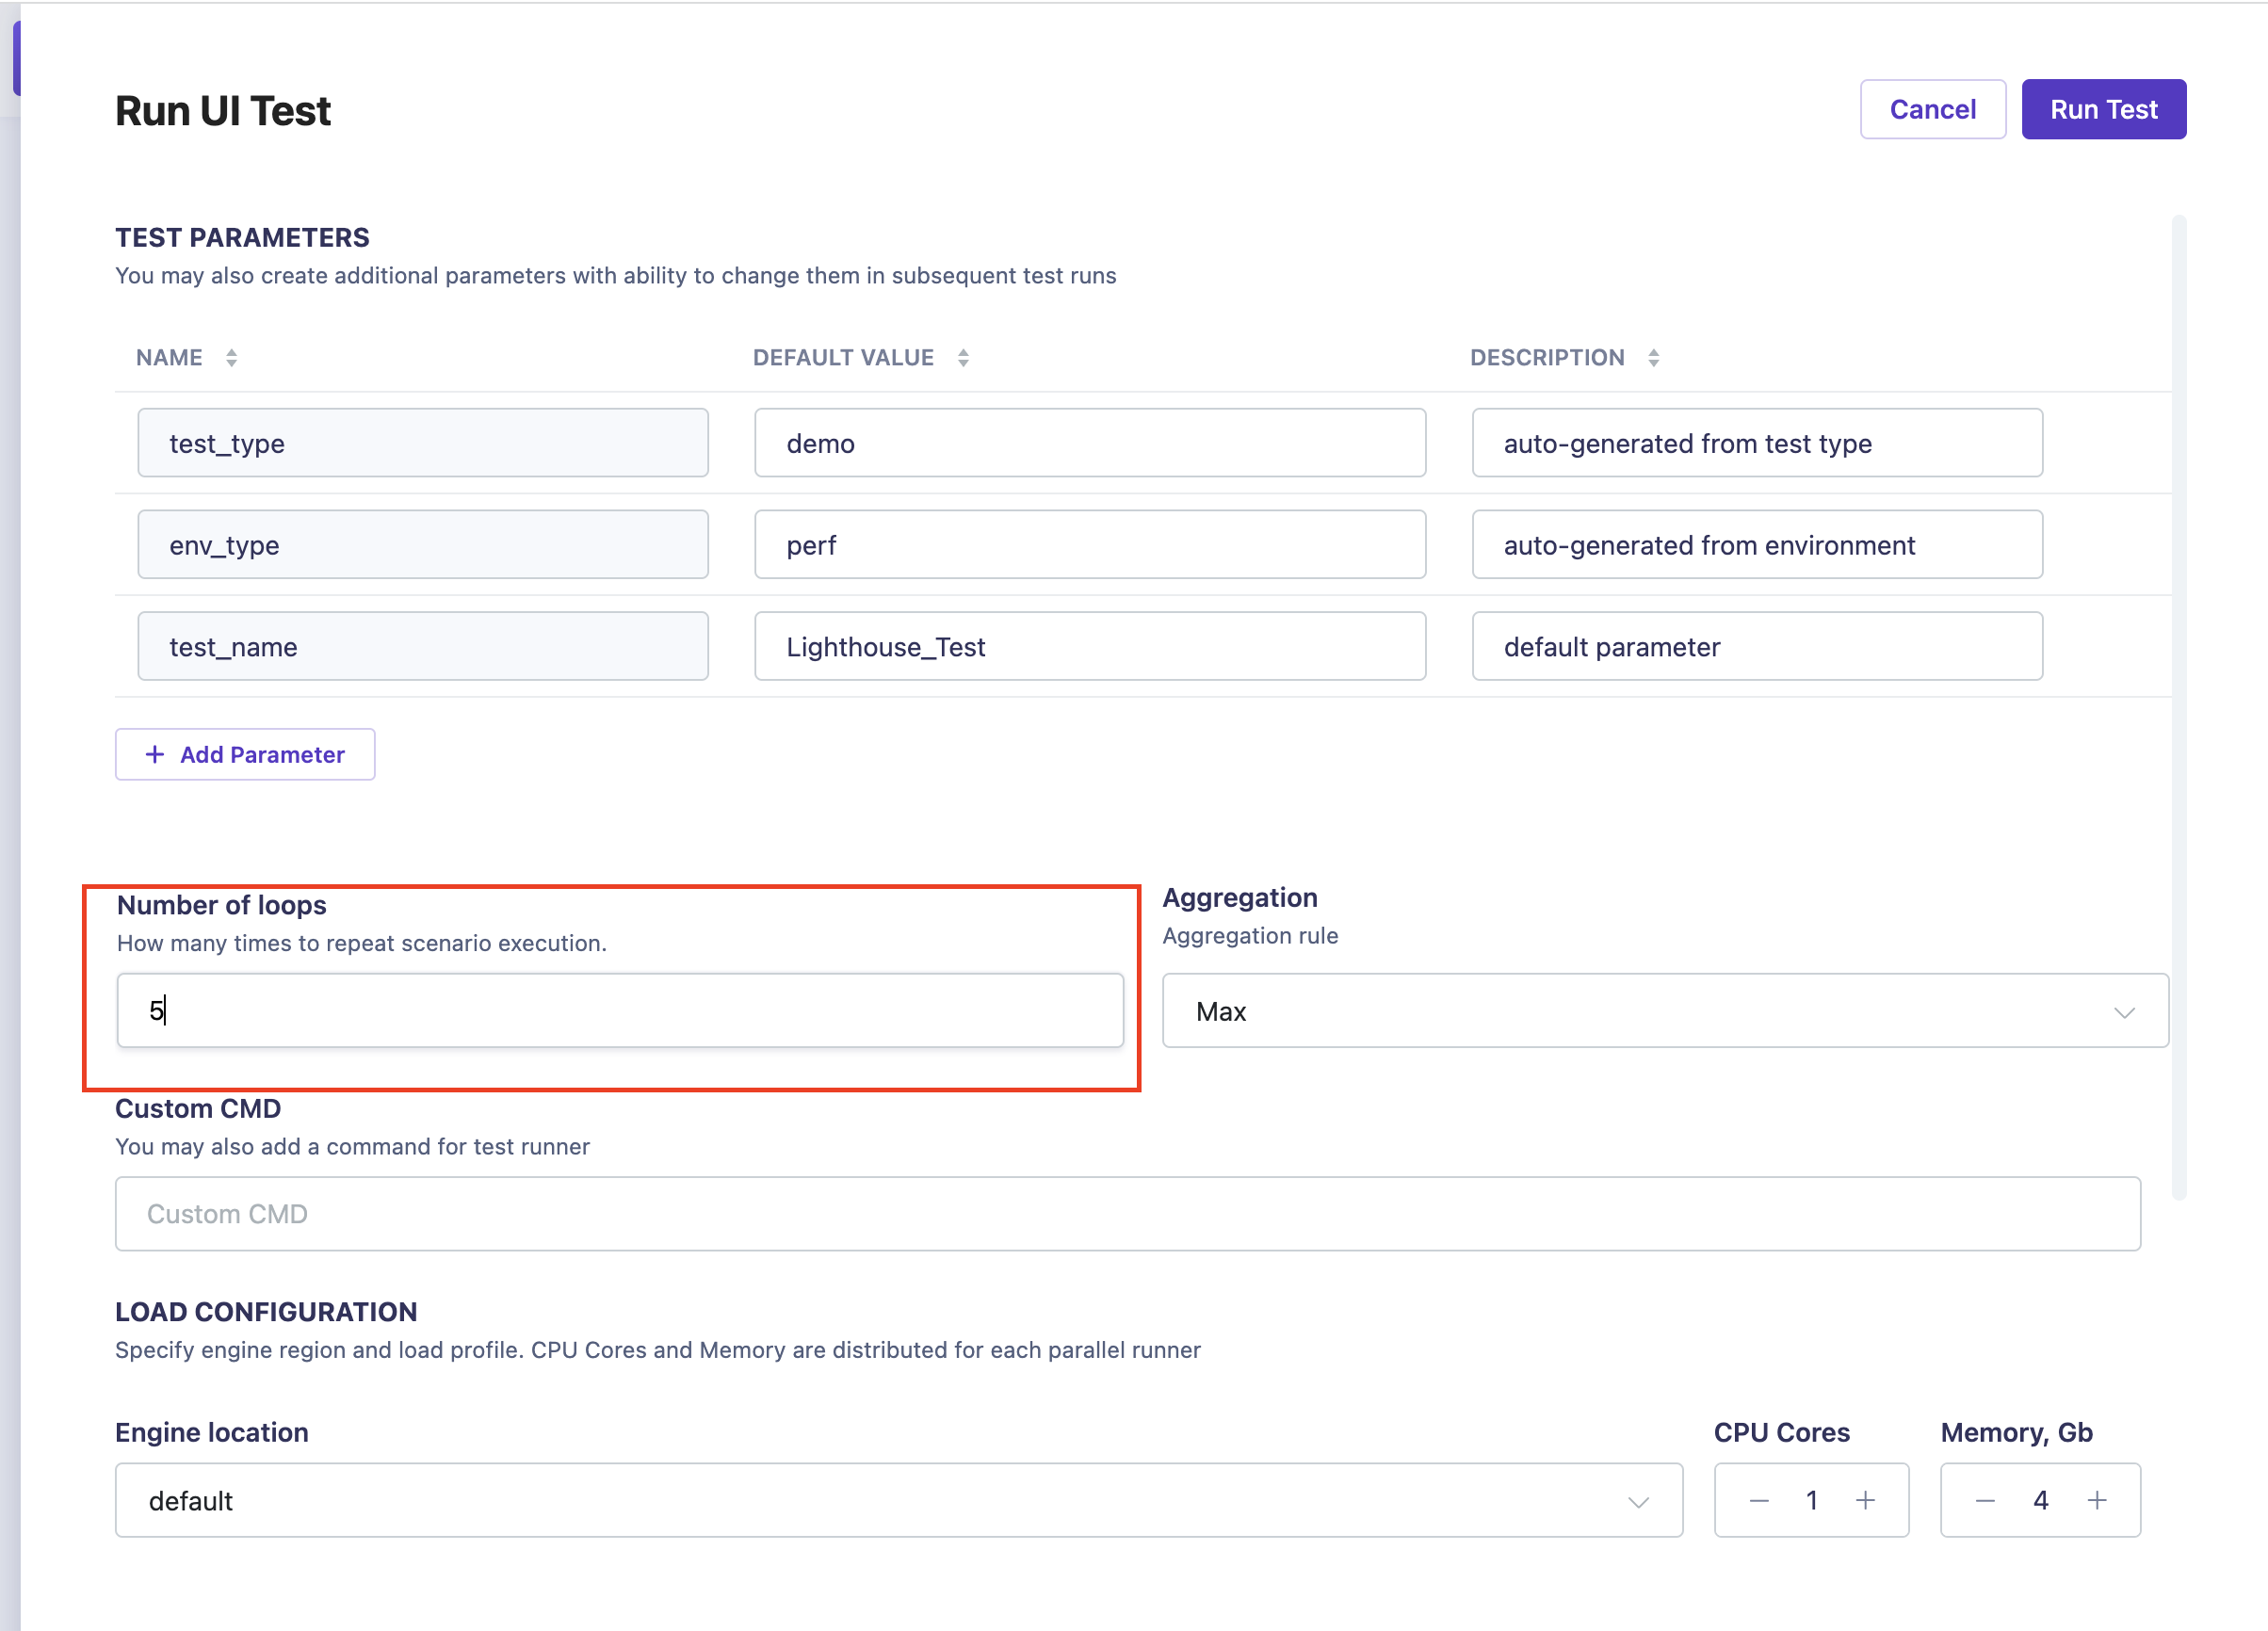
- Number of loops: Specify the number of loops or iterations for the test.
- Aggregation: Set the aggregation method for the test results.
- Test Parameters: Create additional parameters that can be changed in subsequent test runs.
- Integrations: Configure integrations to compare test results with SLAs using
QualityGate. - Reporters: Specify the reporters for test results. You can also set reporters in the Integrations section.
- Scheduling: Create schedules for the test with different parameters.
- Advanced Parameters: Configure additional parameters for the test runner, test data, and network settings.
It is recommended to run UI tests in parallel with backend tests to get realistic performance resutls
![UI Test Parameters]()
- Source: Select the desired option to get Source code with test scripts. Options include
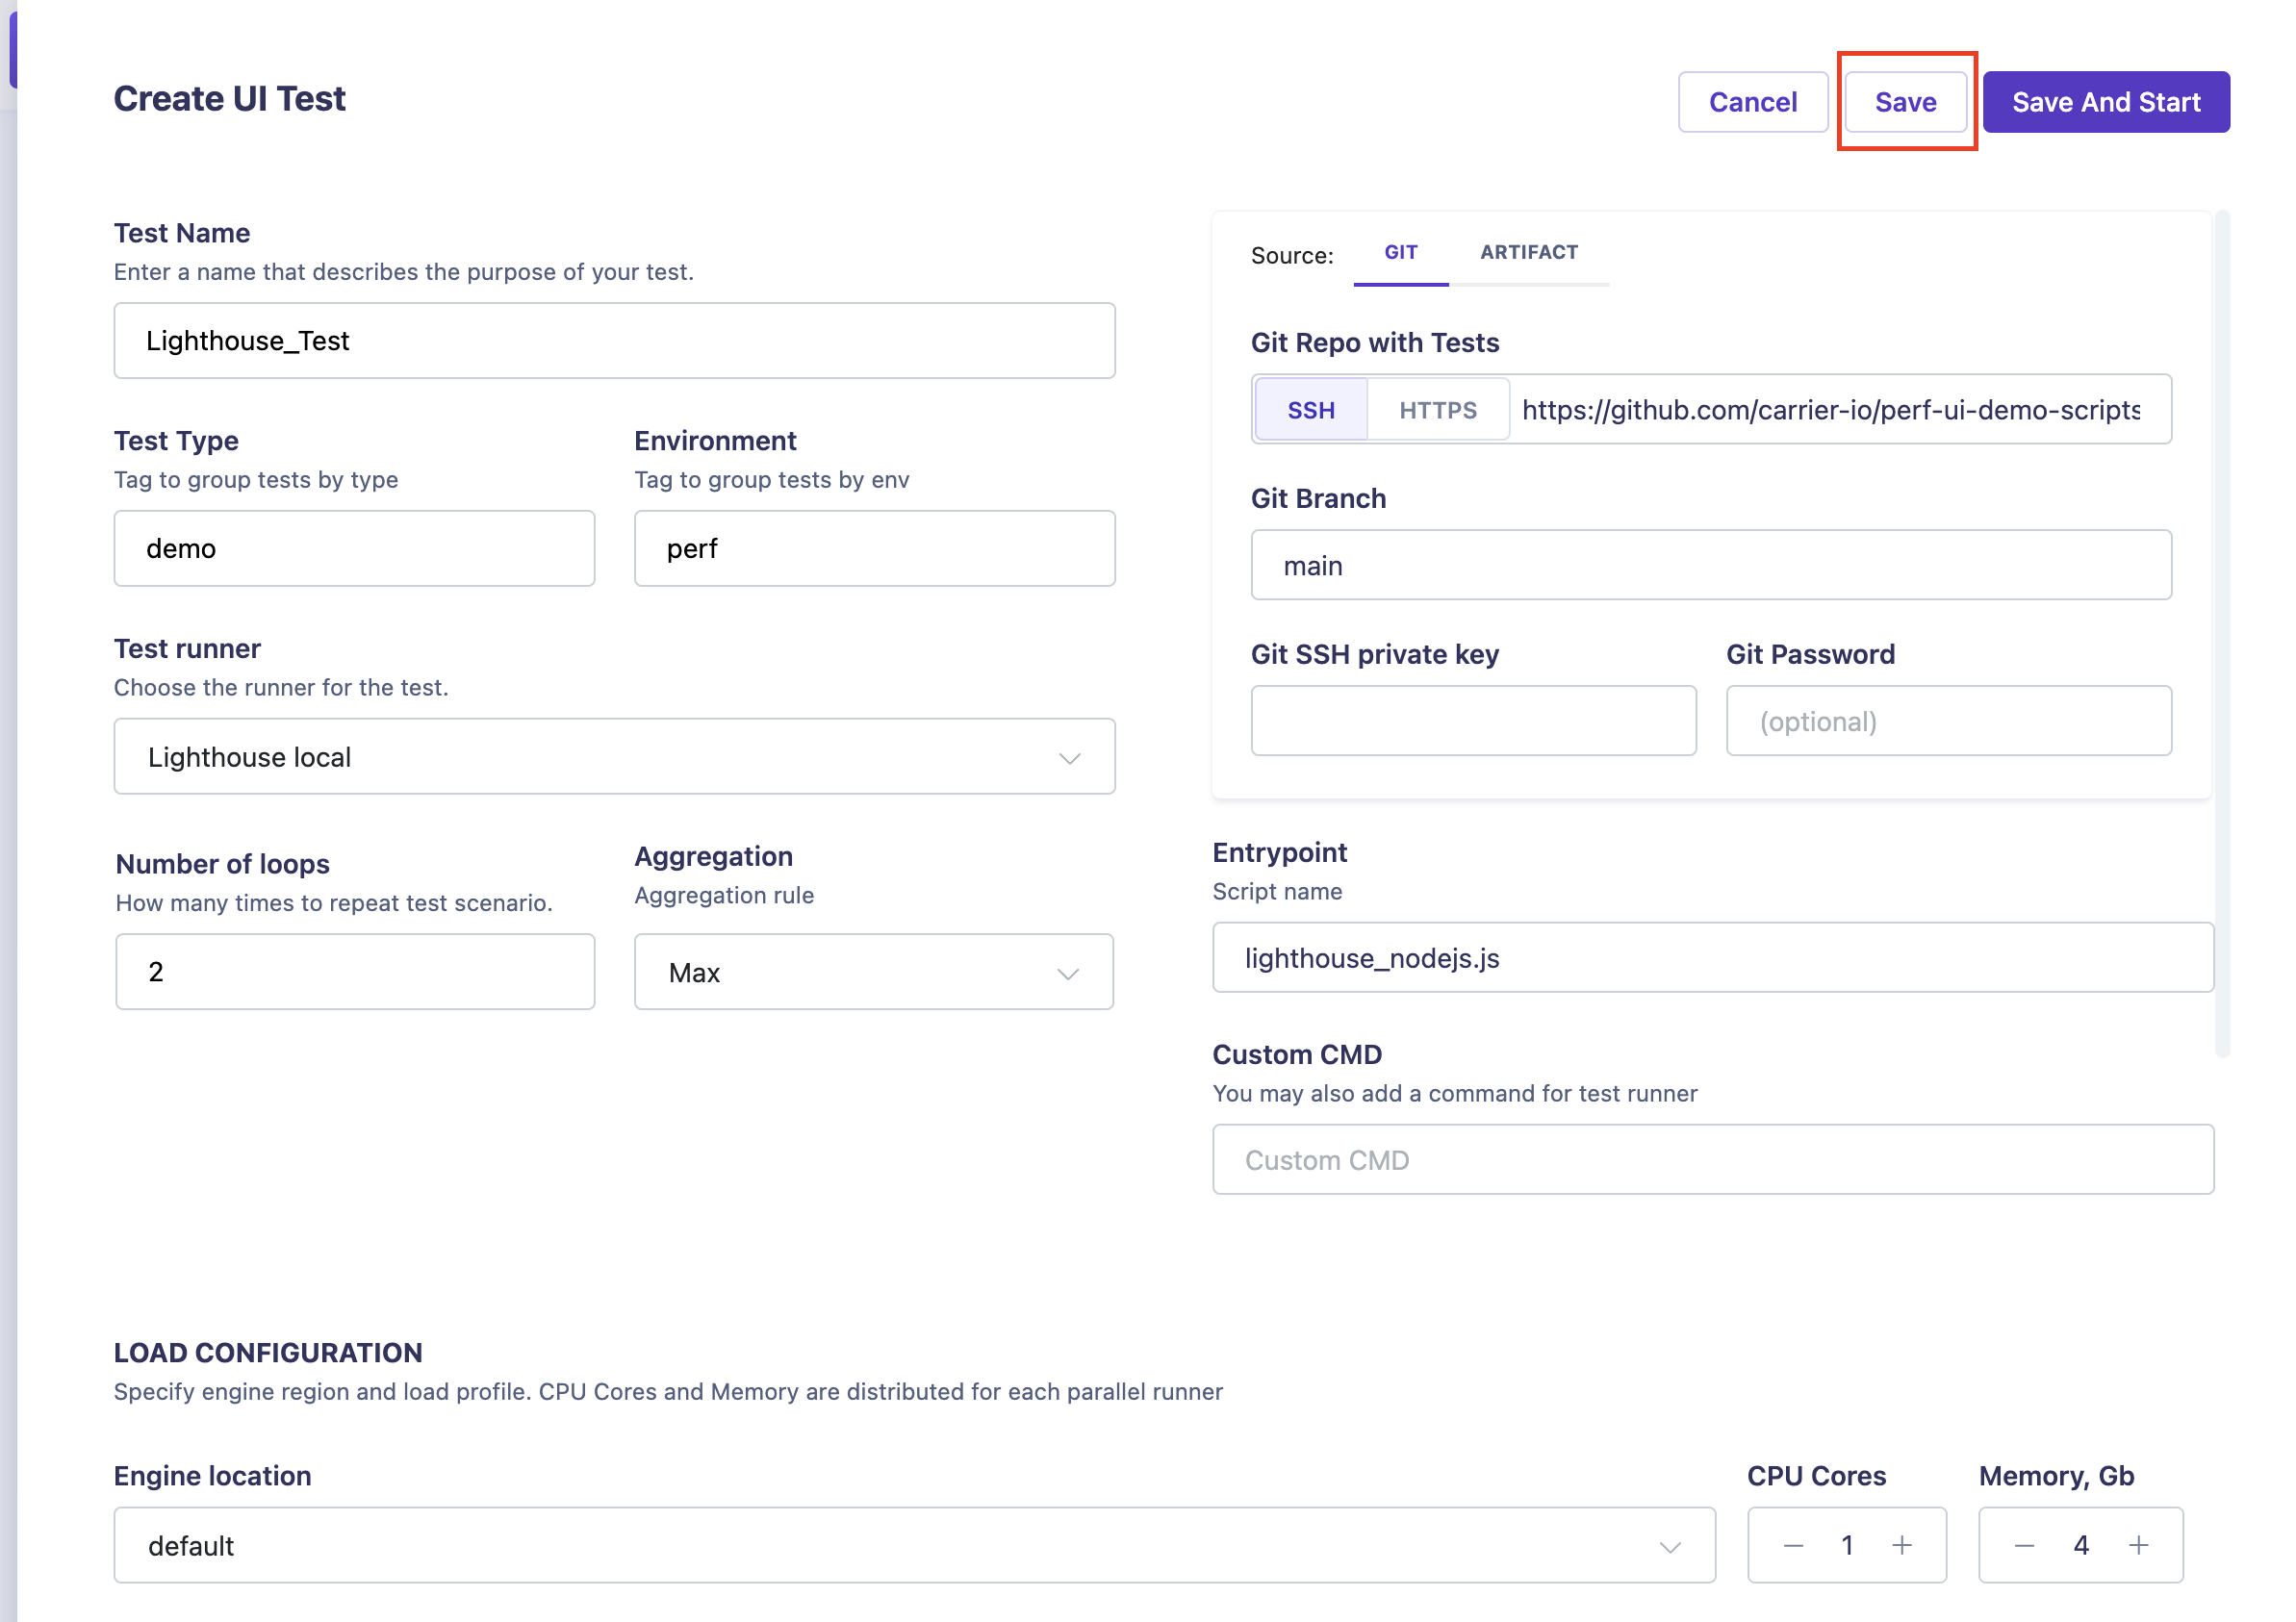
Step 6: Save the UI Performance Test
- After configuring all the necessary parameters for the UI performance test, click the “Save” button to save your changes.
![Save Test]()
Step 7: Run the UI Performance Test
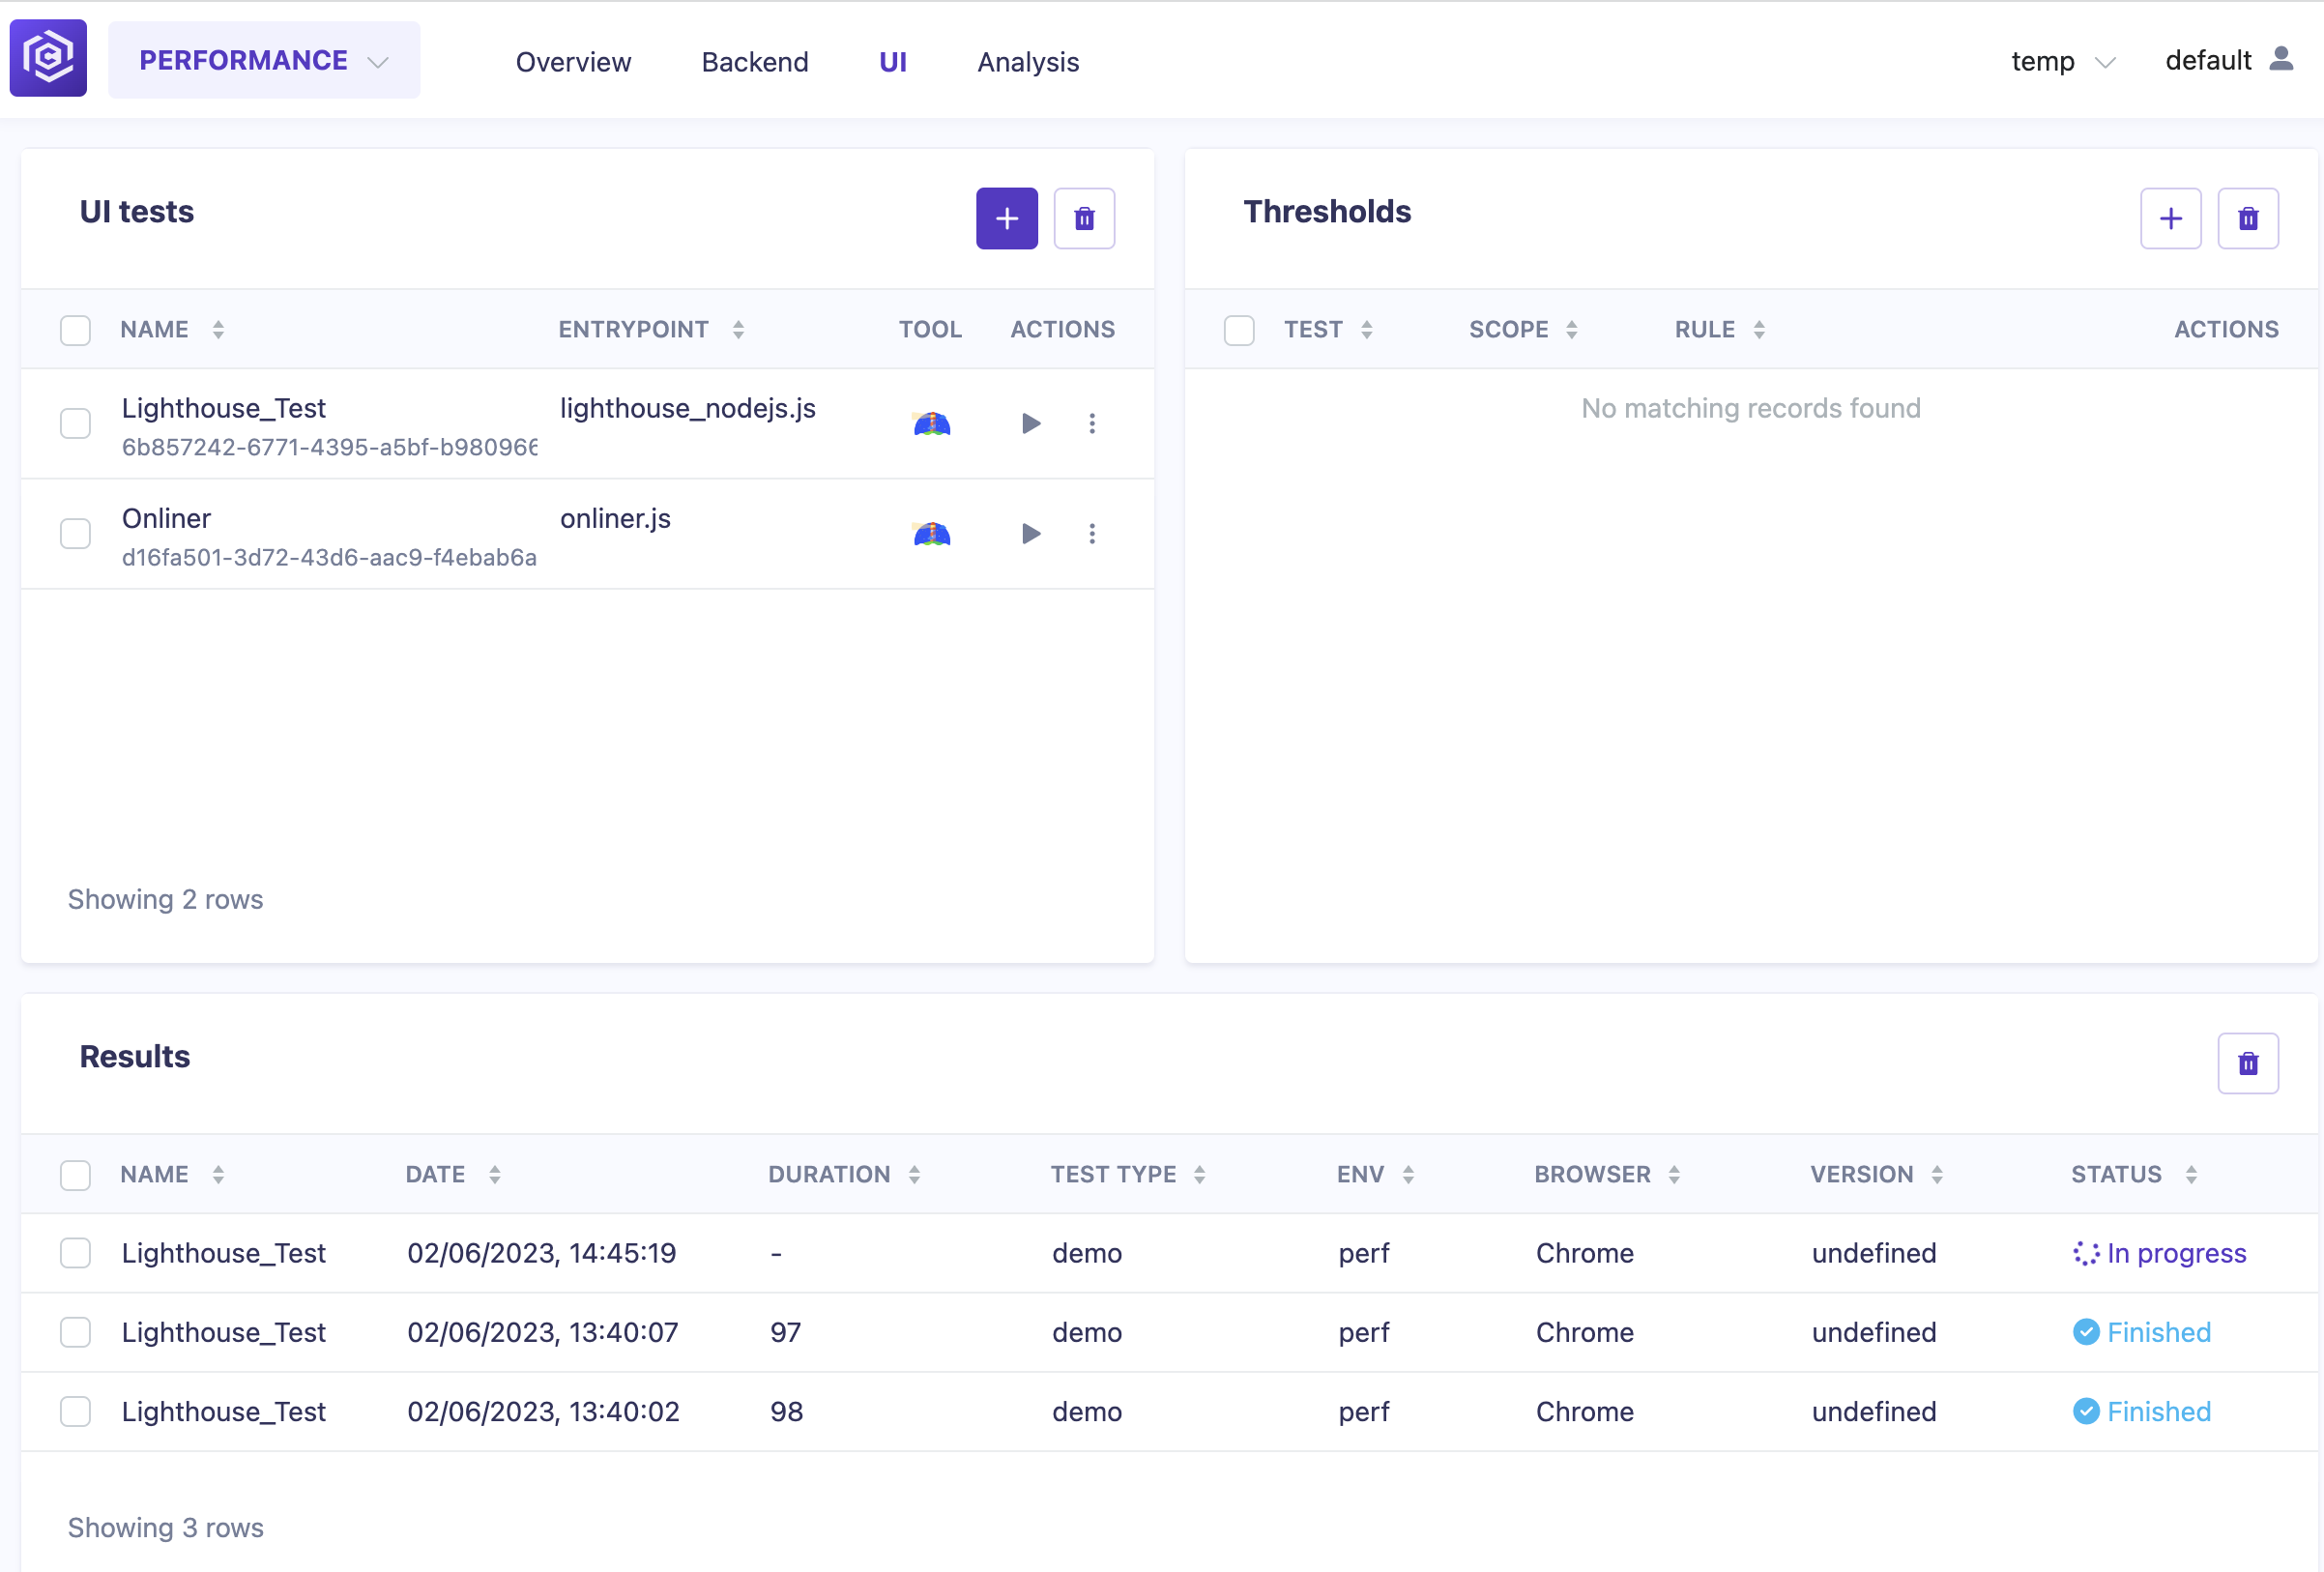
- Locate the UI performance test you created in the test list.
- Click on the “Run” button next to the test name.
- Specify the number of loops for the test.
- Click the “Run Test” button to start the test run.
You can also schedule the test to run at specific intervals or on a recurring basis by using the scheduling options provided in the Carrier web interface.

Step 8: Select the Test in the “Results” Table
- Wait for the UI performance test to complete. You can monitor the progress of the test run in the “Results” table.
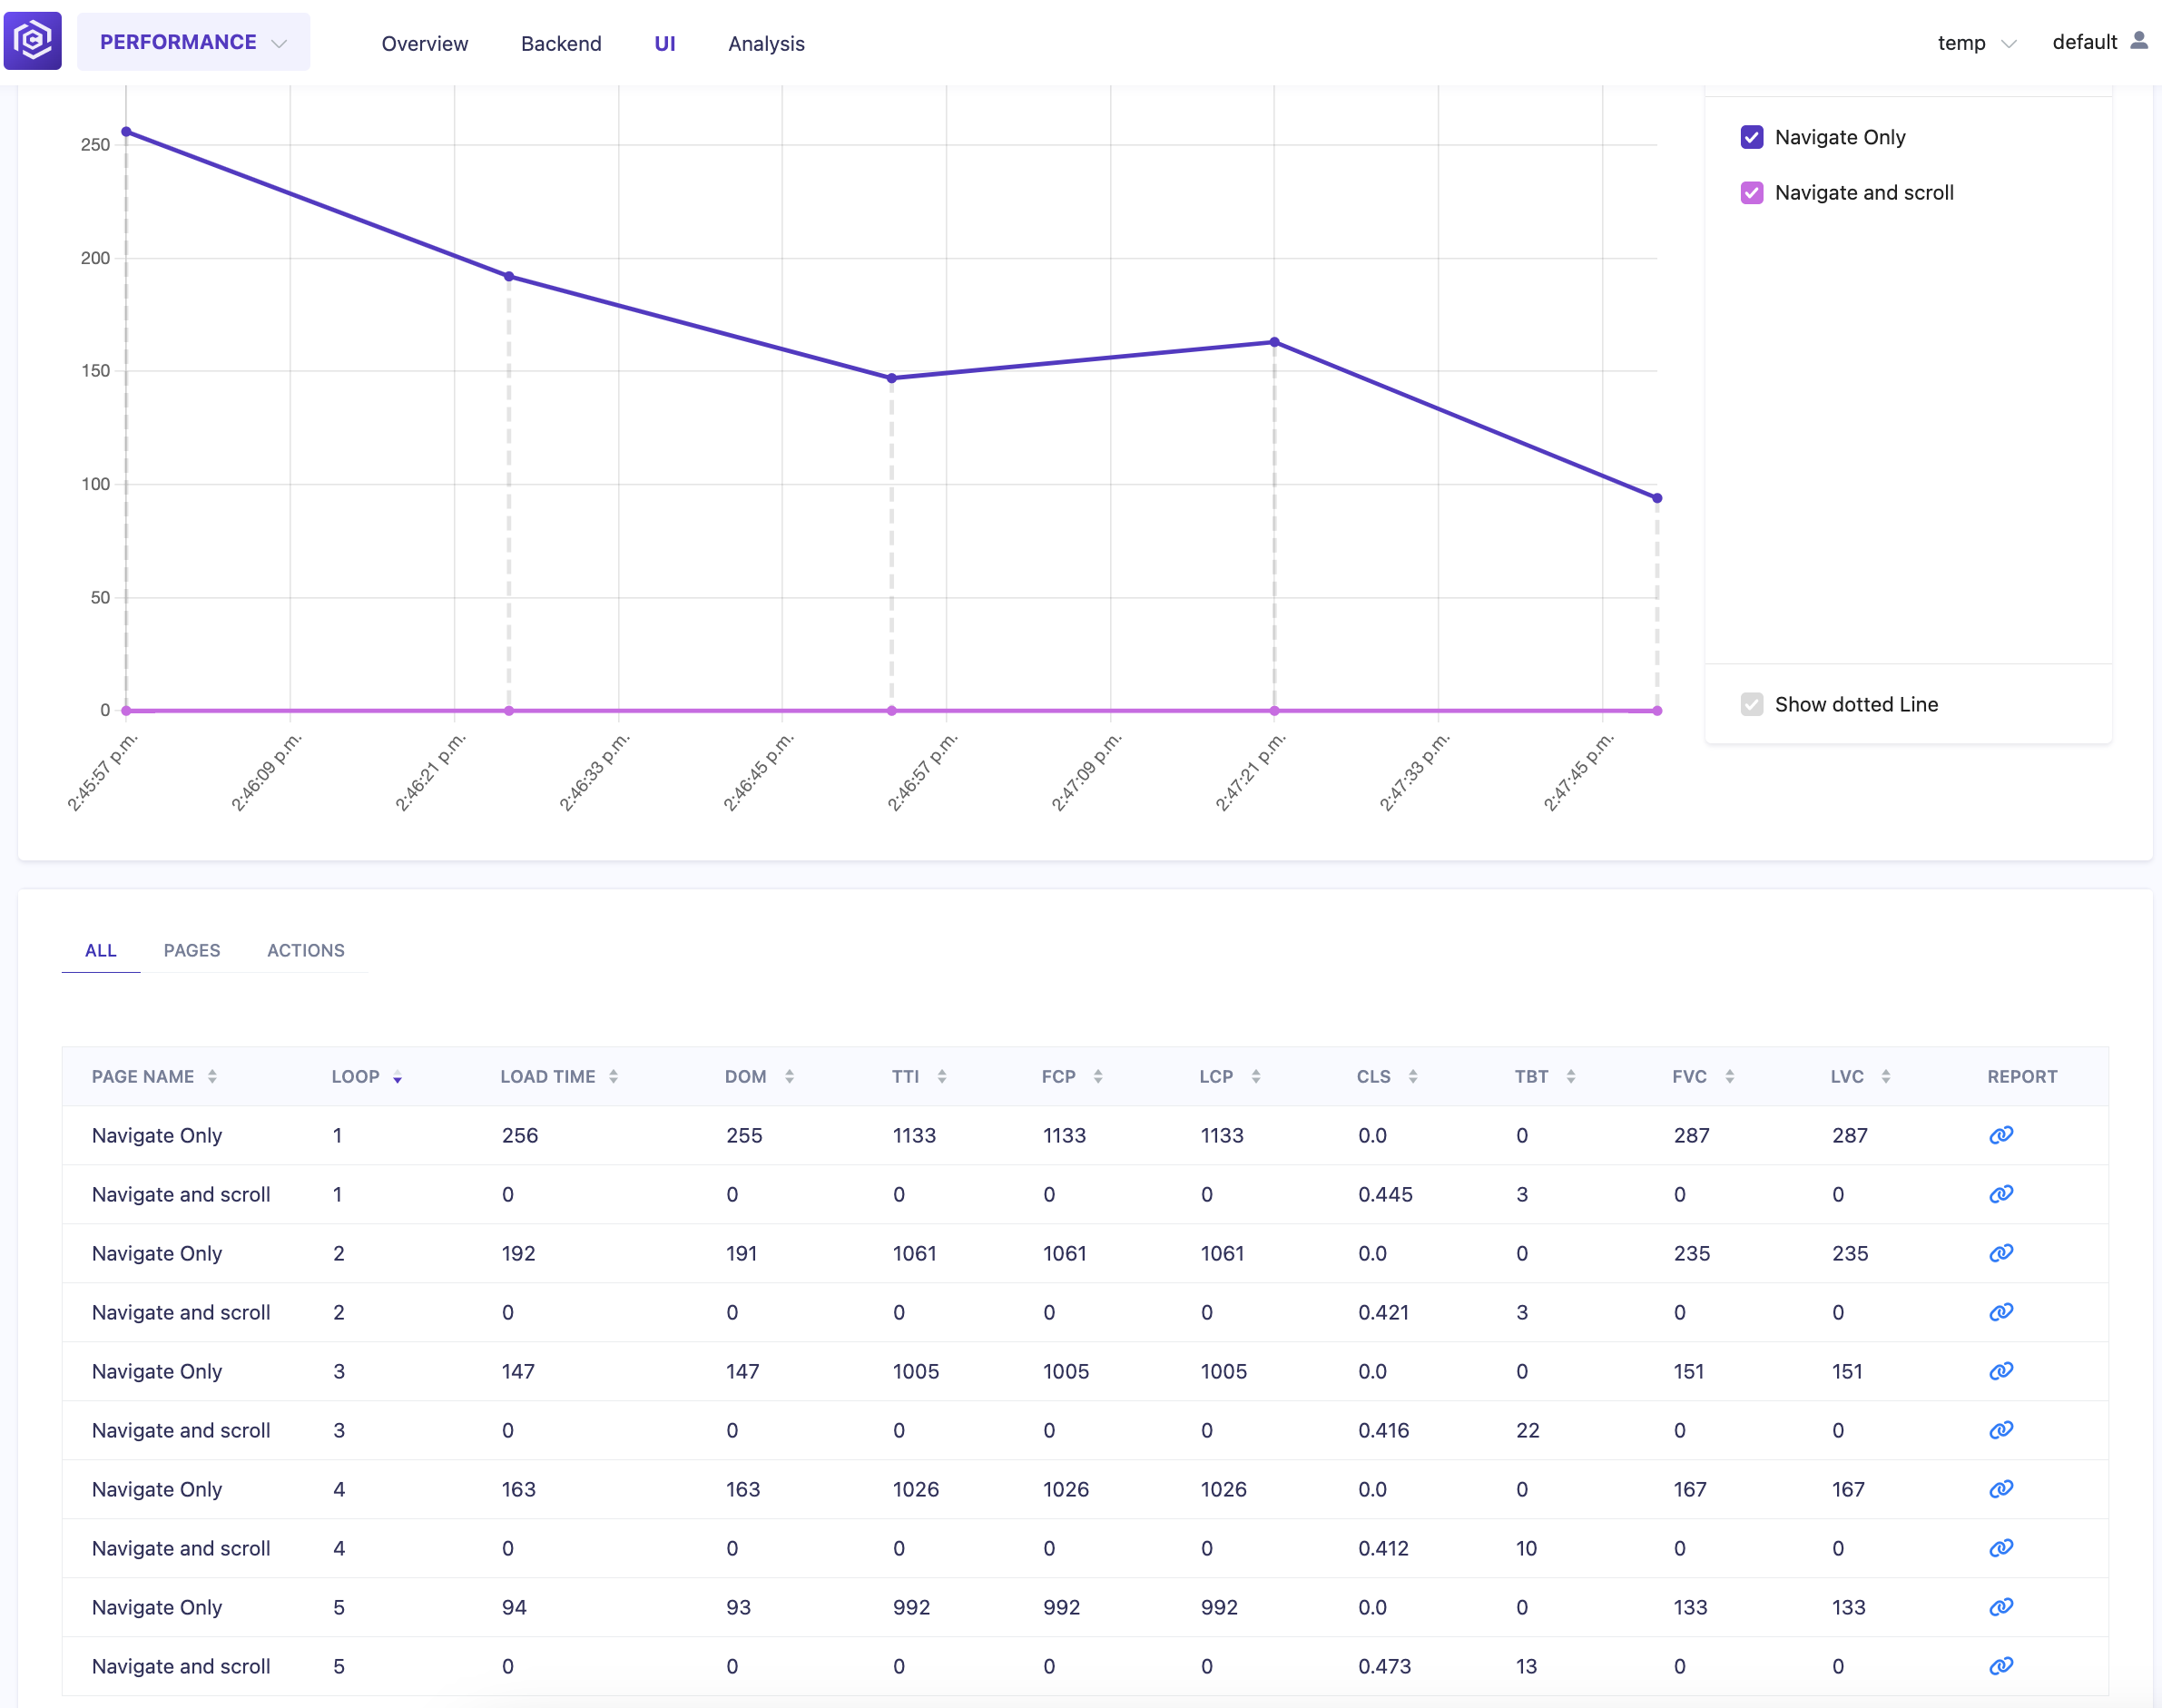
Once the test finishes, locate the test in the “Results” table and click on it to view the detailed results.
2.1 1 Charts
![Test Results Table]()
2.2 2 Summary
![Test Results Table]()

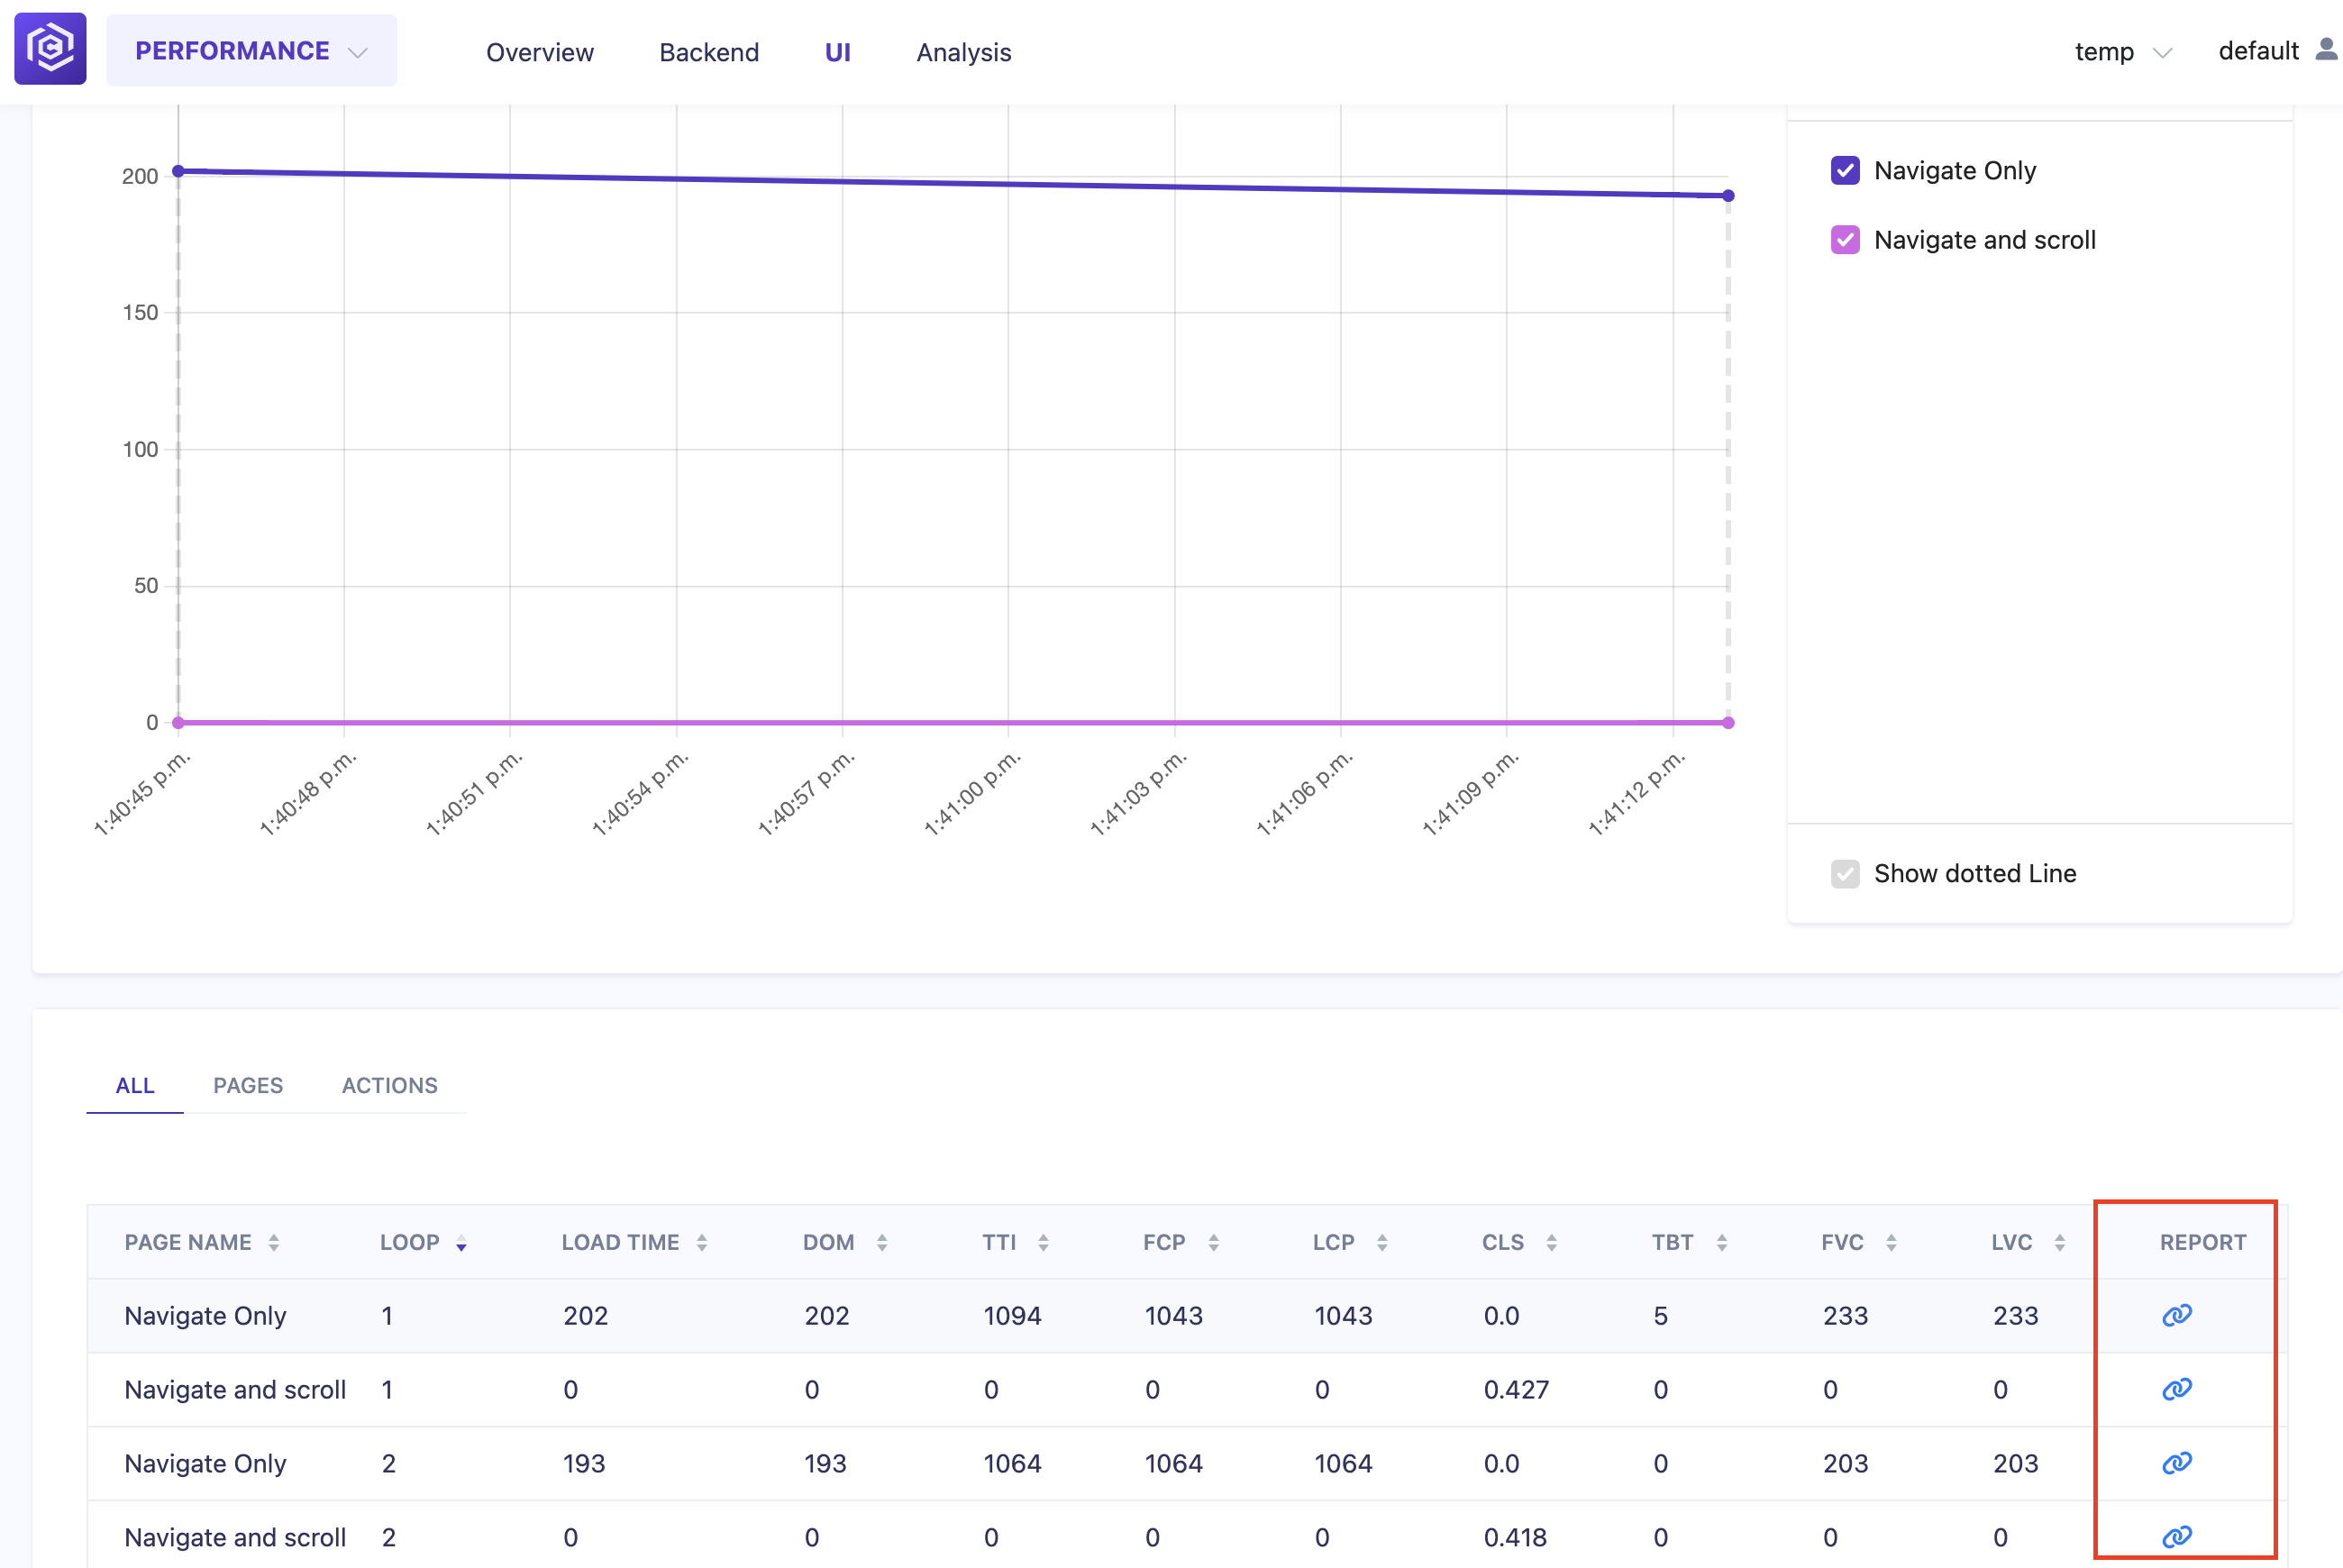
Step 9: Open the Lighthouse Report
In the test results summary table, you will find links to Lighthouse reports. Click on the report link to open it and analyze the performance metrics of your website or web application.
![Lighthouse Report]()
Lighthouse report will be opened in new tab
![Lighthouse Report]()
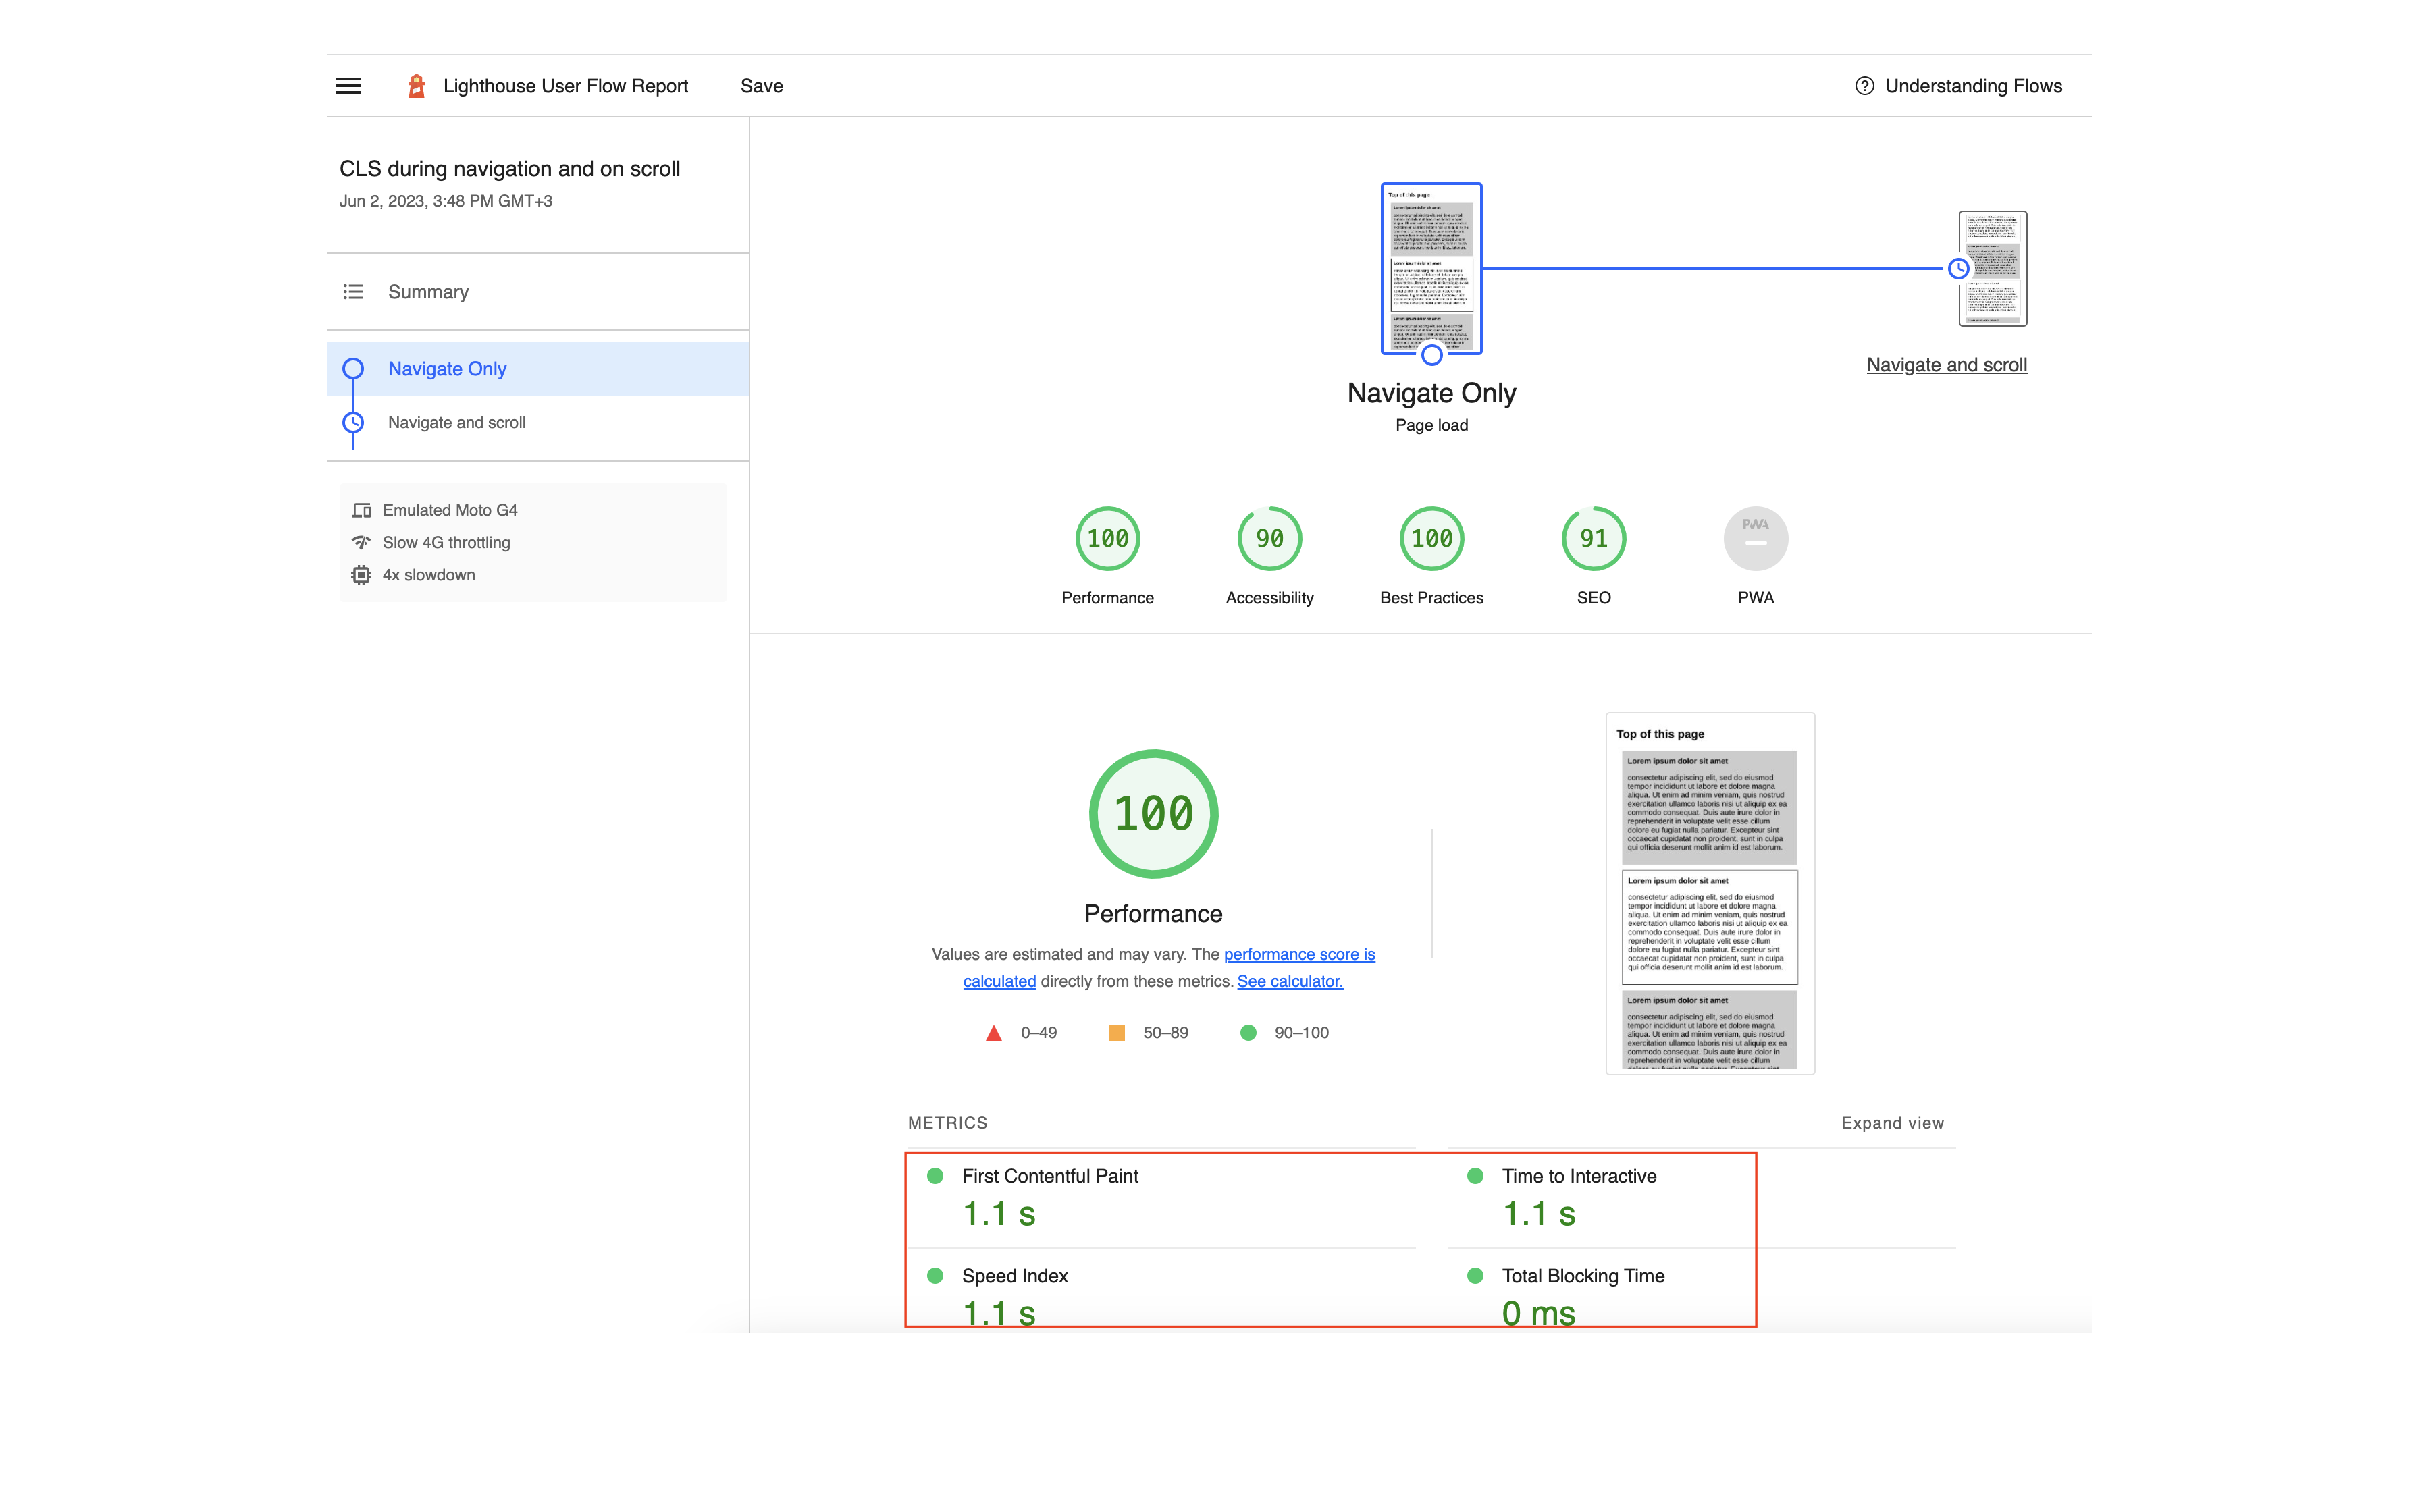
Congratulations! You have successfully configured and run a UI performance test in Carrier. Use the Lighthouse report to evaluate the performance of your website or web application and identify any areas for improvement.
Next Steps
Once you have analyzed the UI performance test results, you can take further actions to optimize the performance of your website or web application. This can include optimizing page load times, reducing server response times, improving resource caching, and optimizing the use of JavaScript and CSS.