Overview
This guide provides step-by-step instructions for configuring AWS integration in Carrier. AWS integration allows you to leverage Amazon Web Services for your performance testing needs.
Prerequisites
Before you begin configuring AWS integration in Carrier, ensure that you have completed the following:
- Installed and set up Carrier successfully or you have a Carrier account with the necessary permissions
- Created a project in Carrier
- Have valid AWS access keys (direct link to the relevant section of the AWS documentation: Creating Access Keys)
Note. Access keys consist of two parts: an
Access Key ID(for example, AKIAIOSFODNN7EXAMPLE) and aSecret Access Key(for example, wJalrXUtnFEMI/K7MDENG/bPxRfiCYEXAMPLEKEY). Below you must use both the Access Key ID and Secret Access Key together to authenticate your requests.
Steps
Follow the steps below to configure AWS integration in Carrier:
Step 1: Access the Carrier Web Interface
- Open a web browser and enter the URL of your Carrier installation.
- Log in to the Carrier web interface using your credentials.
Note: Make sure you have logged in using the appropriate user account that has access to the project where you want to configure AWS integration.
Step 2: Create AWS Secret Access Key in Secrets Section
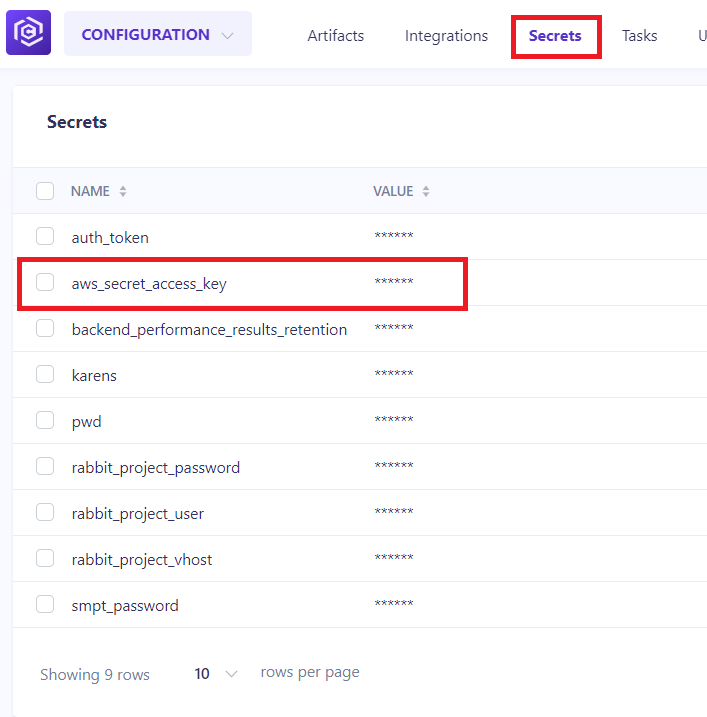
- Navigate to Configuration > Secrets.
- Create a new secret with the name
<aws_secret_access_key>and use the AWSSecret Access Keythat you created/received at the stage of preparation for the implementation of these steps.
Step 3: Integrate with Amazon in the Clouds Block
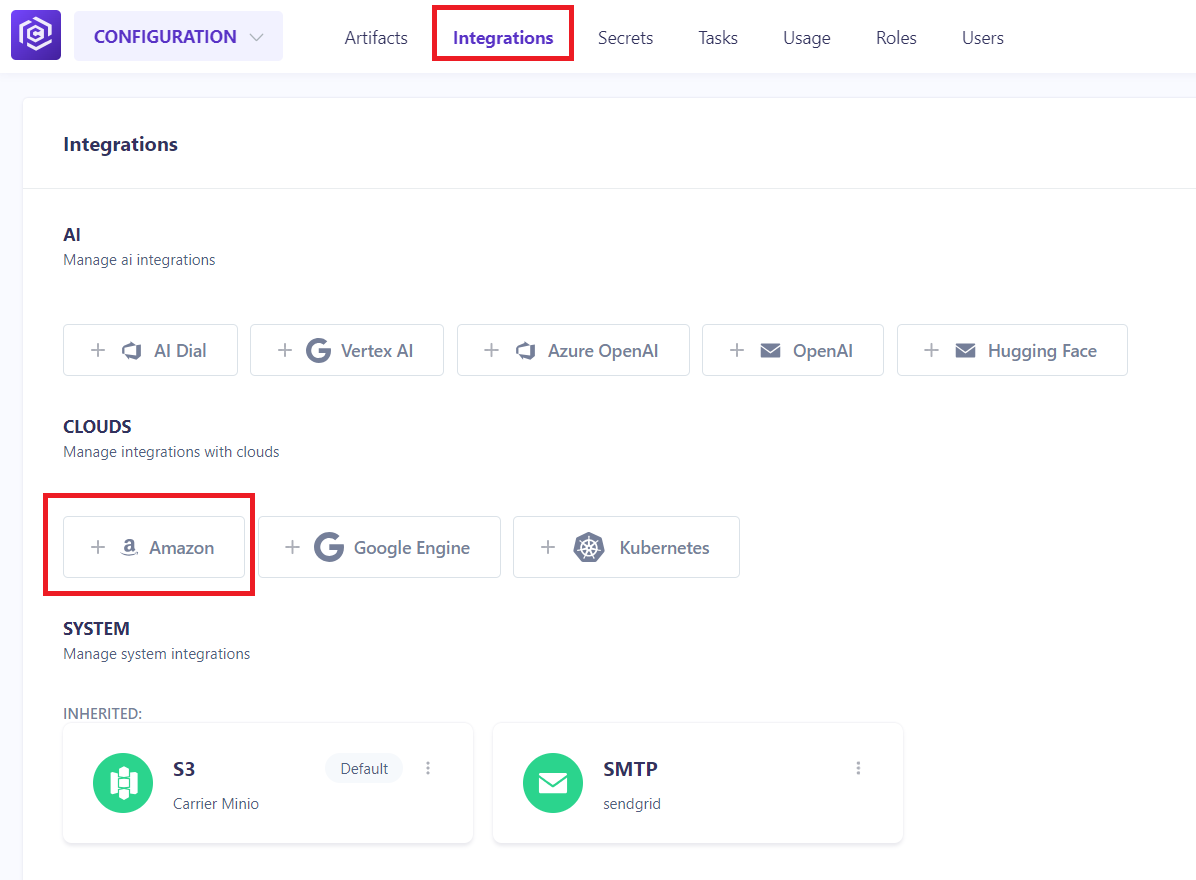
- Navigate to Integrations > Clouds.
- Select integration with Amazon.
Step 4: Fill in Required Fields and Update
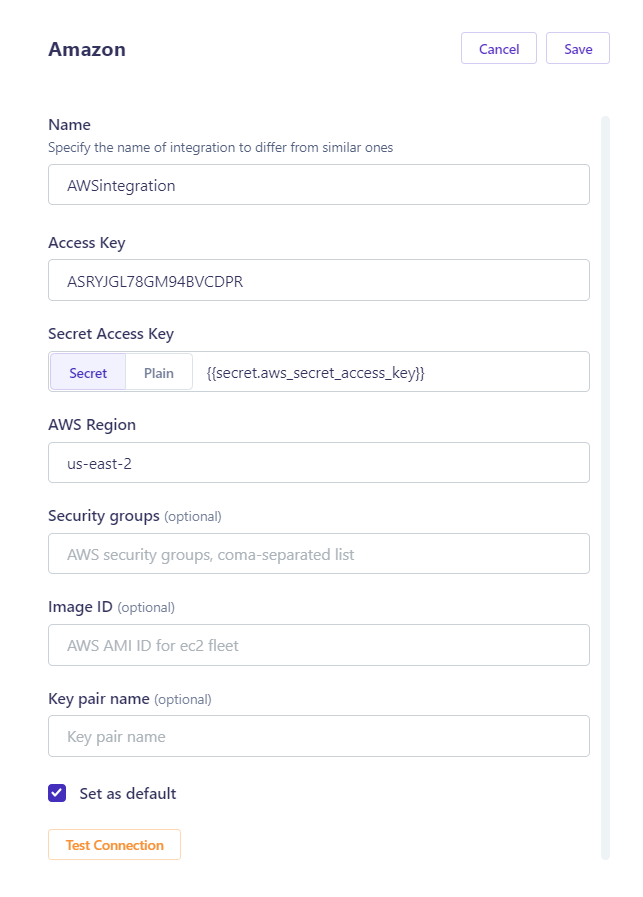
- Fill in the required fields such as
Access Key(insertAccess Key ID),Secret Access Key(insert secret with the name<aws_secret_access_key>wich was created in Step 2),Region(see below AWS Codes for Major Regions).
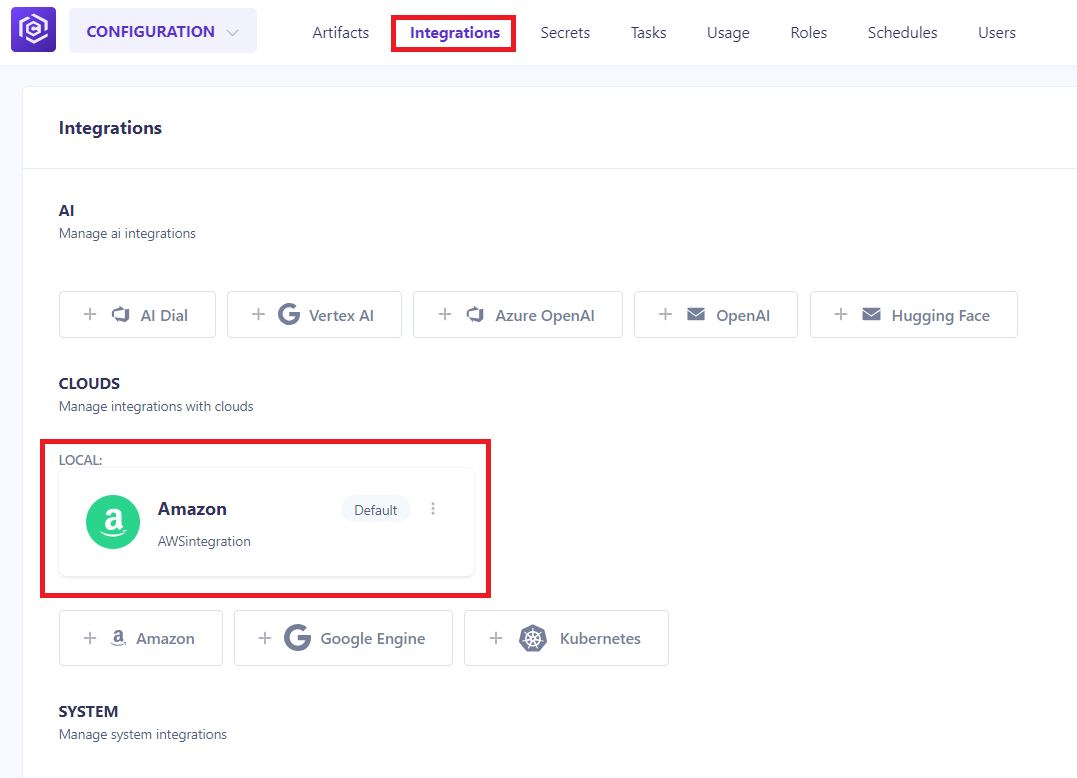
- Click ‘Update’.
Note: An orange status of “Check Connection” is acceptable if you specified the correct ‘Secret Access Key’ in the Secrets and ‘Access Key’.
AWS Codes for Major Regions
- US East (N. Virginia): us-east-1
- US East (Ohio): us-east-2
- US West (N. California): us-west-1
- US West (Oregon): us-west-2
- Africa (Cape Town): af-south-1
- Asia Pacific (Mumbai): ap-south-1
- Asia Pacific (Seoul): ap-northeast-2
- Asia Pacific (Singapore): ap-southeast-1
- Asia Pacific (Sydney): ap-southeast-2
- Asia Pacific (Tokyo): ap-northeast-1
- Canada (Central): ca-central-1
- Europe (Frankfurt): eu-central-1
- Europe (Ireland): eu-west-1
- Europe (London): eu-west-2
- Europe (Paris): eu-west-3
- Europe (Stockholm): eu-north-1
- Middle East (Bahrain): me-south-1
- South America (Sao Paulo): sa-east-1
Note: If no security group is specified, the instance will automatically be assigned a default security group.
Step 5: Create or Use Existing Test Plan
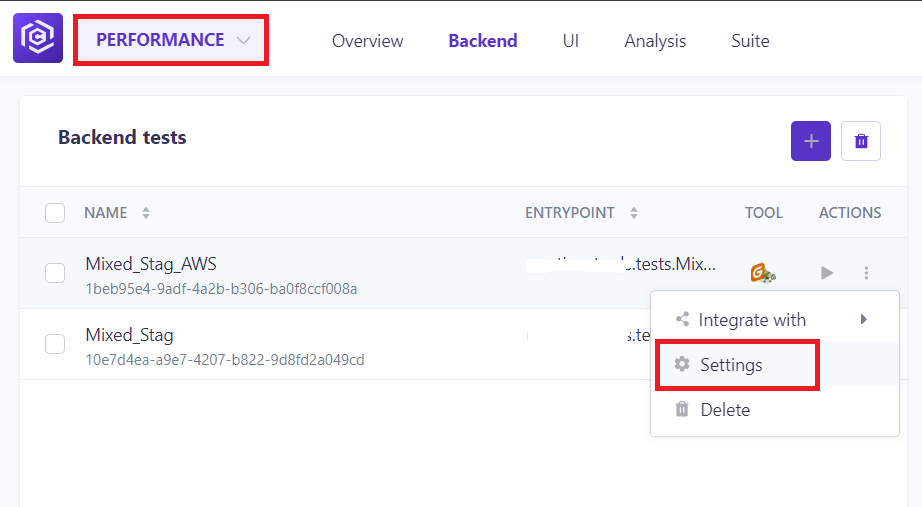
- Create a new test plan or use an existing one.
- Open the test plan settings.
Step 6: Configure Load Settings
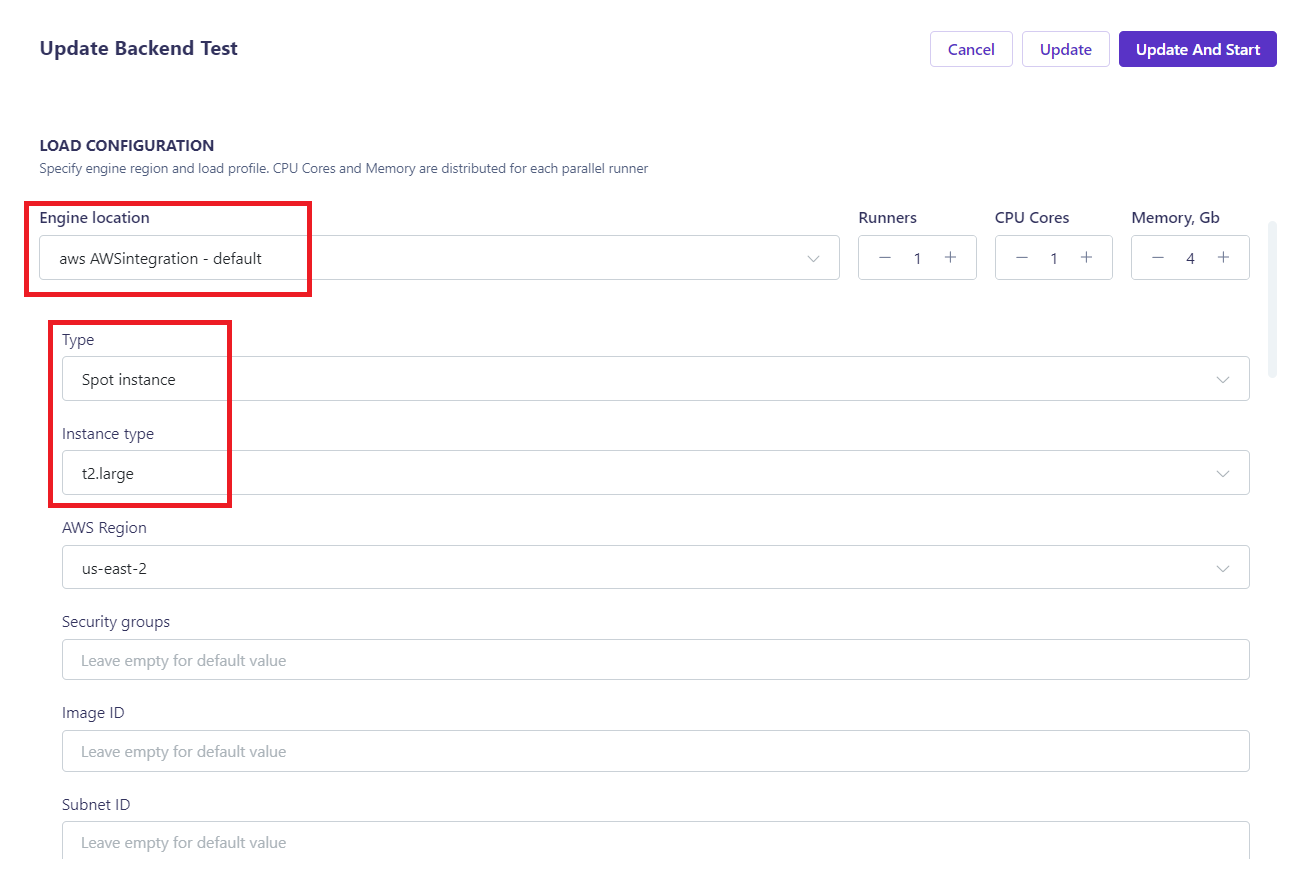
- In the Load configuration block, select
Engine location,Type, andInstance type. - Check other parameters of the test plan.
- Click ‘Update’ or ‘Update And Start’.
Note: If you are configuring Backend test take into account that maximum CPU cores you can use are 6 and maximum memory are 11(Gb). These limitations are related to the use of Java in Backend tests.
Step 7: Verify Settings in Debug Mode
- Check in debug mode using control-tower to ensure all settings are correct.
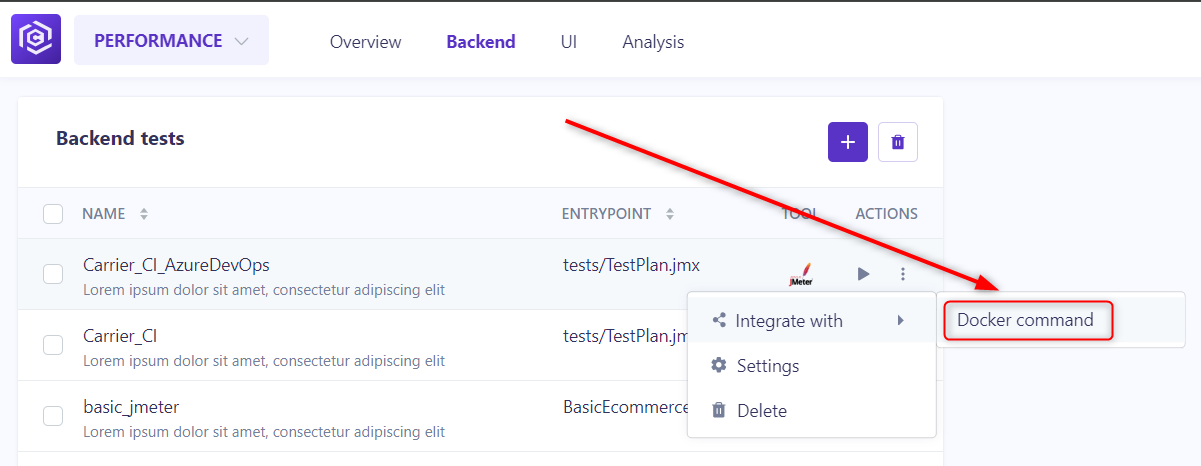
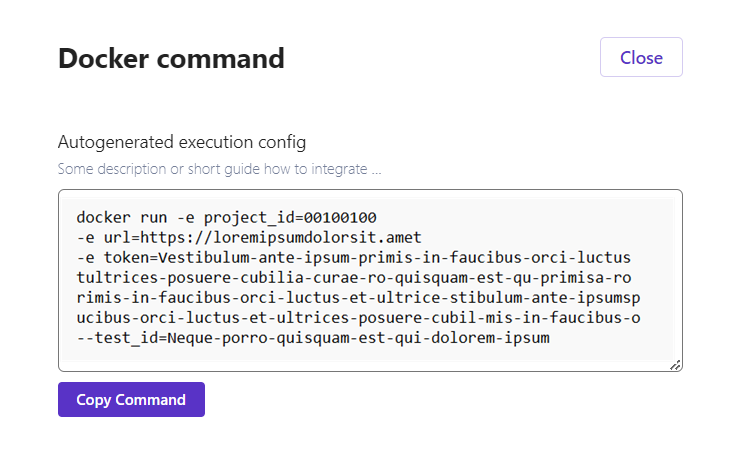
- Copy the execution config and run it from a local Linux machine with Docker installed.
A link to the running test will appear in the results panel.
Note: Verify that all settings have been made correctly to avoid any issues during the test run.
Next Steps
Once you have configured AWS integration in Carrier, you can proceed to run your performance tests leveraging AWS resources.

